Model MRC88 | Page: 49 |
Section 4: Programming The Controller
There are three ways in which the MRC88 can be controlled or to control your audio, video and home control systems; by pressing the buttons on the MRC88 Keypad, from signals received from an Infrared (IR) remote at the keypads IR Receiver eye, or from RS232 control from a touch screen panel or other RS232 controller device.
There are three types of commands that can be associated with the MRC88 Keypad buttons.
•Source component commands such as DVD Power, Play, Track Skip, etc.
•MRC88 Controller/Amplifier “INTERNAL AMPLIFIER COMMANDS” such as Zone Source Select, Zone Power, VOL+, VOL- etc.
•RS232 Command Strings for controlling sophisticated control systems such as Lighting, HVAC, etc. utilizing the MRC88 Controllers RS232 COM PORT output.
All of the IR Codes (Palettes or IR Command Groups) should be confirmed and tested before continuing (Same goes for RS232 Commands - ADVANCED only). In the sections to follow, you will be setting up the Keypads for use in controlling the system. This will consist of setting up the Source Icons, placing IR or RS232 commands onto the Virtual Keypad, and setting up power management to name a few.
CONFIGURING SOURCE ICONS ON MRC88 KEYPAD LCD
(BASIC/ADVANCED/EXPANDED)
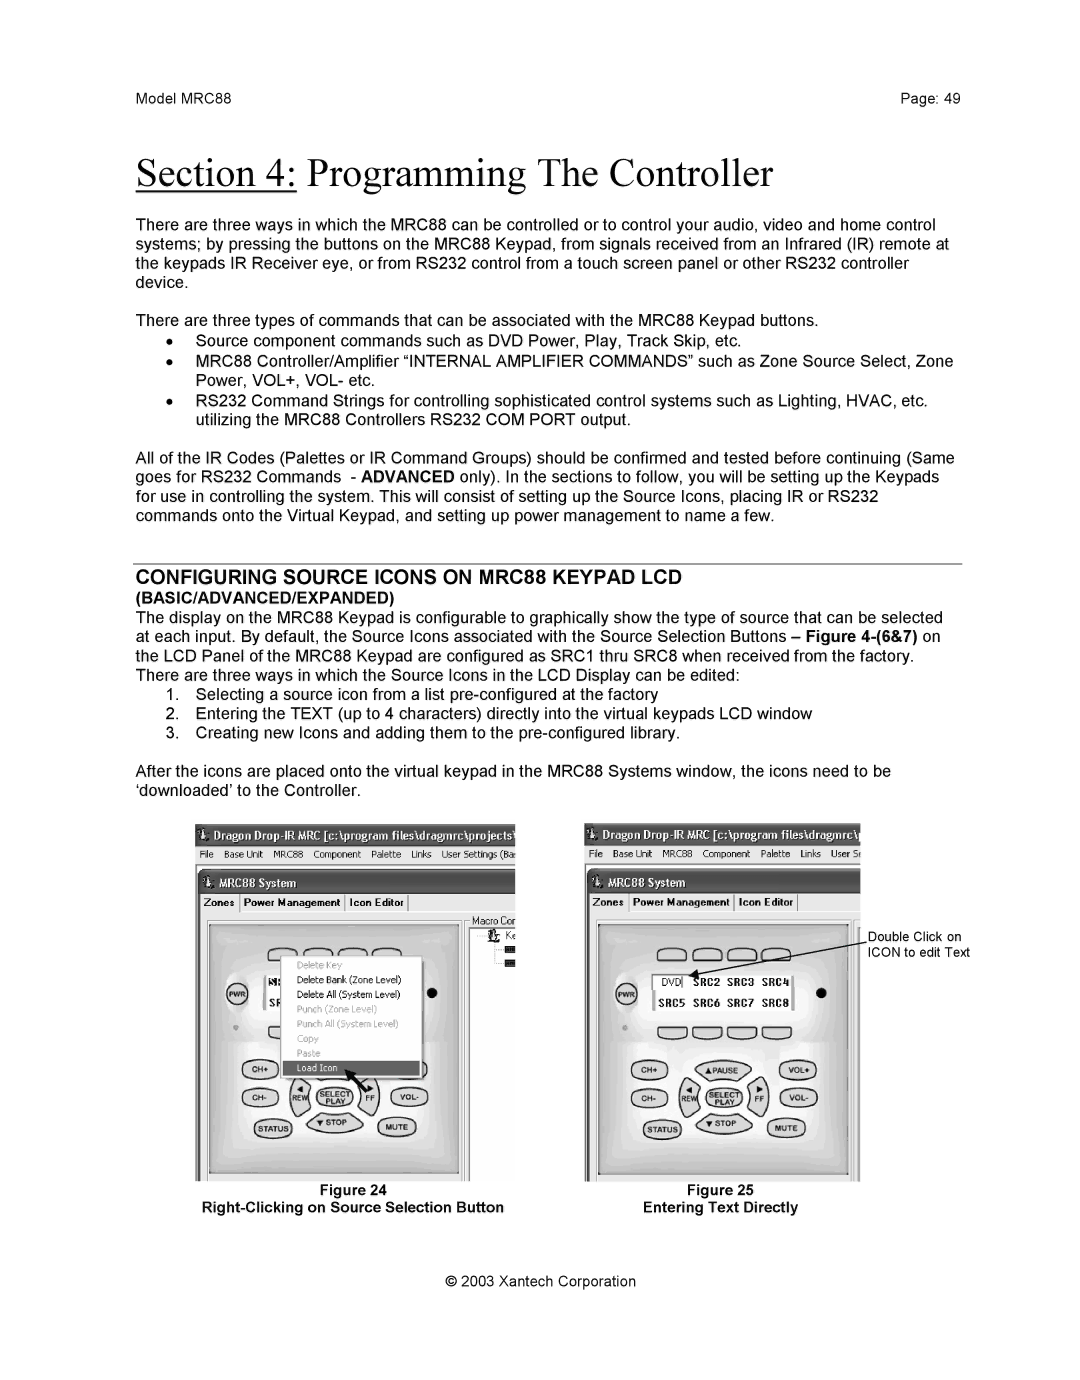
The display on the MRC88 Keypad is configurable to graphically show the type of source that can be selected at each input. By default, the Source Icons associated with the Source Selection Buttons – Figure
There are three ways in which the Source Icons in the LCD Display can be edited:
1.Selecting a source icon from a list
2.Entering the TEXT (up to 4 characters) directly into the virtual keypads LCD window
3.Creating new Icons and adding them to the
After the icons are placed onto the virtual keypad in the MRC88 Systems window, the icons need to be ‘downloaded’ to the Controller.
Double Click on
![]() ICON to edit Text
ICON to edit Text
Figure 24 | Figure 25 |
Entering Text Directly |
© 2003 Xantech Corporation