Quick Guide Styles (Auto Accompaniment)
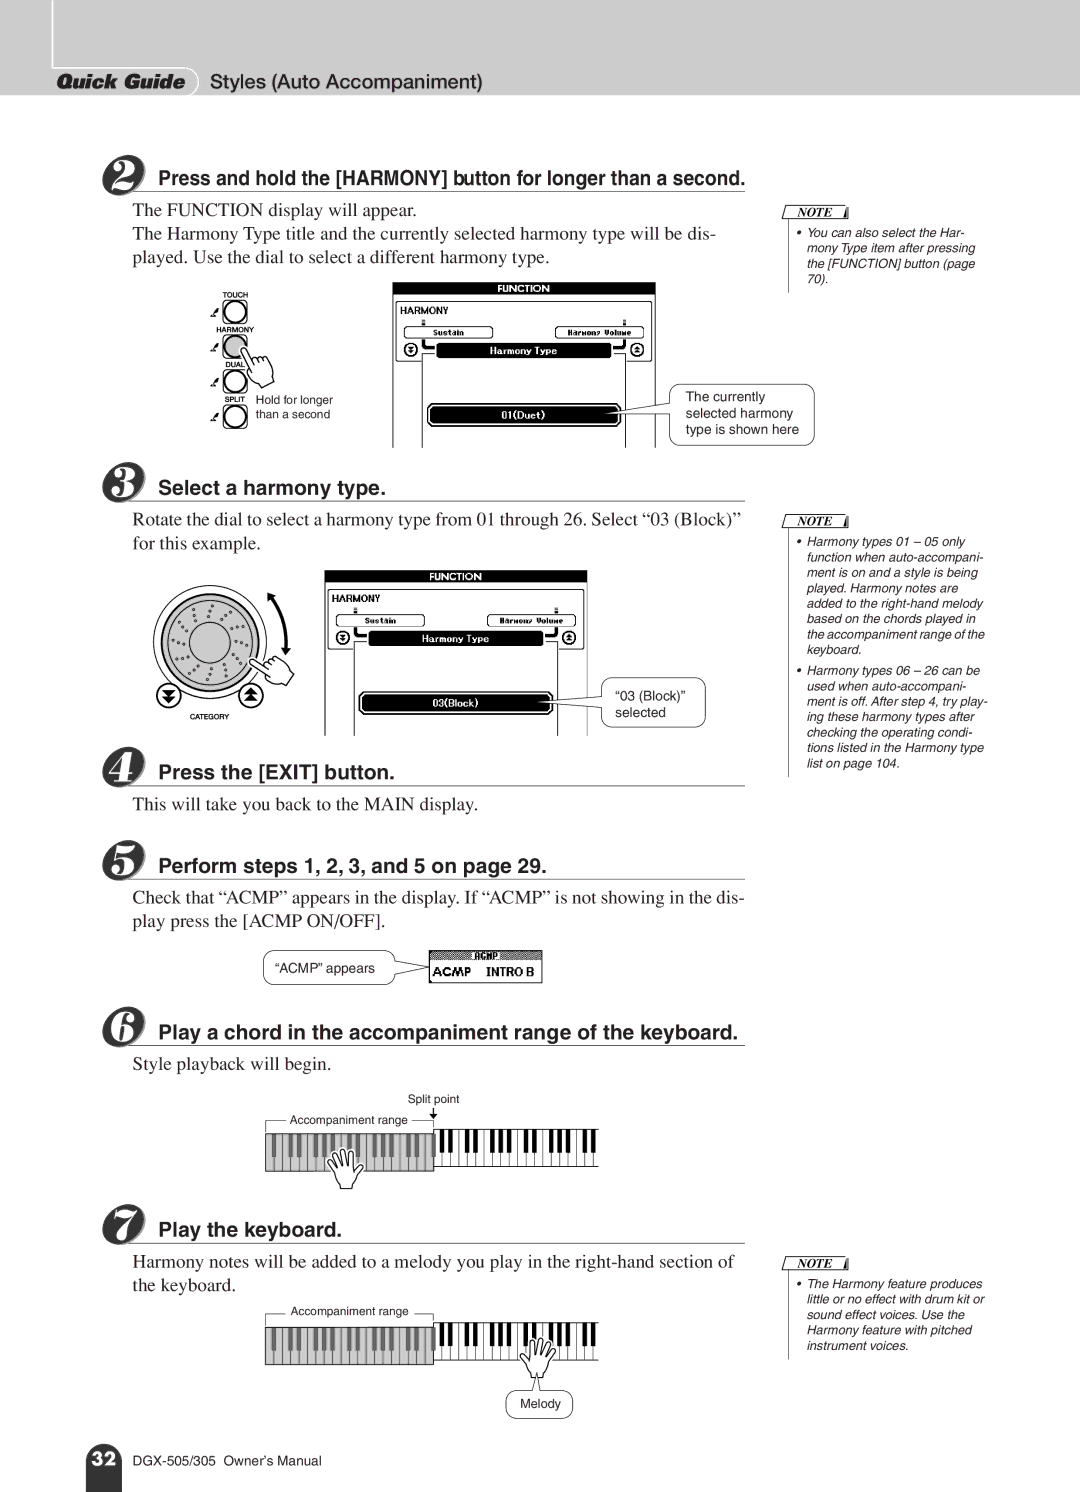
2 Press and hold the [HARMONY] button for longer than a second.
The FUNCTION display will appear.
The Harmony Type title and the currently selected harmony type will be dis- played. Use the dial to select a different harmony type.
NOTE
•You can also select the Har- mony Type item after pressing the [FUNCTION] button (page 70).
Hold for longer | The currently |
than a second | selected harmony |
| type is shown here |
3 Select a harmony type.
Rotate the dial to select a harmony type from 01 through 26. Select “03 (Block)” for this example.
“03 (Block)” selected
4 Press the [EXIT] button.
This will take you back to the MAIN display.
NOTE
•Harmony types 01 – 05 only function when
•Harmony types 06 – 26 can be used when
5 Perform steps 1, 2, 3, and 5 on page 29.
Check that “ACMP” appears in the display. If “ACMP” is not showing in the dis- play press the [ACMP ON/OFF].
“ACMP” appears
6 Play a chord in the accompaniment range of the keyboard. Style playback will begin.
Split point
Accompaniment range ![]()
7 Play the keyboard.
Harmony notes will be added to a melody you play in the
Accompaniment range
NOTE
•The Harmony feature produces little or no effect with drum kit or sound effect voices. Use the Harmony feature with pitched instrument voices.
Melody
32
