|
| r |
|
|
| e e |
| ||
f |
| n | ||
e |
|
|
| c |
R |
|
|
| e |
|
|
|
| |
Function settings
The Function pages that can be accessed via the FUNCTION display include detailed settings for the instrument’s voices, effects, split point, tuning, and more. Button shortcuts can be used to quickly access commonly used settings: hold a shortcut button for longer than a second to directly access the related setting display.
Locating and Editing the Function Settings
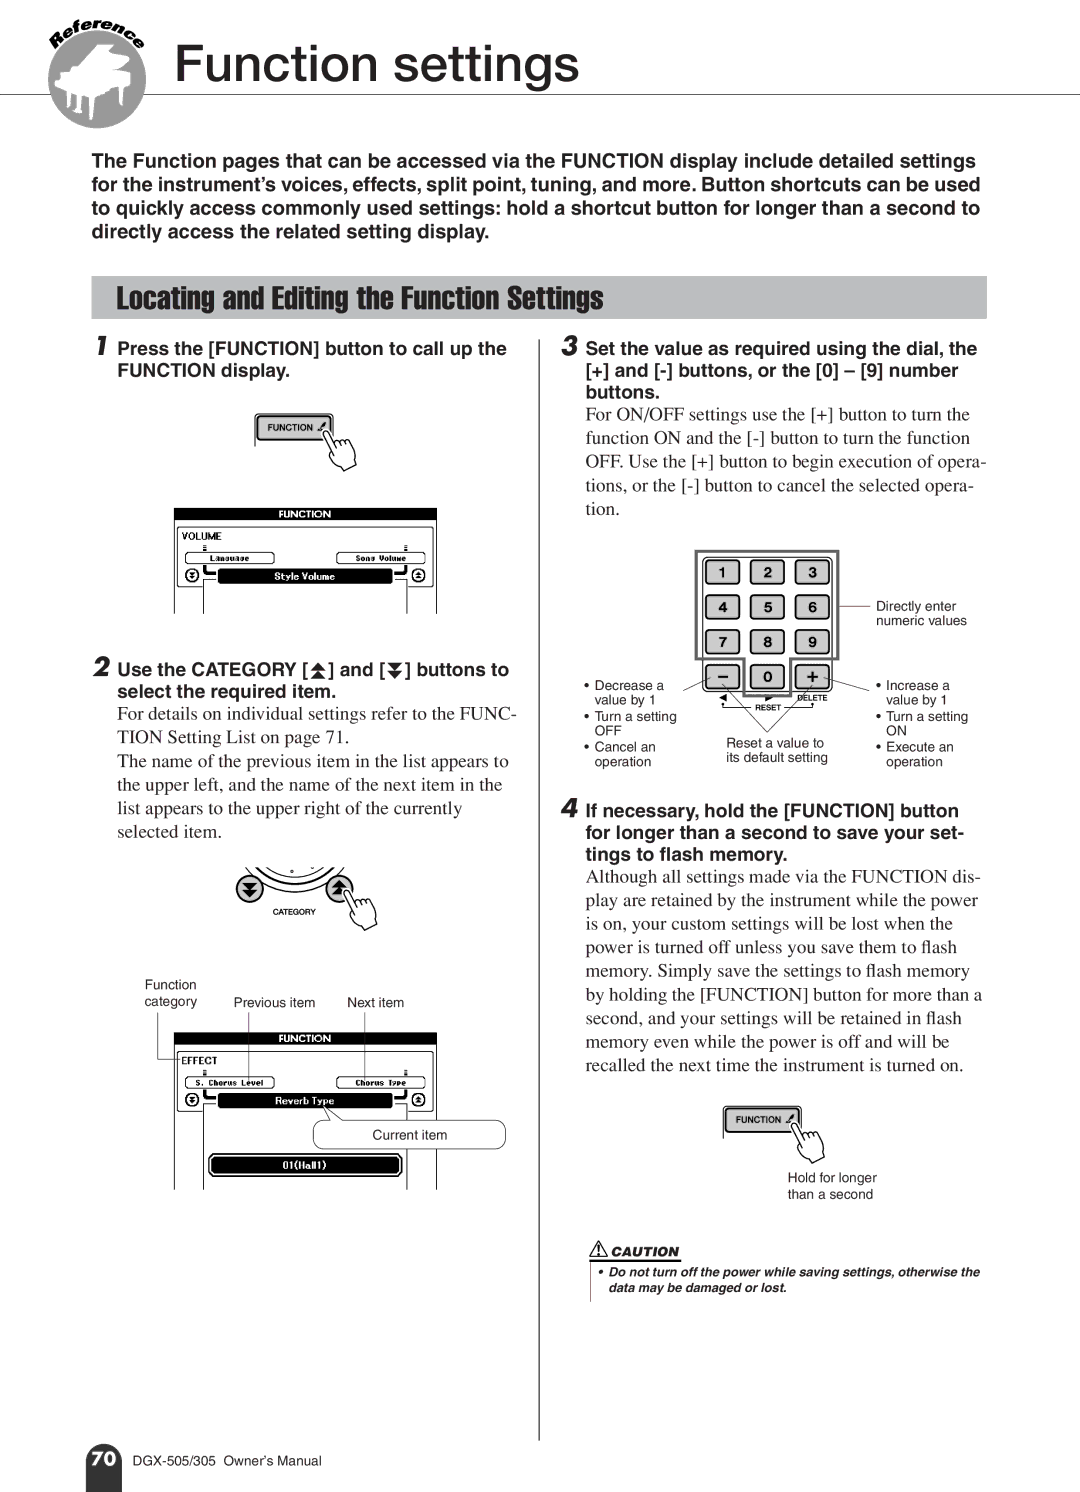
1 Press the [FUNCTION] button to call up the FUNCTION display.
2 Use the CATEGORY [f ] and [r ] buttons to select the required item.
For details on individual settings refer to the FUNC- TION Setting List on page 71.
The name of the previous item in the list appears to the upper left, and the name of the next item in the list appears to the upper right of the currently selected item.
Function |
|
|
category | Previous item | Next item |
Current item
3 Set the value as required using the dial, the
[+]and
For ON/OFF settings use the [+] button to turn the function ON and the
|
| Directly enter | |
|
| numeric values | |
• Decrease a |
| • Increase a | |
value by 1 |
| value by 1 | |
• Turn a setting |
| • Turn a setting | |
OFF | Reset a value to | ON | |
• Cancel an | • Execute an | ||
its default setting | |||
operation | operation | ||
|
4 If necessary, hold the [FUNCTION] button for longer than a second to save your set- tings to flash memory.
Although all settings made via the FUNCTION dis- play are retained by the instrument while the power is on, your custom settings will be lost when the power is turned off unless you save them to flash memory. Simply save the settings to flash memory by holding the [FUNCTION] button for more than a second, and your settings will be retained in flash memory even while the power is off and will be recalled the next time the instrument is turned on.
Hold for longer than a second
![]() CAUTION
CAUTION
•Do not turn off the power while saving settings, otherwise the data may be damaged or lost.
70
