Styles (Auto Accompaniment) Quick Guide
9 Play along with the style.
Play a melody with right hand while playing cords in the accompaniment range of the keyboard with your left hand. The [START/STOP] button will flash at the current playback tempo (red on the first beat of each measure, blue on the oth- ers).
Accompaniment range ![]()
Flashes at the current tempo
Chords | Melody |
|
Each style has two main patterns – MAIN A and MAIN B.
If you press the [MAIN/AUTO FILL] button during playback a
●An example of how you might play a pattern:
Style preparation | INTRO A |
|
| MAIN A |
|
| FILL B |
|
| MAIN B |
|
| ENDING | Style stop |
|
|
|
| |||||||||||
|
|
|
|
|
|
|
|
|
|
|
|
|
|
|
10 Press the [INTRO/ENDING/rit.] button to end.
Style playback will stop after an appropriate ending.
Harmony
This feature adds harmony notes to the main voice.
When you press the [HARMONY] button to turn this feature on, the appropriate harmony type for the currently selected main voice is automatically selected. 26 different harmony types are provided. You can select a different har- mony type by following the procedure outlined below. The effect and operation of each harmony type is different – refer to the Harmony Type List on page 104 for details.
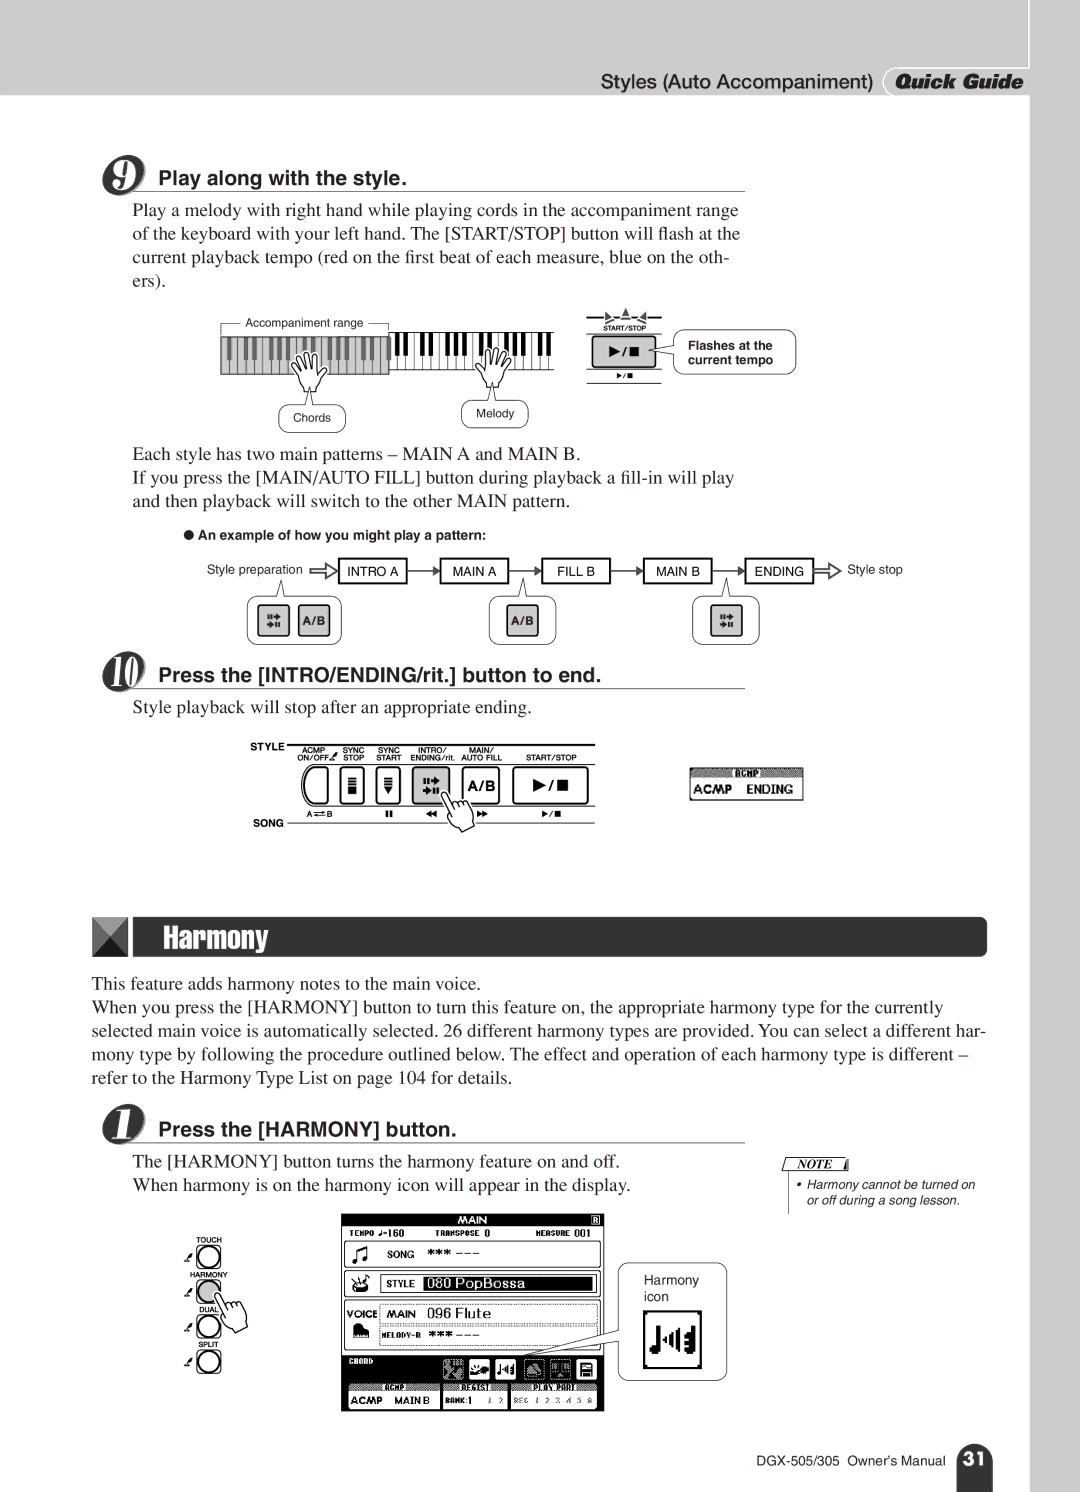
1 Press the [HARMONY] button.
The [HARMONY] button turns the harmony feature on and off. When harmony is on the harmony icon will appear in the display.
NOTE
•Harmony cannot be turned on or off during a song lesson.
Harmony icon