SOUND FIELD PARAMETER DESCRIPTIONS
■LIVENESS
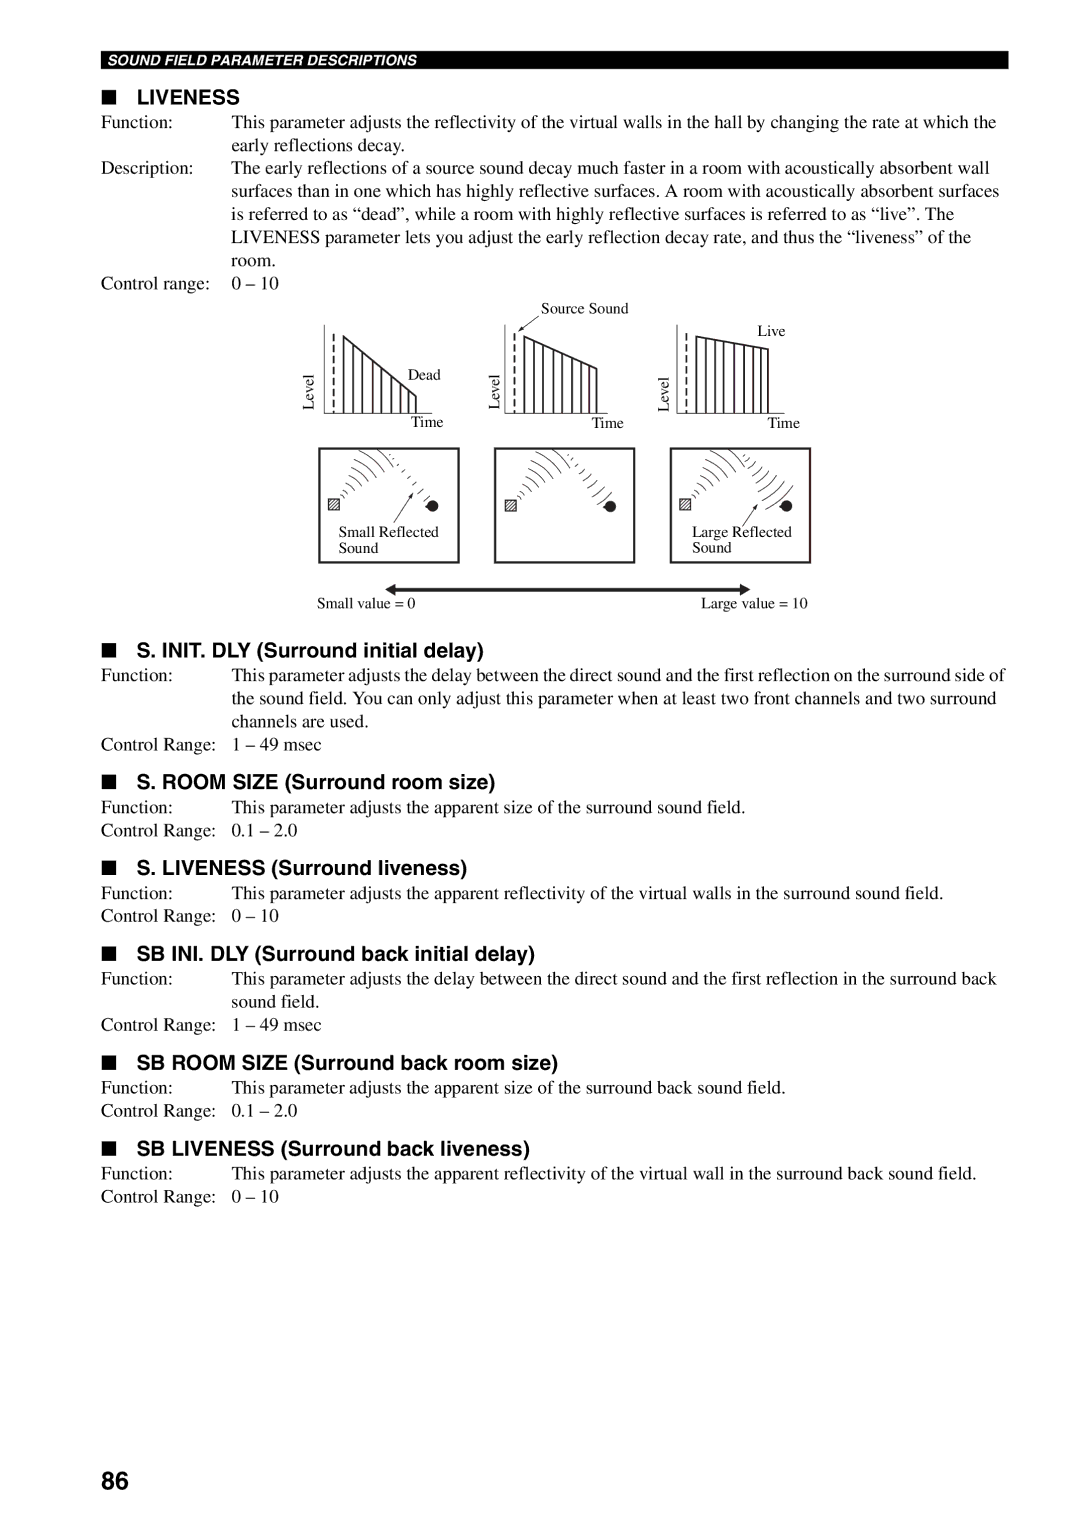
Function: | This parameter adjusts the reflectivity of the virtual walls in the hall by changing the rate at which the |
| early reflections decay. |
Description: | The early reflections of a source sound decay much faster in a room with acoustically absorbent wall |
| surfaces than in one which has highly reflective surfaces. A room with acoustically absorbent surfaces |
| is referred to as “dead”, while a room with highly reflective surfaces is referred to as “live”. The |
| LIVENESS parameter lets you adjust the early reflection decay rate, and thus the “liveness” of the |
| room. |
Control range: | 0 – 10 |
Level
Dead
Time
| Source Sound |
Level | Level |
| Time |
Live
Time
Small Reflected Sound
Large Reflected Sound
Small value = 0 | Large value = 10 |
■S. INIT. DLY (Surround initial delay)
Function: | This parameter adjusts the delay between the direct sound and the first reflection on the surround side of |
| the sound field. You can only adjust this parameter when at least two front channels and two surround |
| channels are used. |
Control Range: | 1 – 49 msec |
■S. ROOM SIZE (Surround room size)
Function: | This parameter adjusts the apparent size of the surround sound field. |
Control Range: | 0.1 – 2.0 |
■S. LIVENESS (Surround liveness)
Function: | This parameter adjusts the apparent reflectivity of the virtual walls in the surround sound field. |
Control Range: | 0 – 10 |
■SB INI. DLY (Surround back initial delay)
Function: | This parameter adjusts the delay between the direct sound and the first reflection in the surround back |
| sound field. |
Control Range: | 1 – 49 msec |
■SB ROOM SIZE (Surround back room size)
Function: | This parameter adjusts the apparent size of the surround back sound field. |
Control Range: | 0.1 – 2.0 |
■SB LIVENESS (Surround back liveness)
Function: | This parameter adjusts the apparent reflectivity of the virtual wall in the surround back sound field. |
Control Range: | 0 – 10 |
86