| DAB frequency table | |
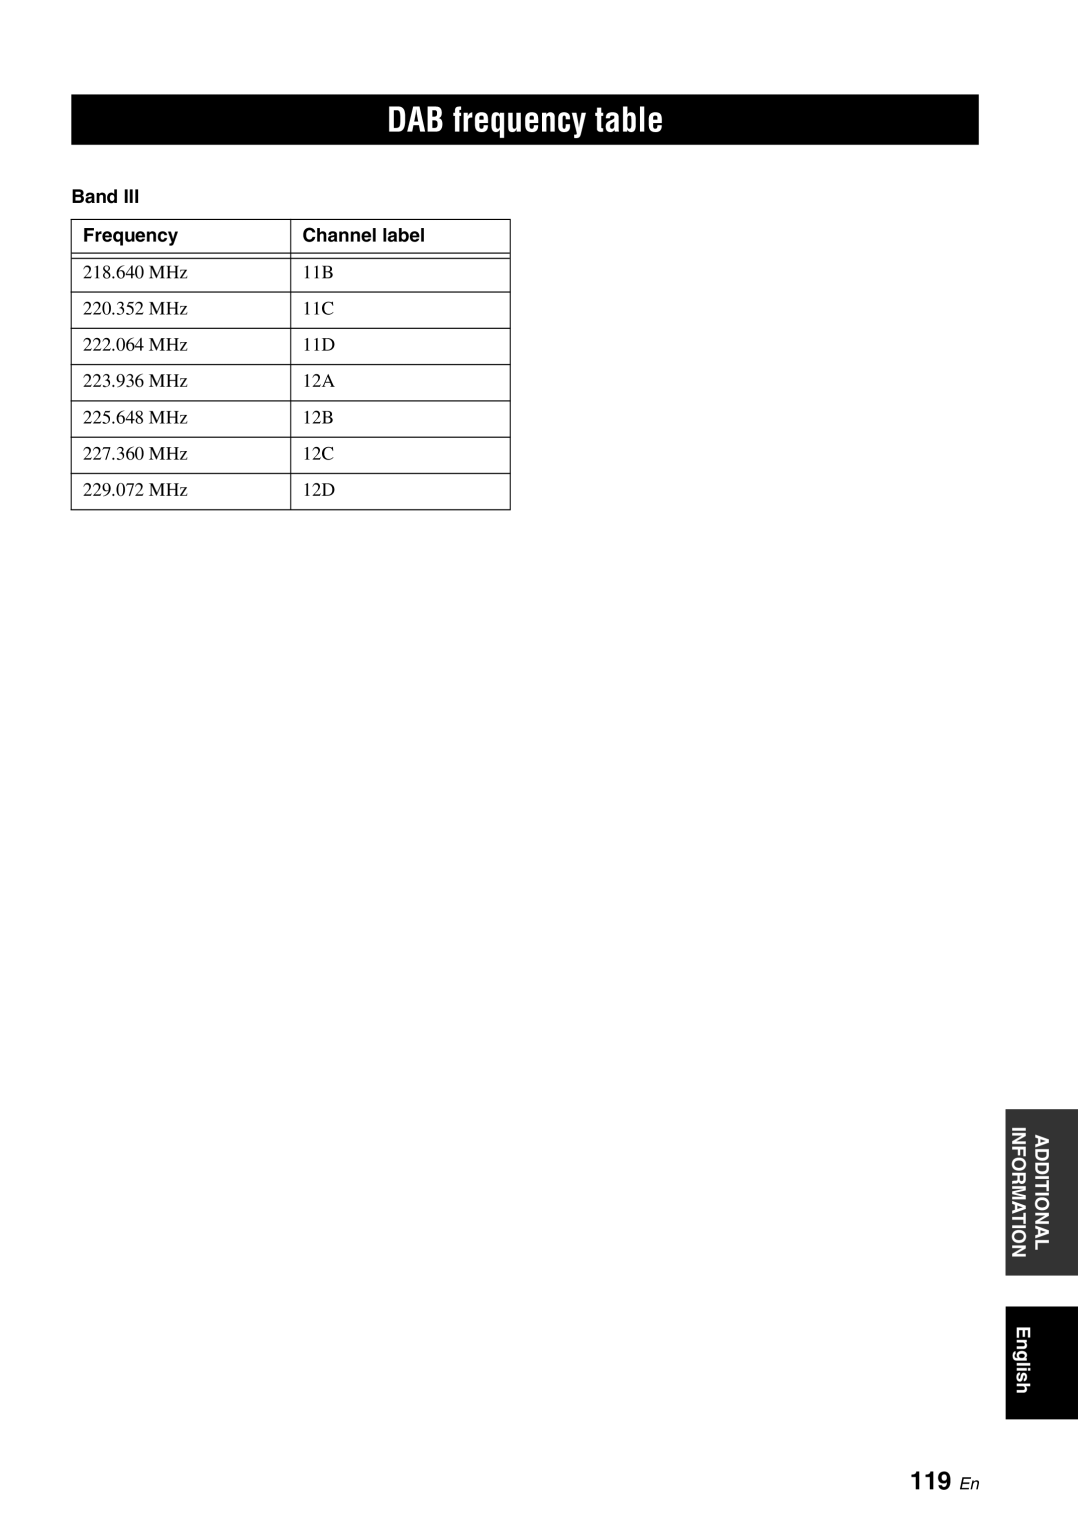
Band III |
|
|
|
|
|
Frequency | Channel label |
|
|
|
|
|
|
|
218.640 MHz | 11B |
|
|
|
|
220.352 MHz | 11C |
|
|
|
|
222.064 MHz | 11D |
|
|
|
|
223.936 MHz | 12A |
|
|
|
|
225.648 MHz | 12B |
|
|
|
|
227.360 MHz | 12C |
|
|
|
|
229.072 MHz | 12D |
|
|
|
|
INFORMATION | ADDITIONAL |
|
|
|
|
English |
|
|
|
| DAB frequency table | |
Band III |
|
|
|
|
|
Frequency | Channel label |
|
|
|
|
|
|
|
218.640 MHz | 11B |
|
|
|
|
220.352 MHz | 11C |
|
|
|
|
222.064 MHz | 11D |
|
|
|
|
223.936 MHz | 12A |
|
|
|
|
225.648 MHz | 12B |
|
|
|
|
227.360 MHz | 12C |
|
|
|
|
229.072 MHz | 12D |
|
|
|
|
INFORMATION | ADDITIONAL |
|
|
|
|
English |
|
|
|