Prestige 1100 Internet Access Router
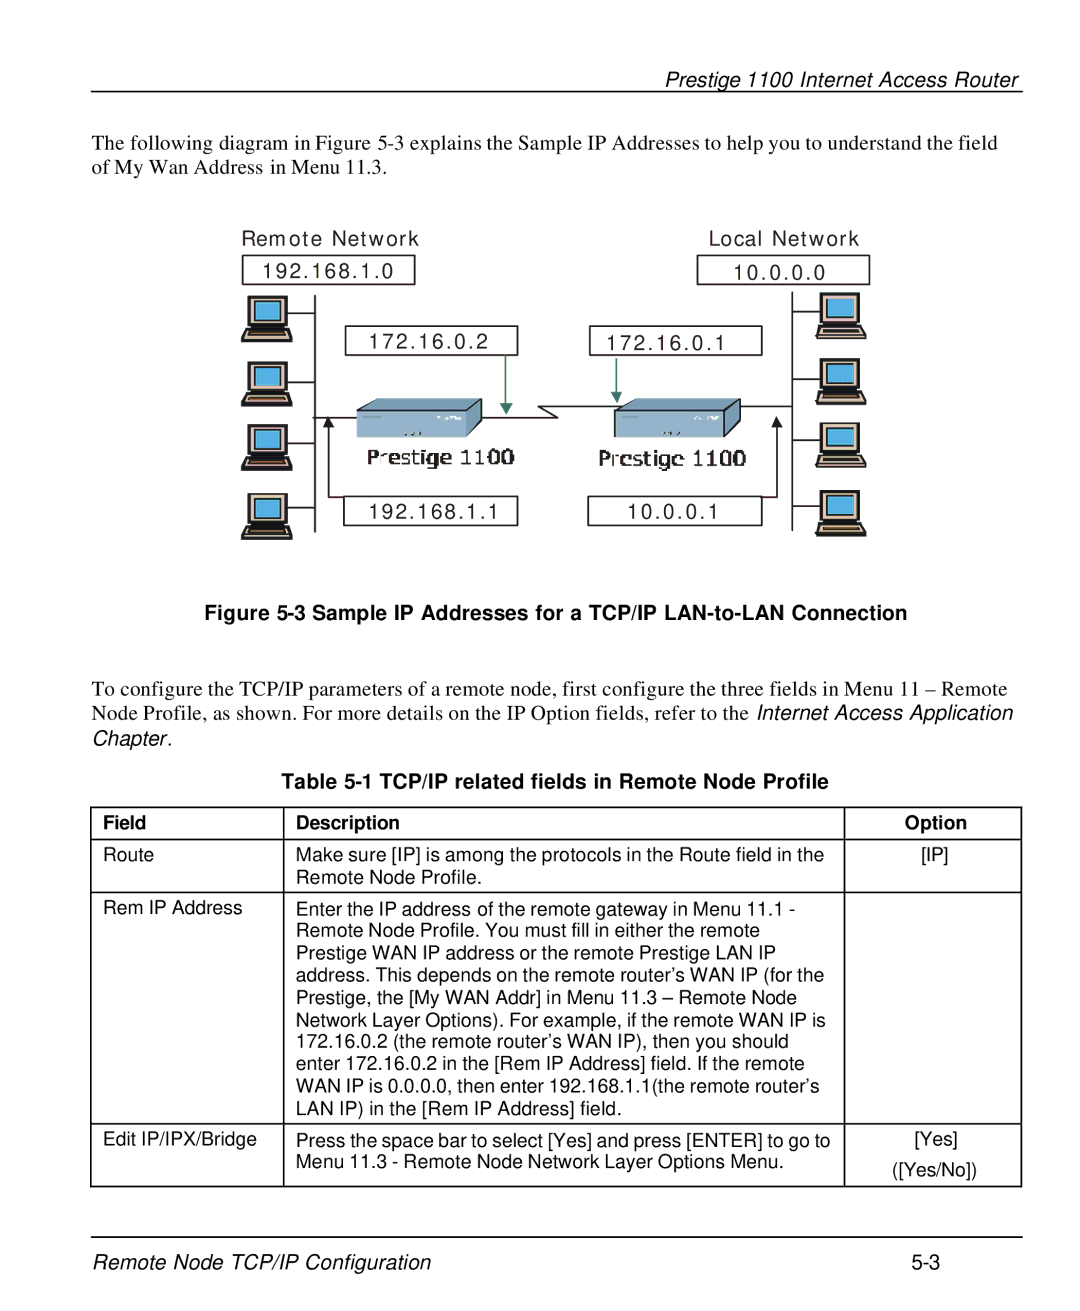
The following diagram in Figure
Remote Network 192.168.1.0
Local Network
10.0.0.0
172.16.0.2
172.16.0.1
192.168.1.1
10.0.0.1
Figure 5-3 Sample IP Addresses for a TCP/IP LAN-to-LAN Connection
To configure the TCP/IP parameters of a remote node, first configure the three fields in Menu 11 – Remote Node Profile, as shown. For more details on the IP Option fields, refer to the Internet Access Application Chapter.
Table 5-1 TCP/IP related fields in Remote Node Profile
Field | Description | Option |
|
|
|
Route | Make sure [IP] is among the protocols in the Route field in the | [IP] |
| Remote Node Profile. |
|
|
|
|
Rem IP Address | Enter the IP address of the remote gateway in Menu 11.1 - |
|
| Remote Node Profile. You must fill in either the remote |
|
| Prestige WAN IP address or the remote Prestige LAN IP |
|
| address. This depends on the remote router’s WAN IP (for the |
|
| Prestige, the [My WAN Addr] in Menu 11.3 – Remote Node |
|
| Network Layer Options). For example, if the remote WAN IP is |
|
| 172.16.0.2 (the remote router’s WAN IP), then you should |
|
| enter 172.16.0.2 in the [Rem IP Address] field. If the remote |
|
| WAN IP is 0.0.0.0, then enter 192.168.1.1(the remote router’s |
|
| LAN IP) in the [Rem IP Address] field. |
|
|
|
|
Edit IP/IPX/Bridge | Press the space bar to select [Yes] and press [ENTER] to go to | [Yes] |
| Menu 11.3 - Remote Node Network Layer Options Menu. | ([Yes/No]) |
|
| |
|
|
|
Remote Node TCP/IP Configuration |
