ZKT42 Trim Kit
3/4" Custom Panels
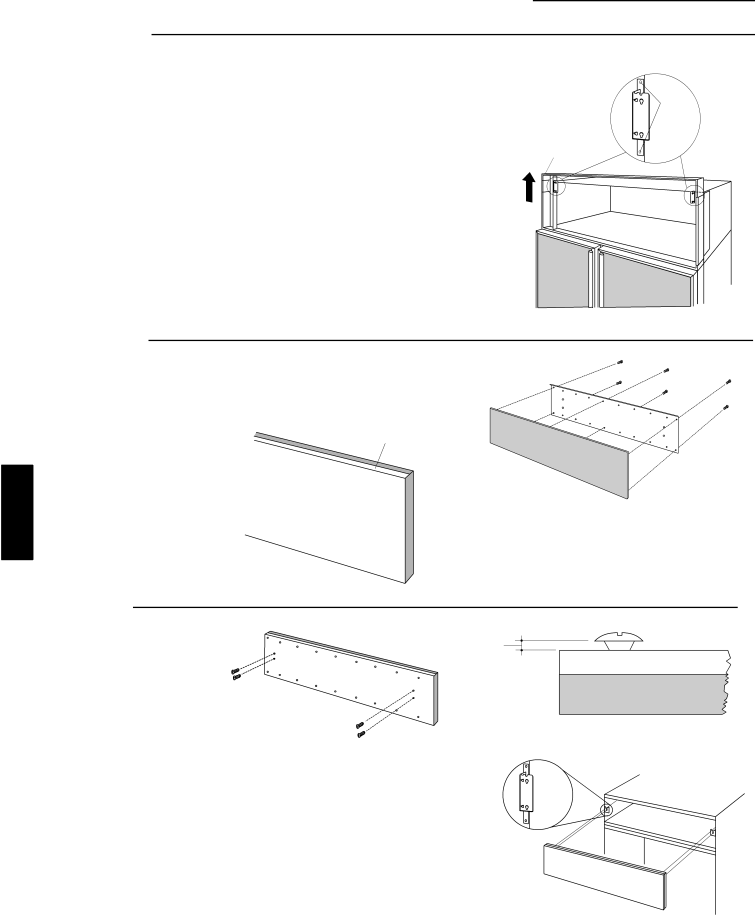
Option 1 Installation
Step 5
Adjust
grille panel
height
The refrigerator is shipped with the top case trim secured at the 83" refrigerator height.
•Loosen 2 screws on both sides and raise the top case trim to meet soffit height, from 83" to
•Tighten all 4 screws.
Screws
Top Case Trim
Raise To
Installation
Height
Step 6 Secure 3/4" panel to grille panel support
INSTALLATION
ZKT42
Important: Maintain
•Secure the new grille panel support to the back side of the 3/4" panel with #6 screws.
•Be sure the lip on the support panel is over the top of the wood panel.
Panel Support
Overlaps Top
Step 7
Install1/16"
grille panel
Back View
Grille Panel Support
•Install four of the six larger under cut screws such that the top of the screws are 1/16" from the surface of the support.
•Attach the assembled panel to the grille frame by inserting the four protruding screws into brackets located on each side of the grille frame.
30