ZKHT1 Trim Kit (For 3/4" Panels)
Support for Custom Handles
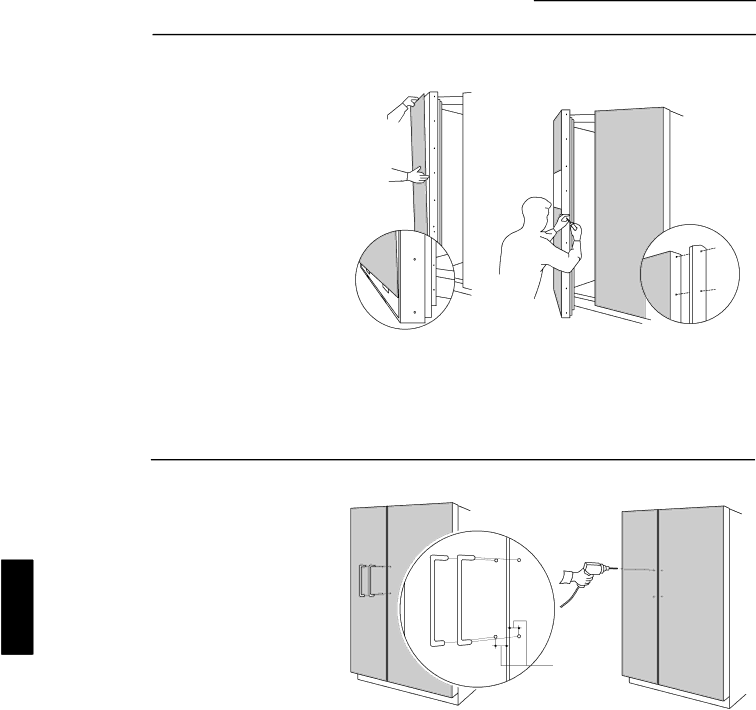
Step 1
Temporarily
mount
door panels
•Place the prepared 3/4"custom door panels on the bottom trim with support bracket tabs inserted into slots.
•Push the panel back against the steel door, making sure panel is flush with hinge side trim.
•Secure the panel to the trim temporarily by driving
2 screws through the back side of the trim at the top.
•Slide door extrusion in between panel and steel door. Temporarily secure with 2 screws.
Step 2
Locate position of handles
INSTALLATION
ZKHT1
3/4" Min.
•Determine the desired location of the custom handles and carefully mark centerlines of the screw holes. The handles must be located 3/4" to
•Again, with both doors closed, check centerlines of the screw holes to be sure they are parallel to the edge of the door, and level with opposite door.
•Drill 1⁄16" pilot hole through the panel until it starts into the aluminum extrusion. This will mark the matching location for drilling a clearance hole when assembling the extrusion, panel and handle.
34