D. Click Apply.
Network: LAN Settings
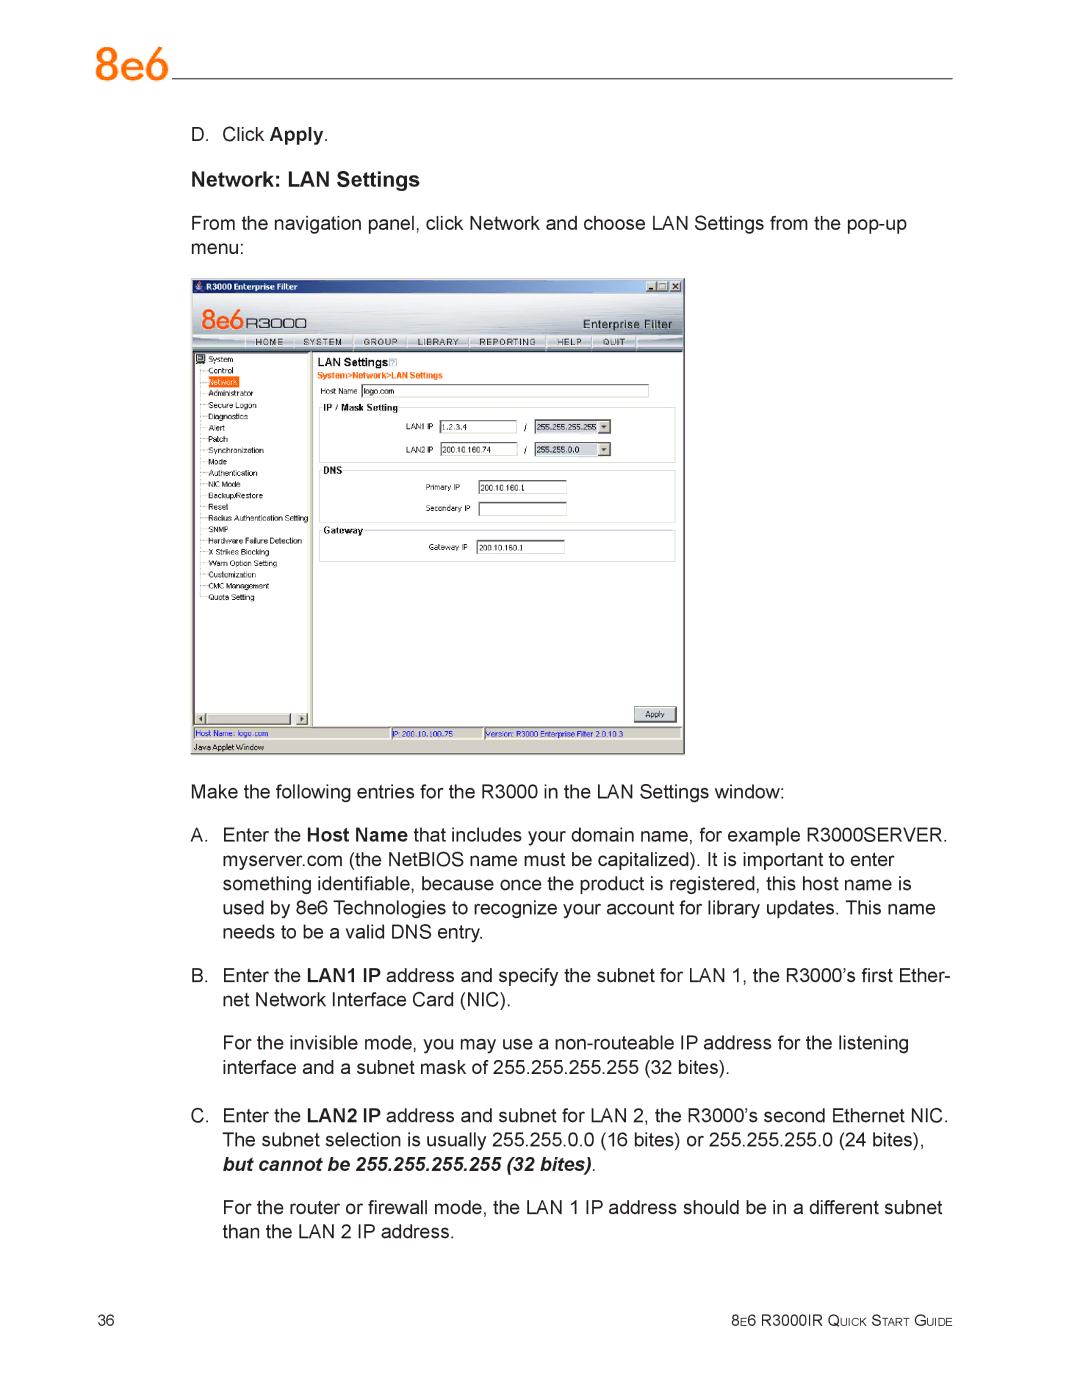
From the navigation panel, click Network and choose LAN Settings from the
Make the following entries for the R3000 in the LAN Settings window:
A.Enter the Host Name that includes your domain name, for example R3000SERVER. myserver.com (the NetBIOS name must be capitalized). It is important to enter something identifiable, because once the product is registered, this host name is used by 8e6 Technologies to recognize your account for library updates. This name needs to be a valid DNS entry.
B.Enter the LAN1 IP address and specify the subnet for LAN 1, the R3000’s first Ether- net Network Interface Card (NIC).
For the invisible mode, you may use a
C.Enter the LAN2 IP address and subnet for LAN 2, the R3000’s second Ethernet NIC.
The subnet selection is usually 255.255.0.0 (16 bites) or 255.255.255.0 (24 bites), but cannot be 255.255.255.255 (32 bites).
For the router or firewall mode, the LAN 1 IP address should be in a different subnet than the LAN 2 IP address.
36 | 8e6 R3000IR Quick Start Guide |