Network: Regional Setting
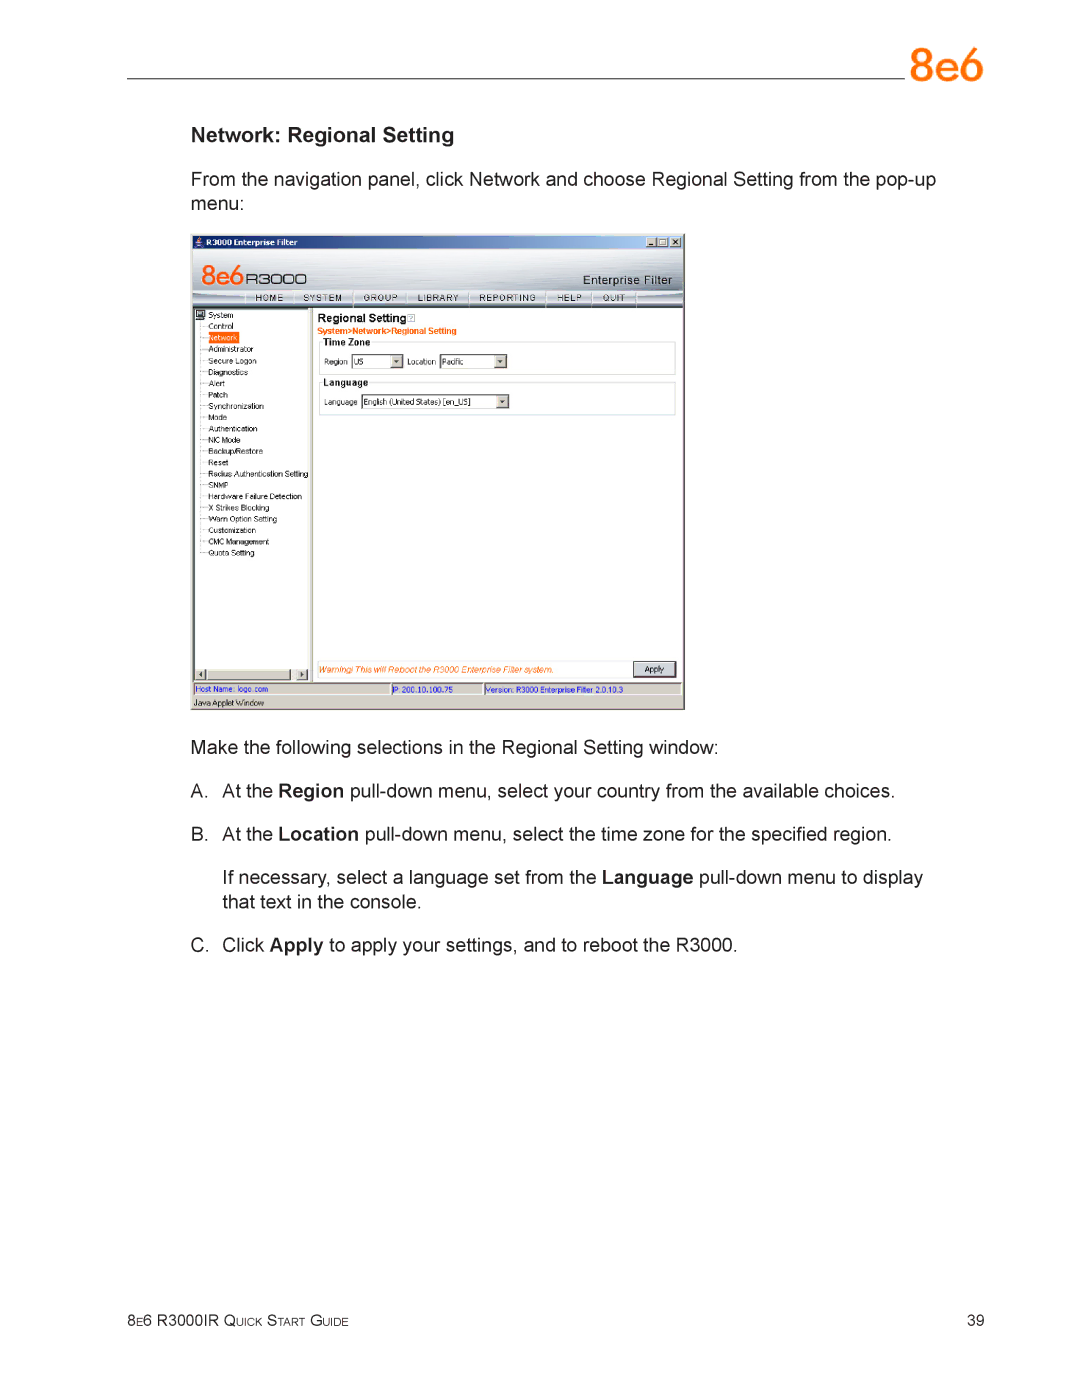
From the navigation panel, click Network and choose Regional Setting from the
Make the following selections in the Regional Setting window:
A.At the Region
B.At the Location
If necessary, select a language set from the Language
C.Click Apply to apply your settings, and to reboot the R3000.
8e6 R3000IR Quick Start Guide | 39 |
