Chapter 5 - System Setup
Setup of Power Array
After the input and output wiring has been properly con- nected and checked by a qualified electrican, the Power Ar- ray is ready for the installation of the battery and power mod- ules. After they are installed, the grill covers are replaced onto the frame, and the PowerView user interface is mounted onto the frame.
Frame Leveling Procedure
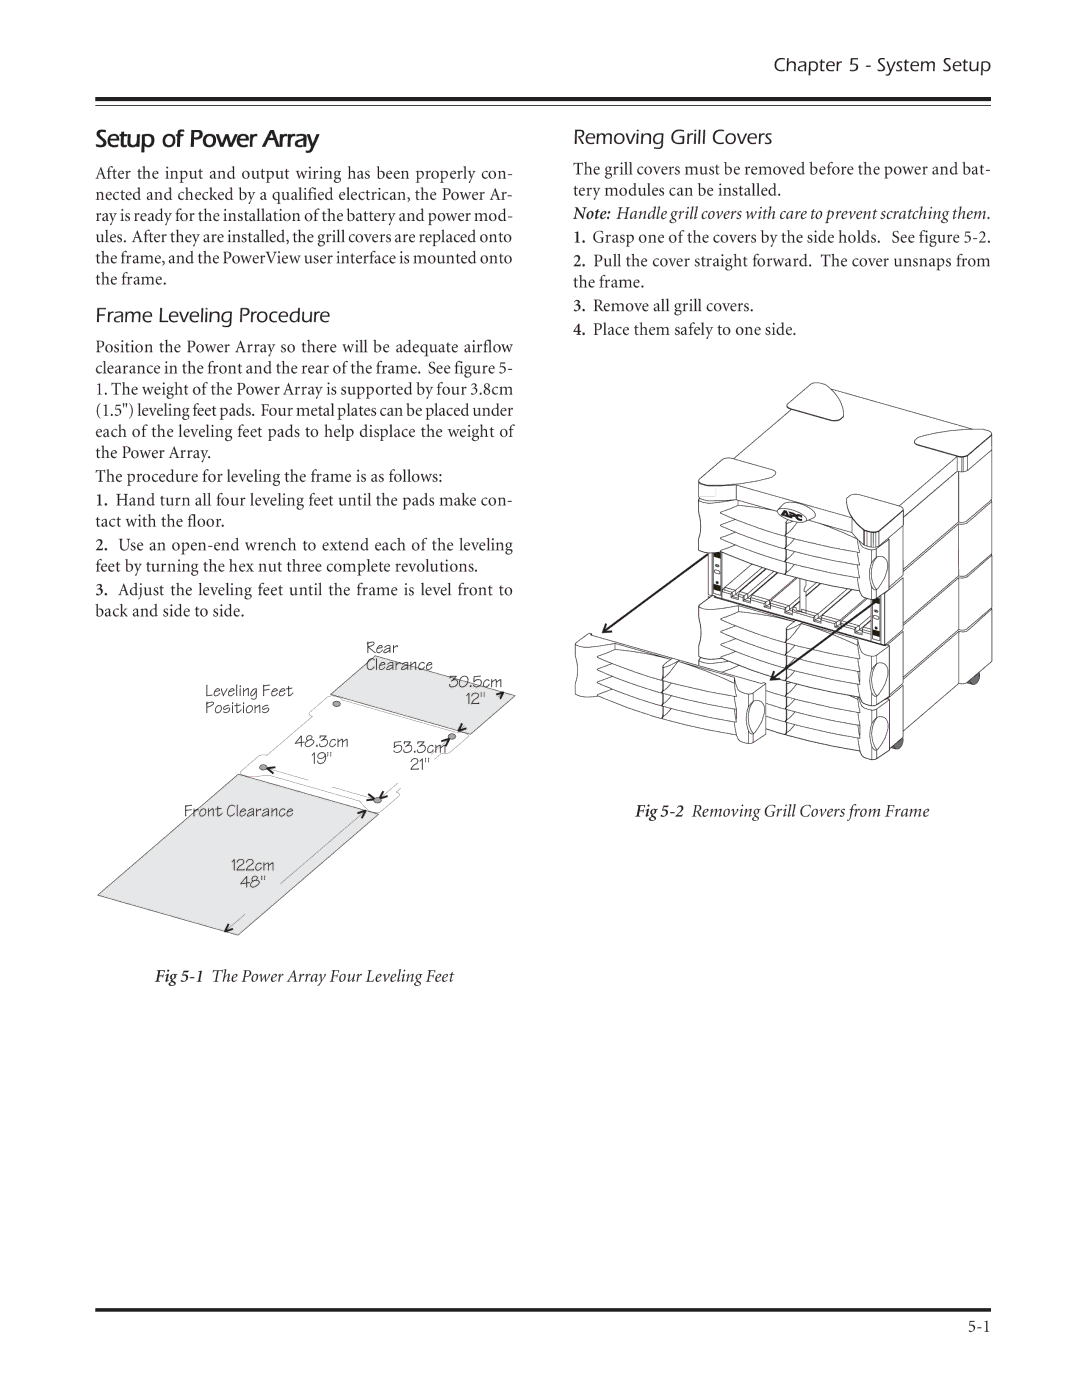
Position the Power Array so there will be adequate airflow clearance in the front and the rear of the frame. See figure 5-
1.The weight of the Power Array is supported by four 3.8cm (1.5") leveling feet pads. Four metal plates can be placed under each of the leveling feet pads to help displace the weight of the Power Array.
The procedure for leveling the frame is as follows:
1.Hand turn all four leveling feet until the pads make con- tact with the floor.
2.Use an
3.Adjust the leveling feet until the frame is level front to back and side to side.
Rear
Clearance
Leveling Feet | 30.5cm | |
12" | ||
Positions | ||
|
48.3cm 53.3cm![]()
19" 21"
Front Clearance
122cm
48"
Fig
Removing Grill Covers
The grill covers must be removed before the power and bat- tery modules can be installed.
Note: Handle grill covers with care to prevent scratching them.
1.Grasp one of the covers by the side holds. See figure
2.Pull the cover straight forward. The cover unsnaps from the frame.
3.Remove all grill covers.
4.Place them safely to one side.
Fig
