User Manual version 2007
5.6. HDD Module Assembly
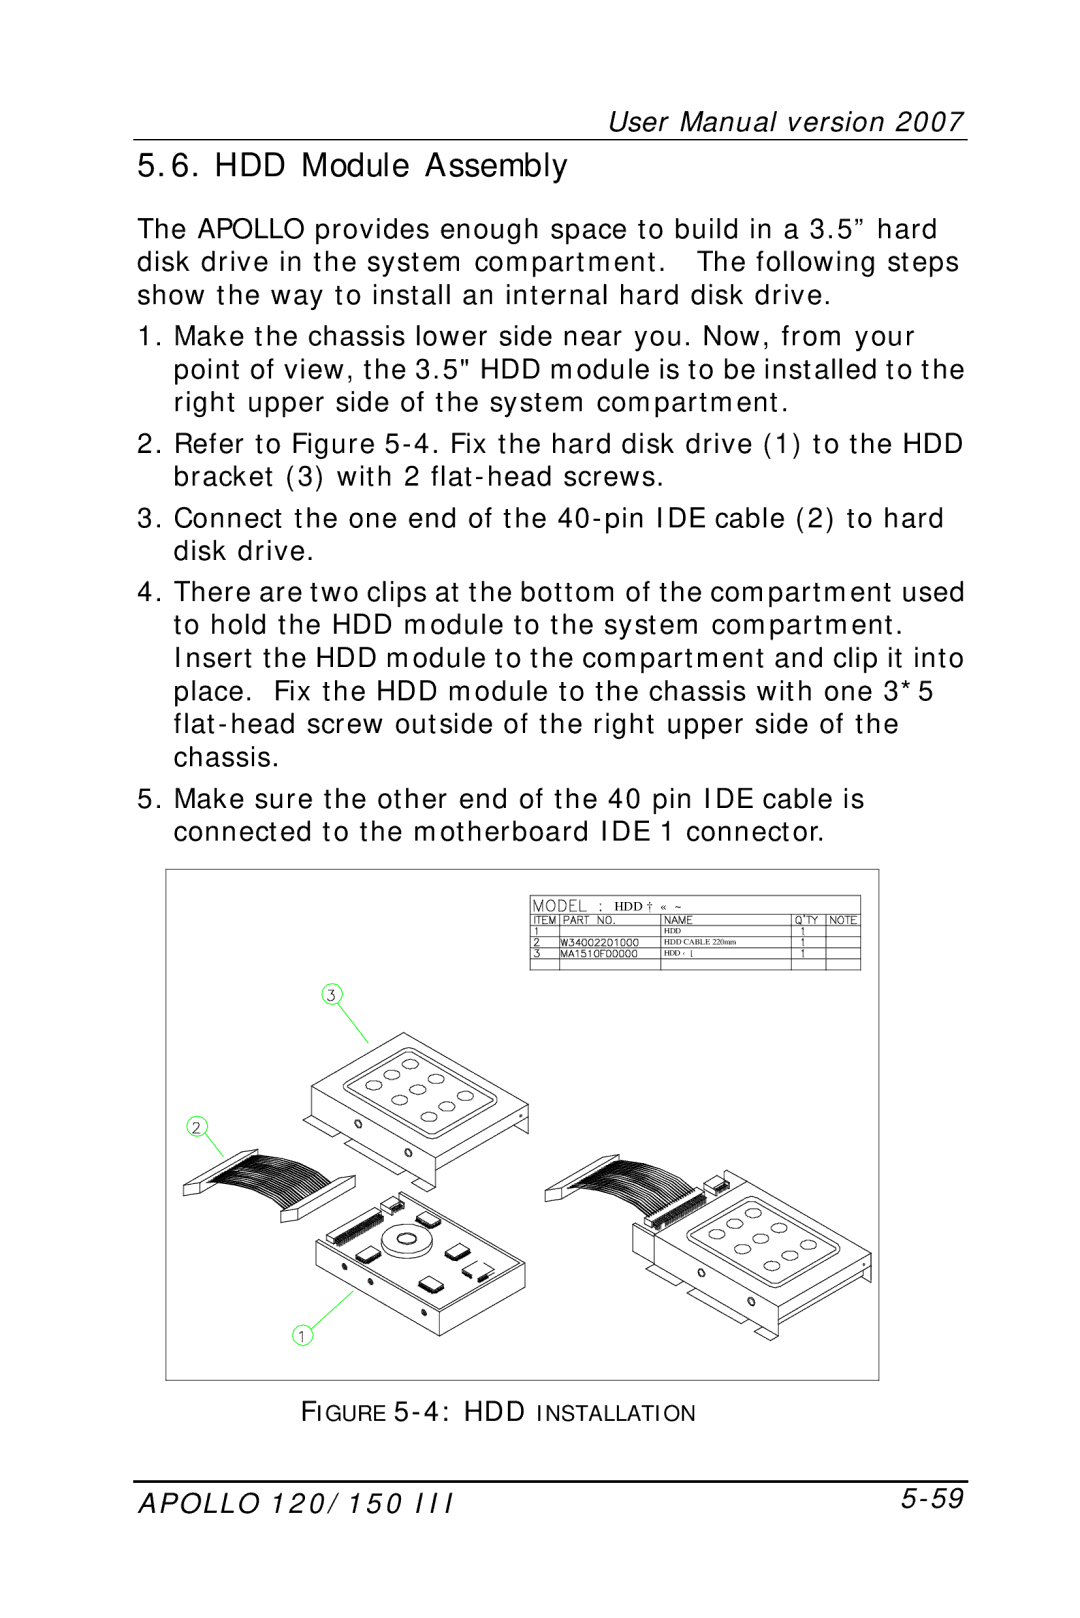
The APOLLO provides enough space to build in a 3.5” hard disk drive in the system compartment. The following steps show the way to install an internal hard disk drive.
1.Make the chassis lower side near you. Now, from your point of view, the 3.5" HDD module is to be installed to the right upper side of the system compartment.
2.Refer to Figure
3.Connect the one end of the
4.There are two clips at the bottom of the compartment used to hold the HDD module to the system compartment. Insert the HDD module to the compartment and clip it into place. Fix the HDD module to the chassis with one 3*5
5.Make sure the other end of the 40 pin IDE cable is connected to the motherboard IDE 1 connector.
HDD ²Õ«~ |
HDD |
HDD CABLE 220mm |
HDD ¬[ |
FIGURE |
APOLLO 120/150 III |