Installation Guidelines
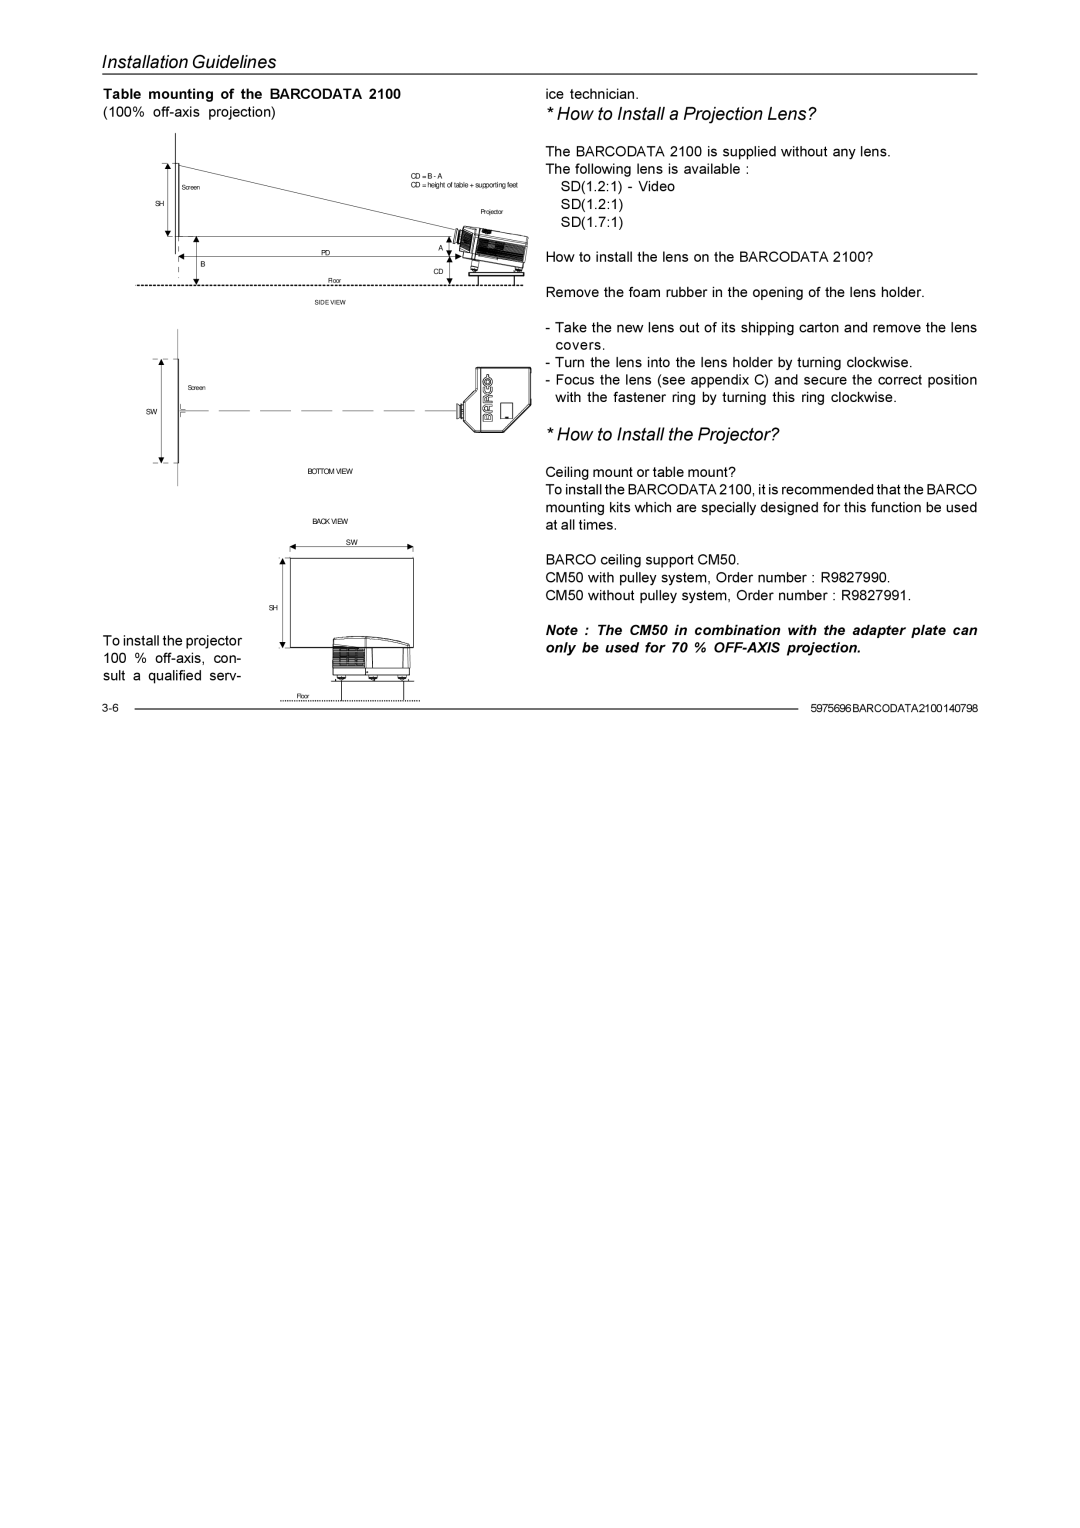
Table mounting of the BARCODATA 2100 (100%
| CD = B - A |
Screen | CD = height of table + supporting feet |
| |
SH |
|
| Projector |
| A |
| PD |
| B |
| CD |
| Floor |
| SIDE VIEW |
Screen
SW
BOTTOM VIEW
BACK VIEW
SW
ice technician.
* How to Install a Projection Lens?
The BARCODATA 2100 is supplied without any lens. The following lens is available :
SD(1.2:1) - Video SD(1.2:1) SD(1.7:1)
How to install the lens on the BARCODATA 2100?
Remove the foam rubber in the opening of the lens holder.
-Take the new lens out of its shipping carton and remove the lens covers.
-Turn the lens into the lens holder by turning clockwise.
-Focus the lens (see appendix C) and secure the correct position with the fastener ring by turning this ring clockwise.
* How to Install the Projector?
Ceiling mount or table mount?
To install the BARCODATA 2100, it is recommended that the BARCO mounting kits which are specially designed for this function be used at all times.
SH
To install the projector 100 %
BARCO ceiling support CM50.
CM50 with pulley system, Order number : R9827990.
CM50 without pulley system, Order number : R9827991.
Note : The CM50 in combination with the adapter plate can only be used for 70 %
Floor
| 5975696BARCODATA2100140798 | |
| ||
|
|
|
|
|
|
