Random Access Adjustment Mode
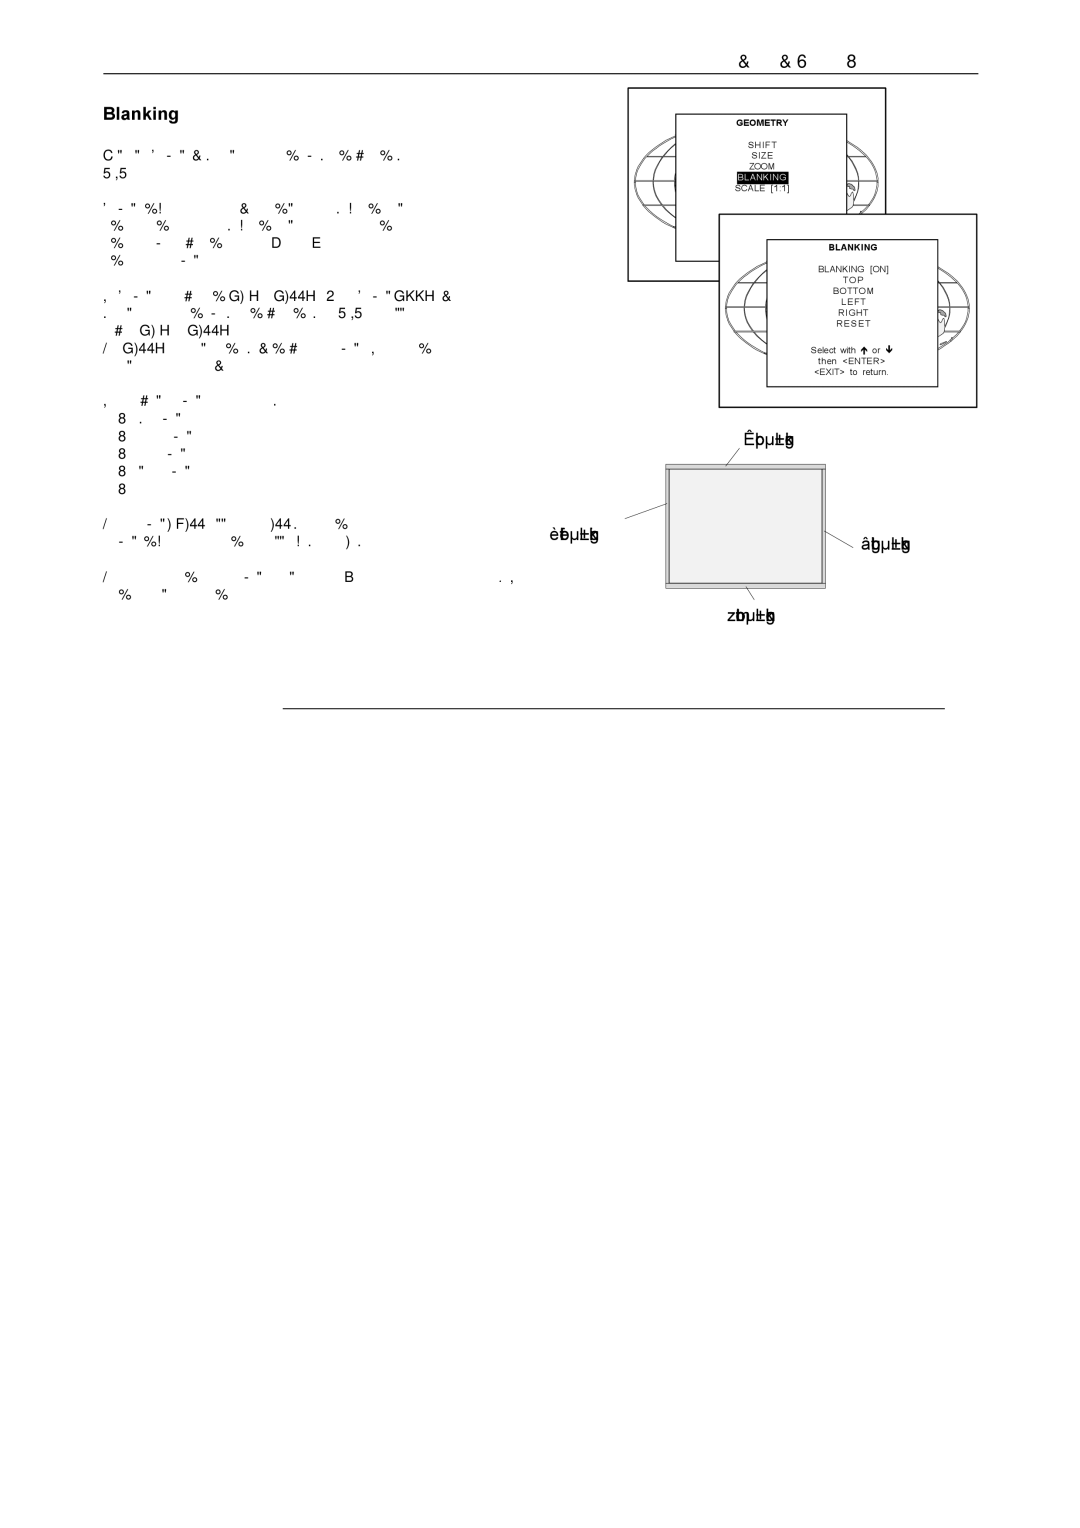
Blanking
Highlight Blanking by pushing the control disk up or down and press ENTER to select.
Blanking adjustments affect only the edges of the projected image and are used to frame the projected image on to the screen and to hide or black out unwanted information (or noise). A 0 on the bar scale indicates no blanking.
The Blanking can be switched [ON] or [OFF]. Select Blanking [xx] by pushing the control disk up or down and press ENTER to toggle between [ON] or [OFF].
When [OFF], the image is displayed without blanking. The installed settings are still in memory for later use.
The following blanking corrections are possible :
-top blanking
-bottom blanking
-left blanking
-right blanking
-reset
When the banking ON/OFF toggle is in the OFF position and one of the blanking adjustment is selected, the toggle jumps in the ON position.
When Reset is selected, the 4 blanking settings are set to zero. The saved settings are erased.
GEOMETRY |
SHIFT |
SIZE |
ZOOM |
BLANKING |
SCALE [1:1] |
BLANKING |
BLANKING [ON] |
TOP |
BOTTOM |
LEFT |
RIGHT |
RESET |
Select with or |
then <ENTER> |
<EXIT> to return. |
Top blanking
Left blanking |
| Right blanking |
|
| |
|
|
|
| Bottom blanking | |
5975696BARCODATA2100140798 |
| |
| ||
|
|
|
