Using the Web-Based Advanced User Interface
Table of Contents | sections | 1 | 2 | 3 | 4 | 5 | 6 | 7 | 8 | 9 | 10 |
To restrict Internet access to a single computer for example, enter the IP address of the computer you wish to restrict access to in the IP fields
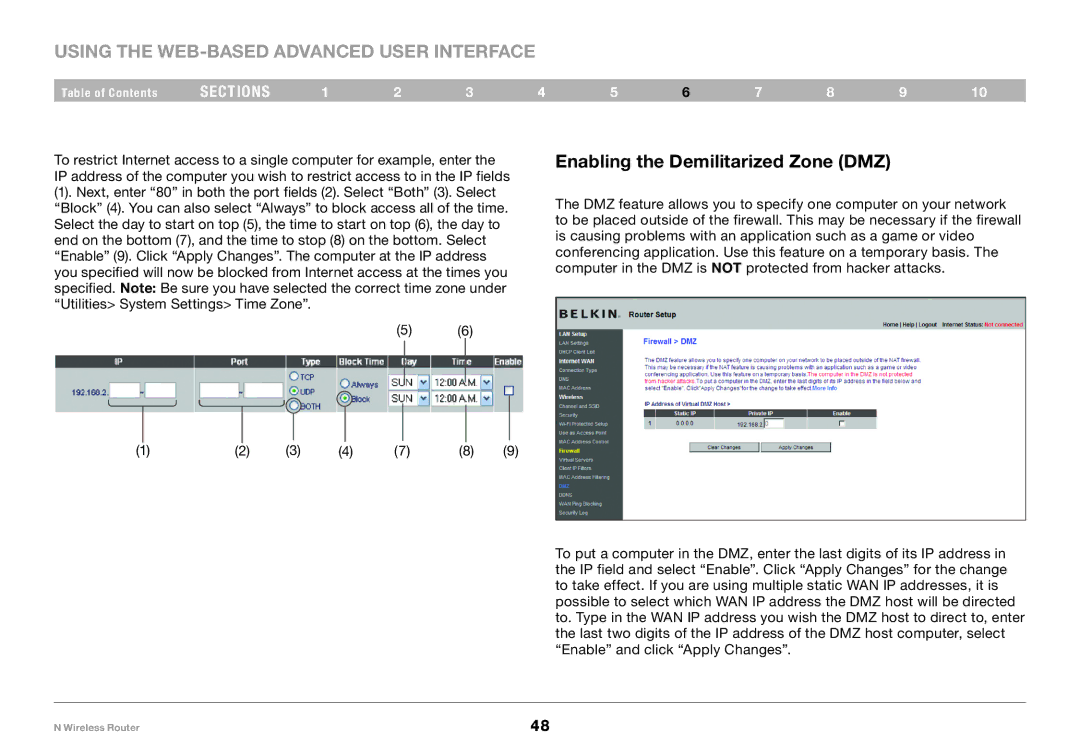
(1). Next, enter “80” in both the port fields (2). Select “Both” (3). Select “Block” (4). You can also select “Always” to block access all of the time. Select the day to start on top (5), the time to start on top (6), the day to end on the bottom (7), and the time to stop (8) on the bottom. Select “Enable” (9). Click “Apply Changes”. The computer at the IP address you specified will now be blocked from Internet access at the times you specified. Note: Be sure you have selected the correct time zone under “Utilities> System Settings> Time Zone”.
(5) (6)
Enabling the Demilitarized Zone (DMZ)
The DMZ feature allows you to specify one computer on your network to be placed outside of the firewall. This may be necessary if the firewall is causing problems with an application such as a game or video conferencing application. Use this feature on a temporary basis. The computer in the DMZ is NOT protected from hacker attacks.
|
|
|
|
|
|
|
|
|
|
|
|
|
|
|
|
|
|
|
|
|
|
|
|
|
|
|
|
|
|
|
|
|
|
|
|
|
|
|
|
|
|
(1) | (2) | (3) | (4) | (7) | (8) | (9) | |||||||
To put a computer in the DMZ, enter the last digits of its IP address in the IP field and select “Enable”. Click “Apply Changes” for the change to take effect. If you are using multiple static WAN IP addresses, it is possible to select which WAN IP address the DMZ host will be directed to. Type in the WAN IP address you wish the DMZ host to direct to, enter the last two digits of the IP address of the DMZ host computer, select “Enable” and click “Apply Changes”.
N Wireless Router | 48 |