it will cancel out your program. The Timer will begin to count down | I1 | |
and 2 of the 3 lights in the Circular Display will stay on. As cooking | ||
| ||
progresses, you will see these lights alternate around the Circular |
| |
Display with 1 or 2 lights on at any given time showing how the |
| |
heat is circulating around the food. The heating elements will not |
| |
glow red. You may want to check doneness of food using a |
| |
standard meat thermometer in case you have to adjust for more |
| |
cooking time. |
|
19. When cooking is done, you will hear 3 beeps and the Timer will flash “00.” Use a pot holder or oven mitt to remove the Lid. Be careful to avoid escaping steam.
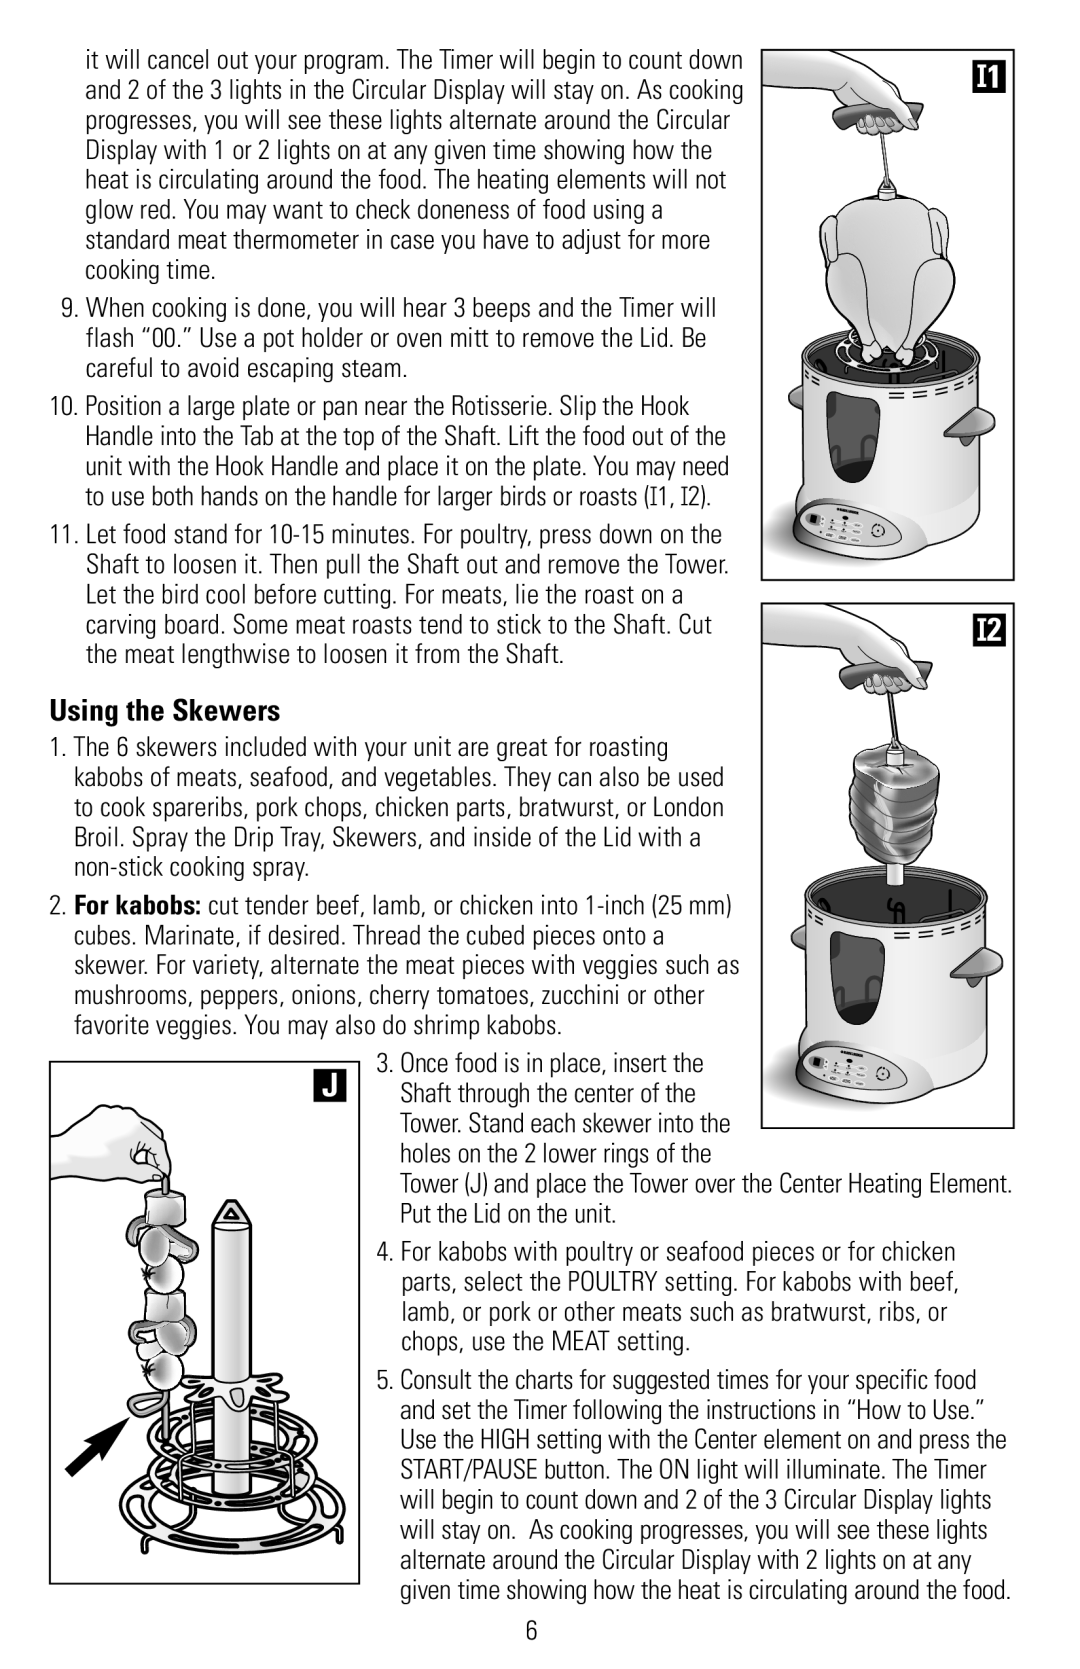
10. Position a large plate or pan near the Rotisserie. Slip the Hook Handle into the Tab at the top of the Shaft. Lift the food out of the unit with the Hook Handle and place it on the plate. You may need to use both hands on the handle for larger birds or roasts (I1, I2).
11. Let food stand for |
|
Shaft to loosen it. Then pull the Shaft out and remove the Tower. |
|
Let the bird cool before cutting. For meats, lie the roast on a |
|
carving board. Some meat roasts tend to stick to the Shaft. Cut | I2 |
the meat lengthwise to loosen it from the Shaft. |
|
Using the Skewers
1. The 6 skewers included with your unit are great for roasting kabobs of meats, seafood, and vegetables. They can also be used to cook spareribs, pork chops, chicken parts, bratwurst, or London Broil. Spray the Drip Tray, Skewers, and inside of the Lid with a
2. For kabobs: cut tender beef, lamb, or chicken into
|
|
| 3. Once food is in place, insert the | |
|
|
| ||
| J |
| ||
|
| Shaft through the center of the | ||
|
| |||
|
|
| Tower. Stand each skewer into the |
|
|
|
|
| |
|
|
| holes on the 2 lower rings of the | |
|
|
| Tower (J) and place the Tower over the Center Heating Element. | |
|
|
| Put the Lid on the unit. | |
4. For kabobs with poultry or seafood pieces or for chicken parts, select the POULTRY setting. For kabobs with beef, lamb, or pork or other meats such as bratwurst, ribs, or chops, use the MEAT setting.
5. Consult the charts for suggested times for your specific food and set the Timer following the instructions in “How to Use.” Use the HIGH setting with the Center element on and press the START/PAUSE button. The ON light will illuminate. The Timer will begin to count down and 2 of the 3 Circular Display lights will stay on. As cooking progresses, you will see these lights alternate around the Circular Display with 2 lights on at any given time showing how the heat is circulating around the food.
6