Chapter 2 Installing the Cisco SFS 7000P Switch
Figure 2-2 Assembled Rack Brackets
144949
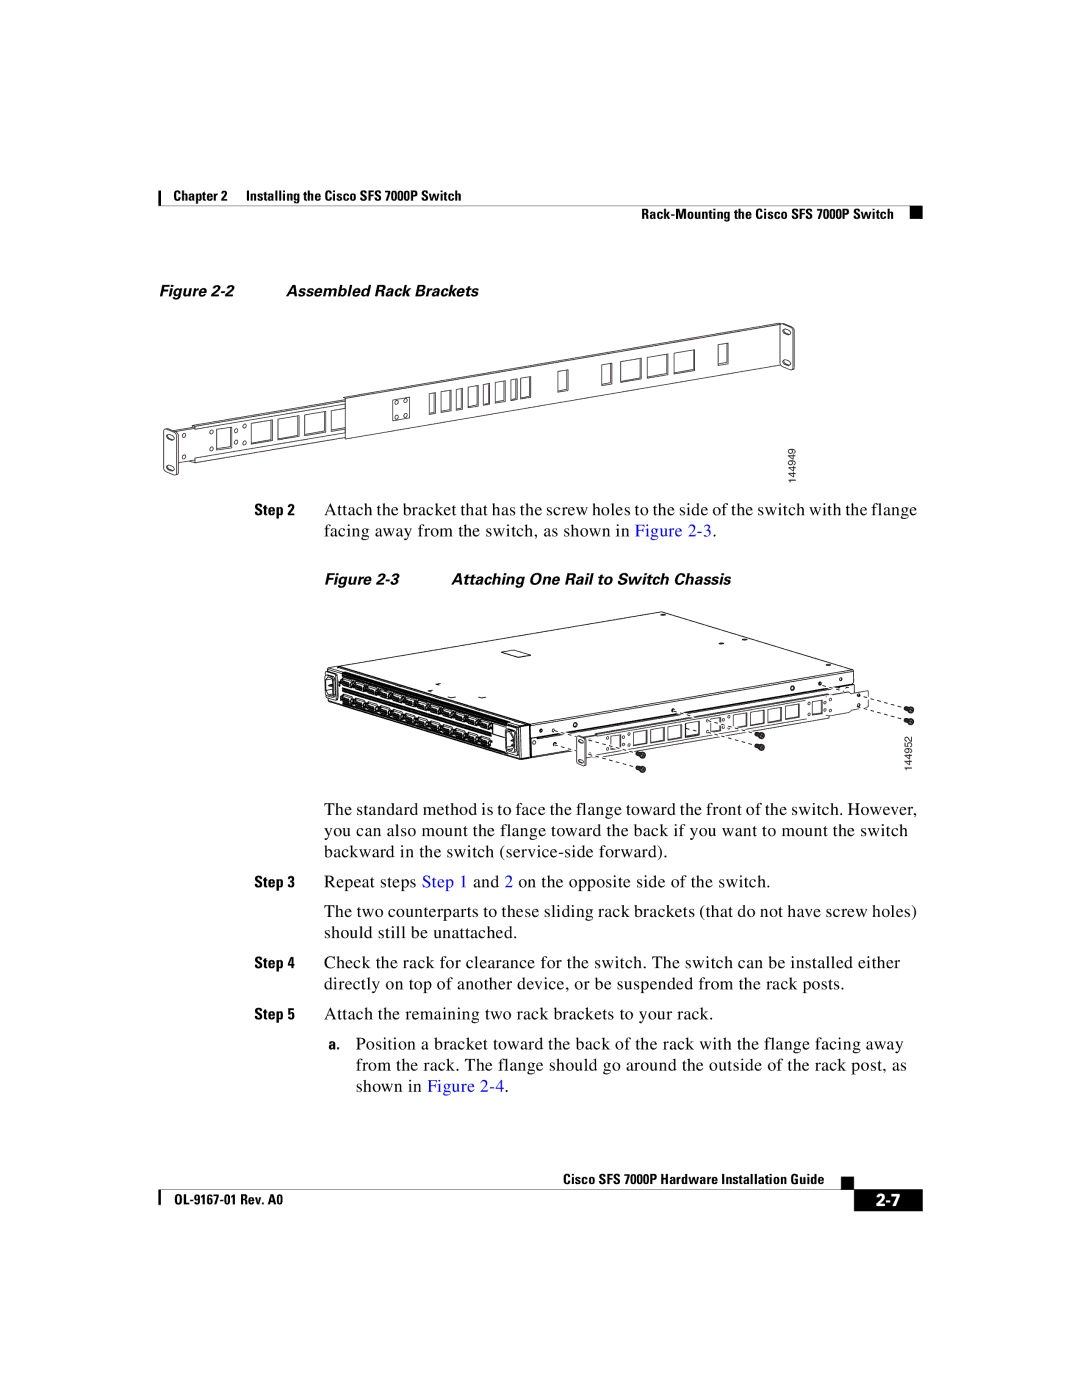
Step 2 Attach the bracket that has the screw holes to the side of the switch with the flange facing away from the switch, as shown in Figure
Figure 2-3 Attaching One Rail to Switch Chassis
144952
The standard method is to face the flange toward the front of the switch. However, you can also mount the flange toward the back if you want to mount the switch backward in the switch
Step 3 Repeat steps Step 1 and 2 on the opposite side of the switch.
The two counterparts to these sliding rack brackets (that do not have screw holes) should still be unattached.
Step 4 Check the rack for clearance for the switch. The switch can be installed either directly on top of another device, or be suspended from the rack posts.
Step 5 Attach the remaining two rack brackets to your rack.
a.Position a bracket toward the back of the rack with the flange facing away from the rack. The flange should go around the outside of the rack post, as shown in Figure
|
| Cisco SFS 7000P Hardware Installation Guide |
|
|
|
|
| ||
|
|
| ||
|
|
|