Section 3 - Software Configuration
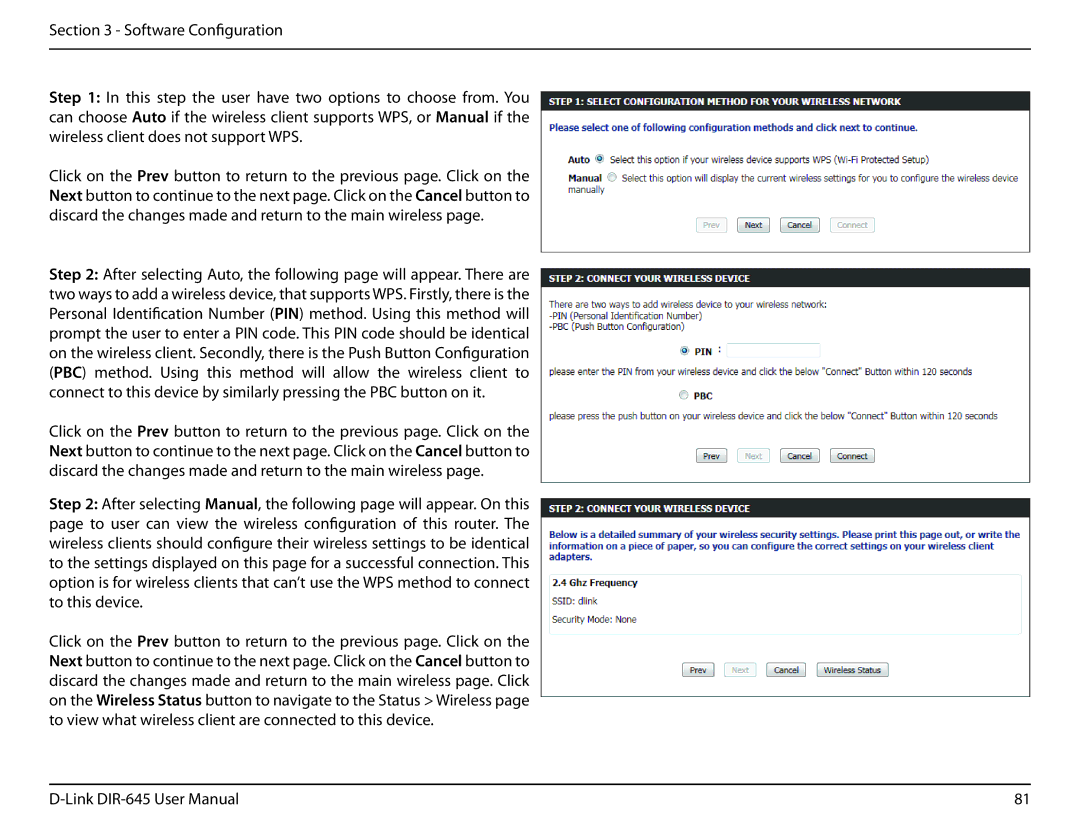
Step 1: In this step the user have two options to choose from. You can choose Auto if the wireless client supports WPS, or Manual if the wireless client does not support WPS.
Click on the Prev button to return to the previous page. Click on the Next button to continue to the next page. Click on the Cancel button to discard the changes made and return to the main wireless page.
Step 2: After selecting Auto, the following page will appear. There are two ways to add a wireless device, that supports WPS. Firstly, there is the Personal Identification Number (PIN) method. Using this method will prompt the user to enter a PIN code. This PIN code should be identical on the wireless client. Secondly, there is the Push Button Configuration (PBC) method. Using this method will allow the wireless client to connect to this device by similarly pressing the PBC button on it.
Click on the Prev button to return to the previous page. Click on the Next button to continue to the next page. Click on the Cancel button to discard the changes made and return to the main wireless page.
Step 2: After selecting Manual, the following page will appear. On this page to user can view the wireless configuration of this router. The wireless clients should configure their wireless settings to be identical to the settings displayed on this page for a successful connection. This option is for wireless clients that can’t use the WPS method to connect to this device.
Click on the Prev button to return to the previous page. Click on the Next button to continue to the next page. Click on the Cancel button to discard the changes made and return to the main wireless page. Click on the Wireless Status button to navigate to the Status > Wireless page to view what wireless client are connected to this device.
81 |
