w w w . d e l l . c o m s u p p o r t . d e l l . c o m
4Unpack the drive and prepare it for installation.
See the documentation that came with the drive to ensure that the drive is setup for your computer.
5Open the computer cover (see page 67).
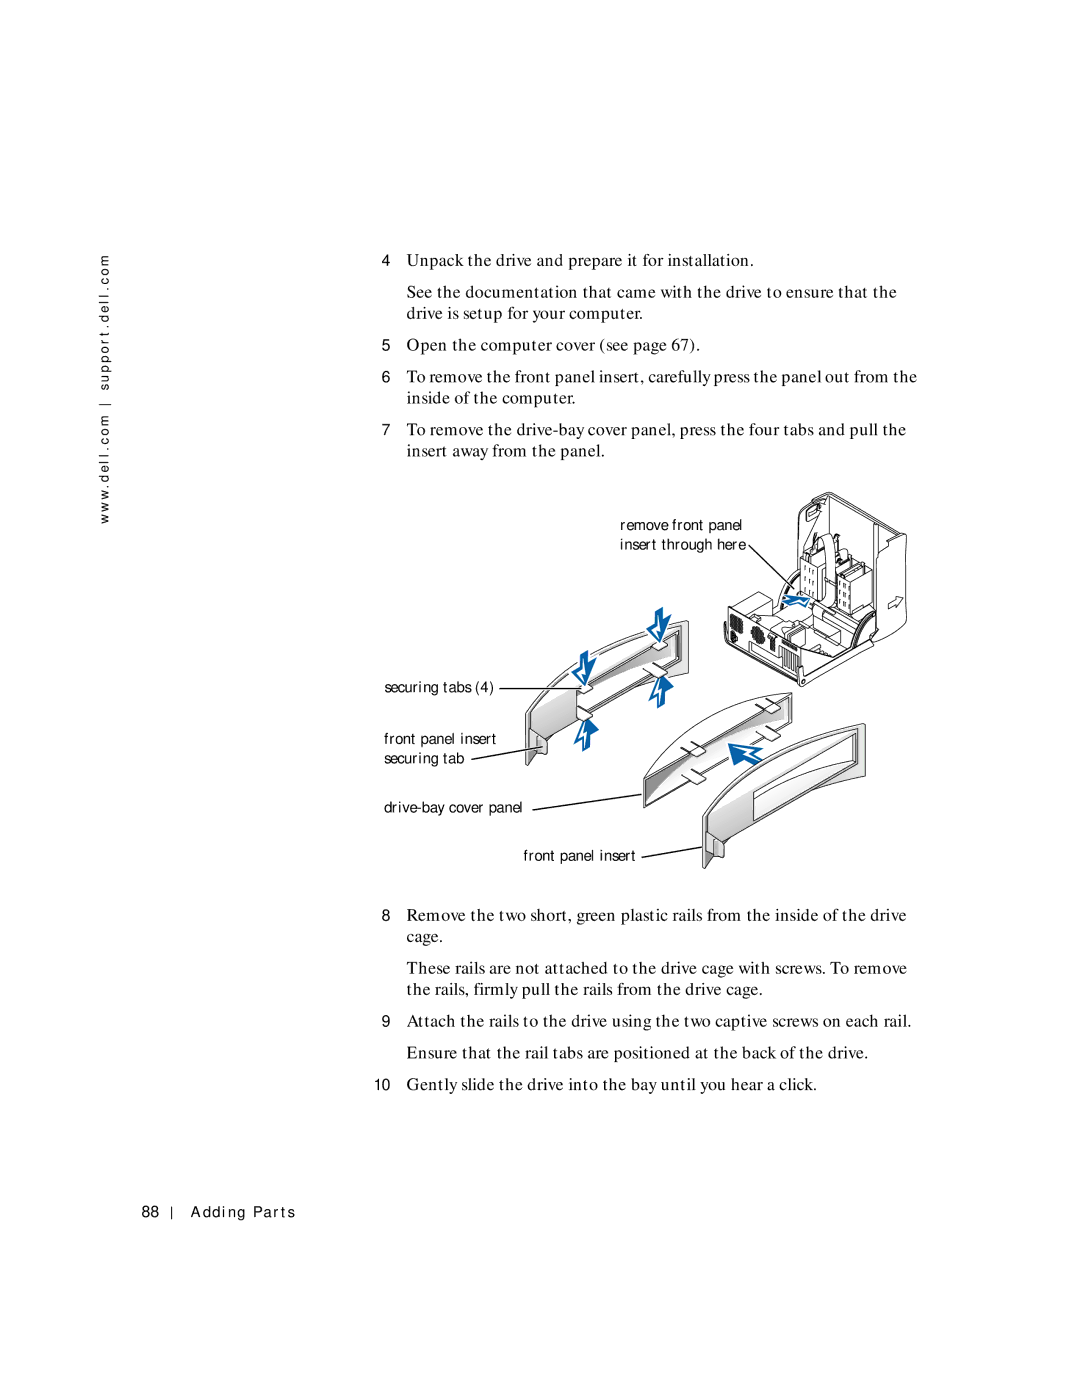
6To remove the front panel insert, carefully press the panel out from the inside of the computer.
7To remove the
remove front panel insert through here
securing tabs (4) 


front panel insert securing tab ![]()
![]()
![]()
![]() front panel insert
front panel insert ![]()
![]()
![]()
8Remove the two short, green plastic rails from the inside of the drive cage.
These rails are not attached to the drive cage with screws. To remove the rails, firmly pull the rails from the drive cage.
9Attach the rails to the drive using the two captive screws on each rail. Ensure that the rail tabs are positioned at the back of the drive.
10Gently slide the drive into the bay until you hear a click.
88