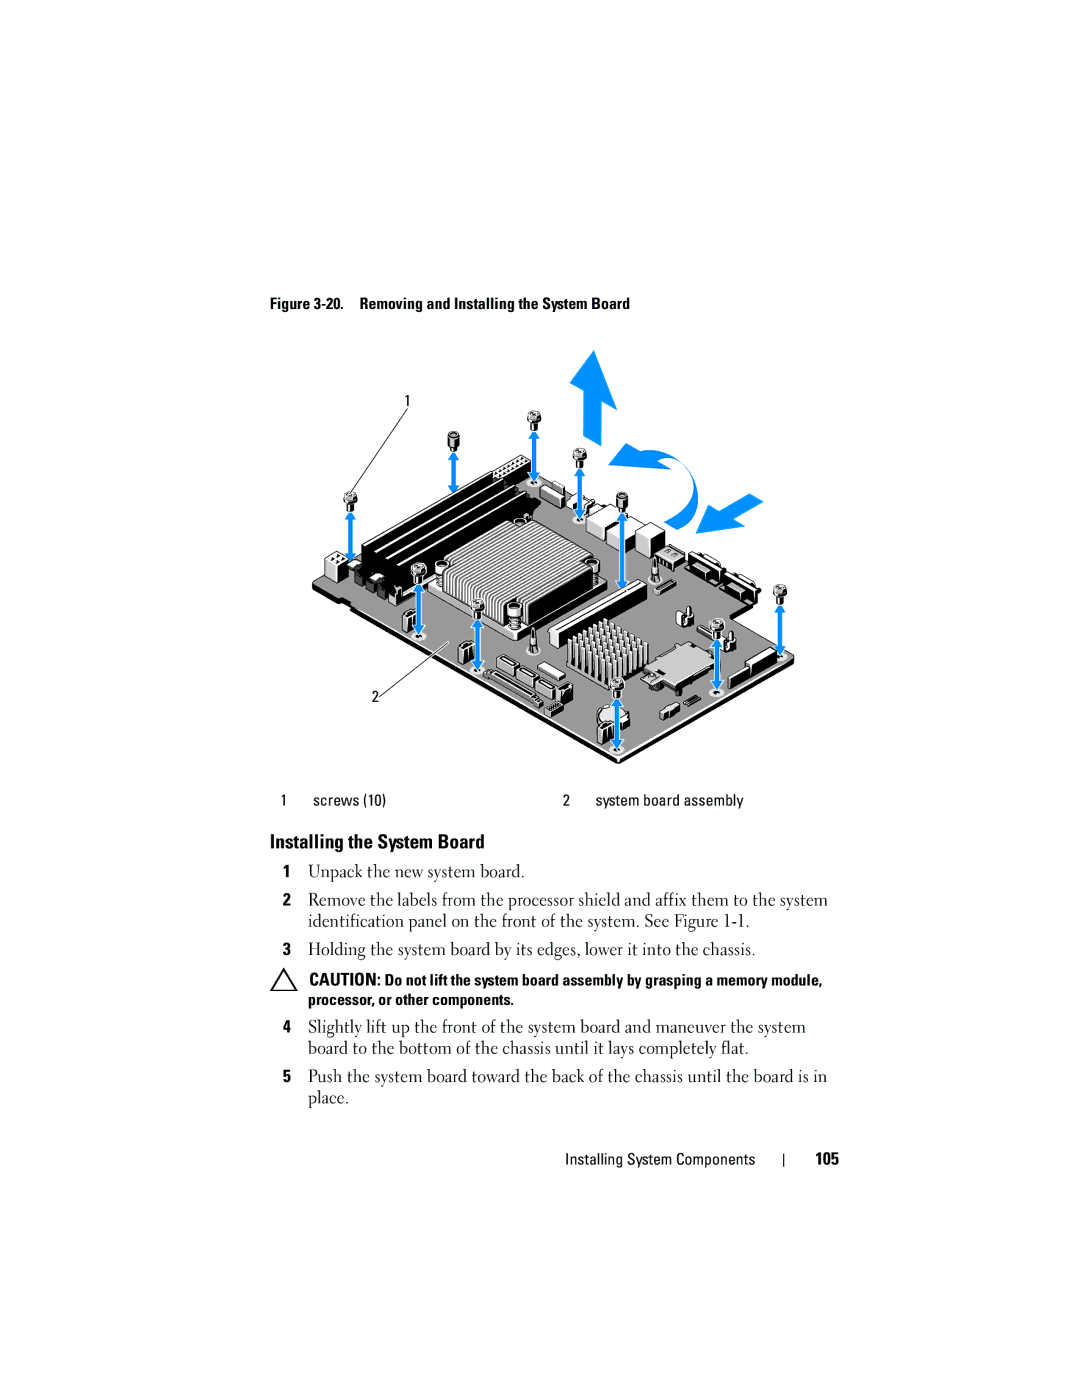
Figure 3-20. Removing and Installing the System Board
1
2![]()
1 | screws (10) | 2 | system board assembly |
Installing the System Board
1Unpack the new system board.
2Remove the labels from the processor shield and affix them to the system identification panel on the front of the system. See Figure
3Holding the system board by its edges, lower it into the chassis.
CAUTION: Do not lift the system board assembly by grasping a memory module, processor, or other components.
4Slightly lift up the front of the system board and maneuver the system board to the bottom of the chassis until it lays completely flat.
5Push the system board toward the back of the chassis until the board is in place.