1. Introduction
Terminal Panel Features
15 | 14 13 | 12 | 3 | ||||||
|
|
|
|
|
|
|
|
|
|
|
|
|
|
|
|
|
|
|
|
|
|
|
|
|
|
|
|
|
|
4
5
6
7 8 9 1 2 10 11
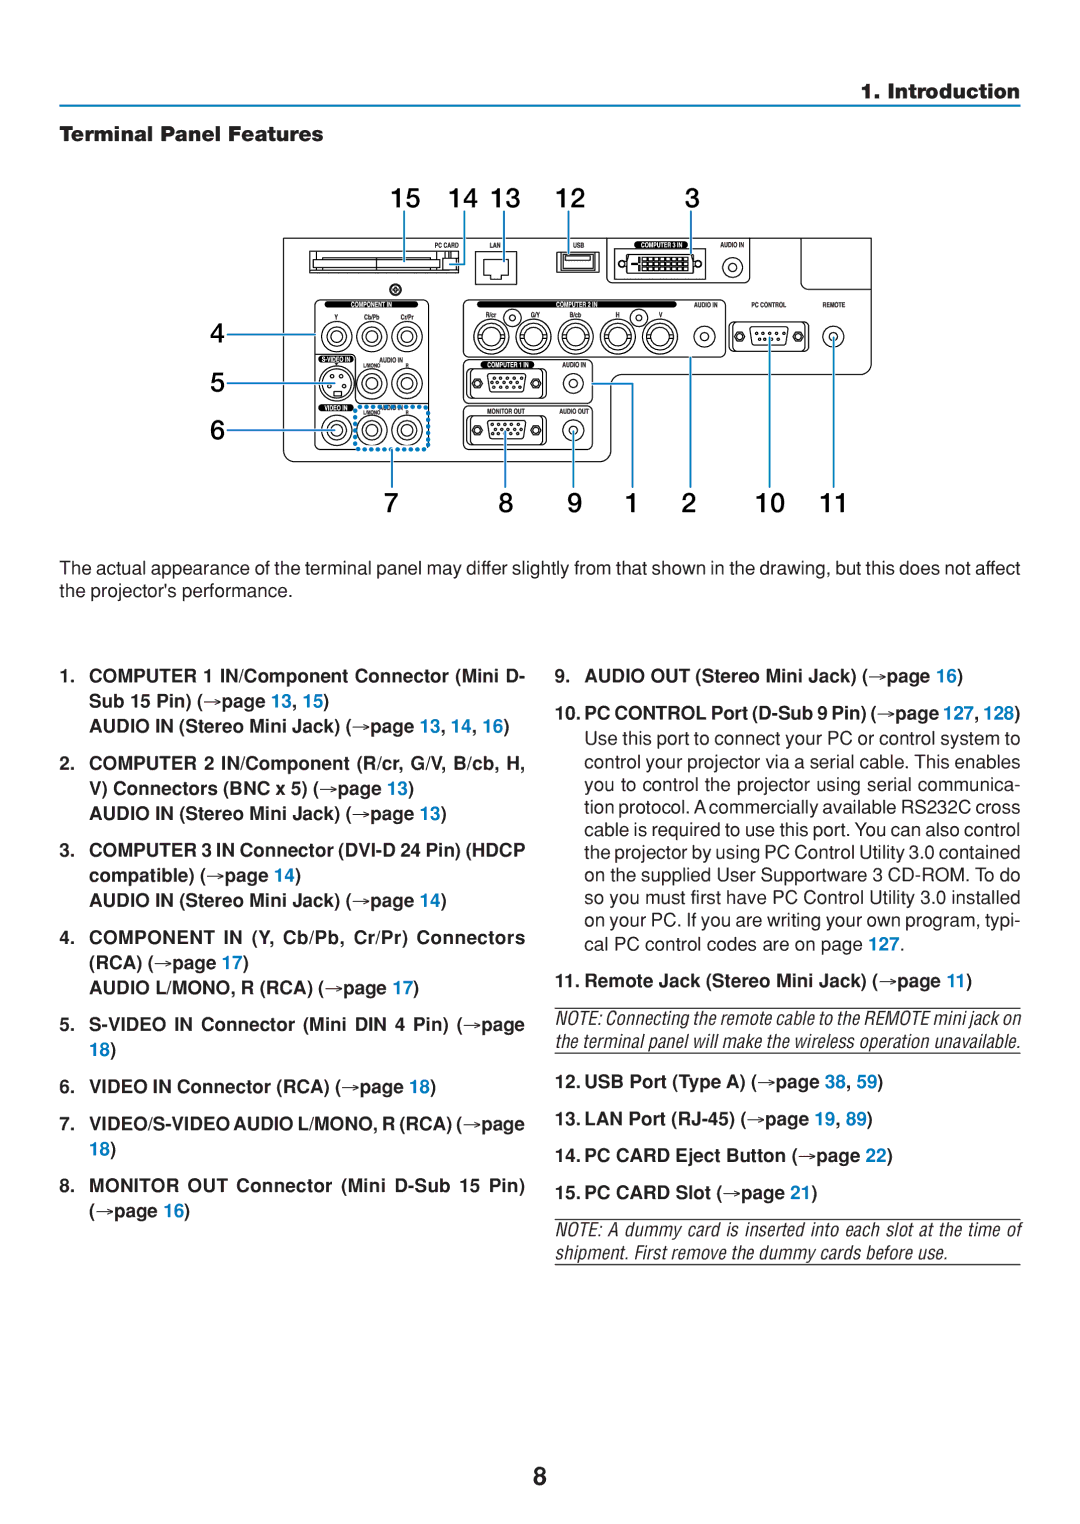
The actual appearance of the terminal panel may differ slightly from that shown in the drawing, but this does not affect the projector's performance.
1.COMPUTER 1 IN/Component Connector (Mini D- Sub 15 Pin) (→page 13, 15)
AUDIO IN (Stereo Mini Jack) (→page 13, 14, 16)
2.COMPUTER 2 IN/Component (R/cr, G/V, B/cb, H, V) Connectors (BNC x 5) (→page 13)
AUDIO IN (Stereo Mini Jack) (→page 13)
3.COMPUTER 3 IN Connector
AUDIO IN (Stereo Mini Jack) (→page 14)
4.COMPONENT IN (Y, Cb/Pb, Cr/Pr) Connectors (RCA) (→page 17)
AUDIO L/MONO, R (RCA) (→page 17)
5.
6.VIDEO IN Connector (RCA) (→page 18)
7.
8.MONITOR OUT Connector (Mini
9.AUDIO OUT (Stereo Mini Jack) (→page 16)
10.PC CONTROL Port
11.Remote Jack (Stereo Mini Jack) (→page 11)
NOTE: Connecting the remote cable to the REMOTE mini jack on the terminal panel will make the wireless operation unavailable.
12.USB Port (Type A) (→page 38, 59)
13.LAN Port
14.PC CARD Eject Button (→page 22)
15.PC CARD Slot (→page 21)
NOTE: A dummy card is inserted into each slot at the time of shipment. First remove the dummy cards before use.
8