2. Installation and Connections
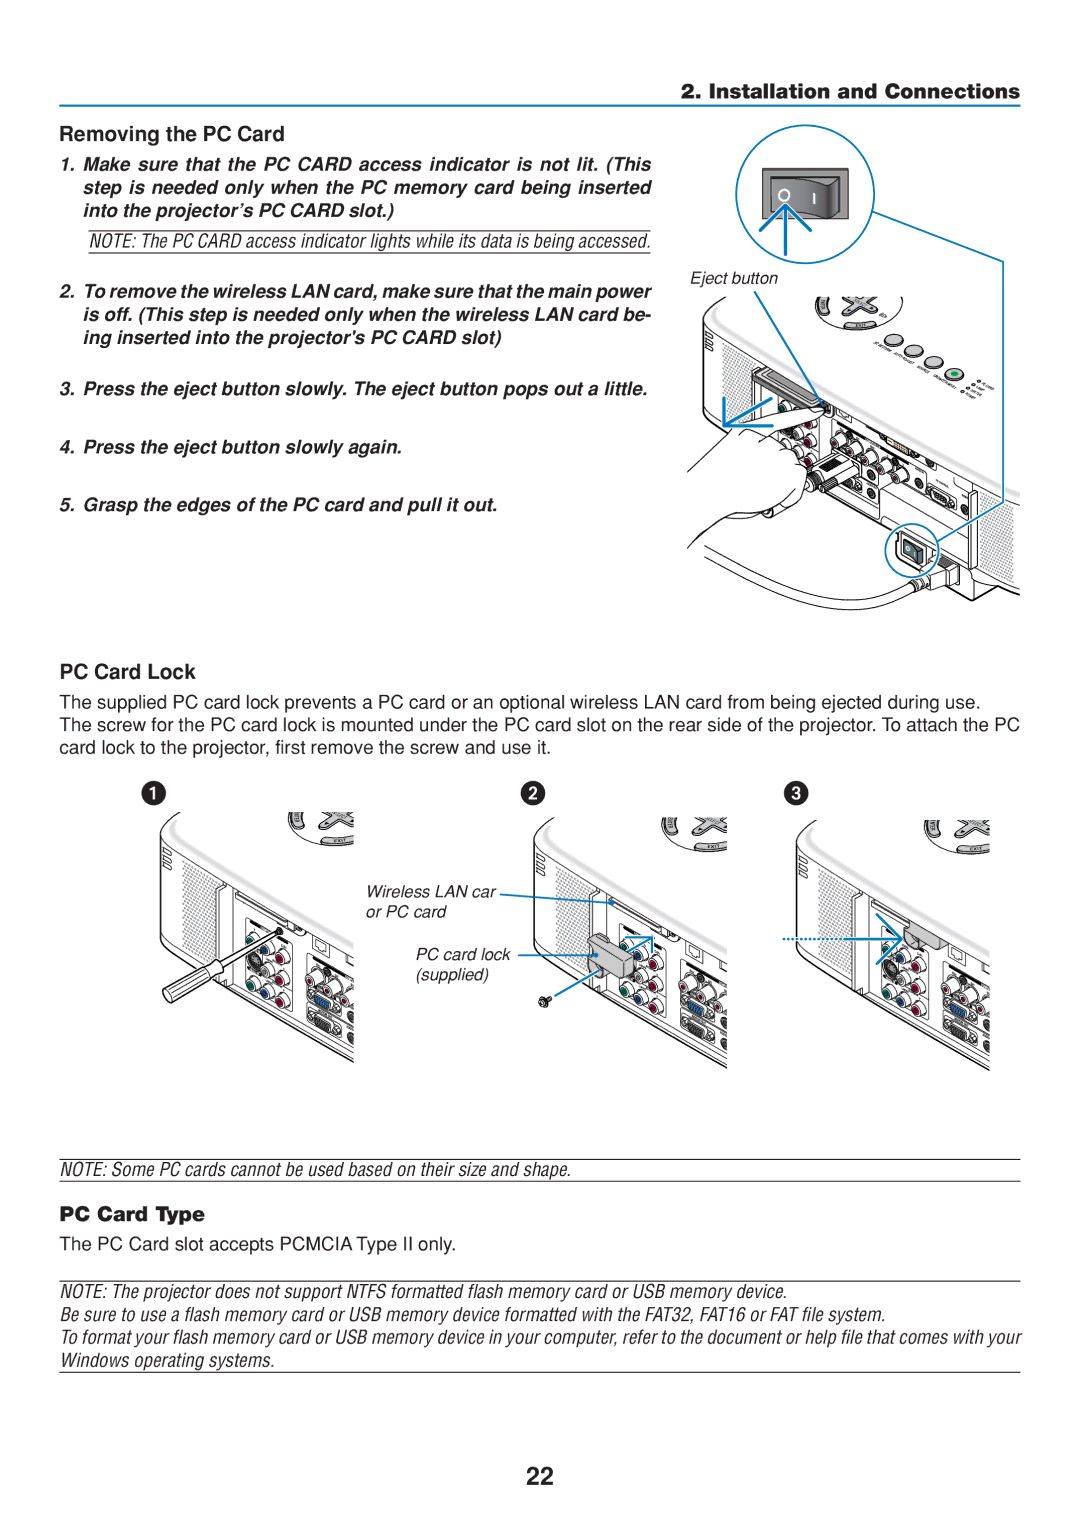
Removing the PC Card
1. Make sure that the PC CARD access indicator is not lit. (This step is needed only when the PC memory card being inserted into the projector’s PC CARD slot.)
NOTE: The PC CARD access indicator lights while its data is being accessed.
Eject button
2. To remove the wireless LAN card, make sure that the main power is off. (This step is needed only when the wireless LAN card be- ing inserted into the projector's PC CARD slot)
3. Press the eject button slowly. The eject button pops out a little.
4. Press the eject button slowly again.
5. Grasp the edges of the PC card and pull it out.
SEL |
|
ECT |
|
3D | REFORM |
| |
| AUTOADJUST |
SOURCE
ON |
|
|
/ST |
| PCCARD |
AND BY | L | |
| AMP | |
| PO STATUS |
|
| WER |
|
PC Card Lock
The supplied PC card lock prevents a PC card or an optional wireless LAN card from being ejected during use. The screw for the PC card lock is mounted under the PC card slot on the rear side of the projector. To attach the PC card lock to the projector, first remove the screw and use it.
S |
|
|
EL |
|
|
EC | SE |
|
T | SE | |
| L | |
| ECT | LECT |
Wireless LAN car or PC card
PC card lock (supplied)
NOTE: Some PC cards cannot be used based on their size and shape.
PC Card Type
The PC Card slot accepts PCMCIA Type II only.
NOTE: The projector does not support NTFS formatted flash memory card or USB memory device.
Be sure to use a flash memory card or USB memory device formatted with the FAT32, FAT16 or FAT file system.
To format your flash memory card or USB memory device in your computer, refer to the document or help file that comes with your Windows operating systems.
22
