Next steps | Configuring the FortiGate unit |
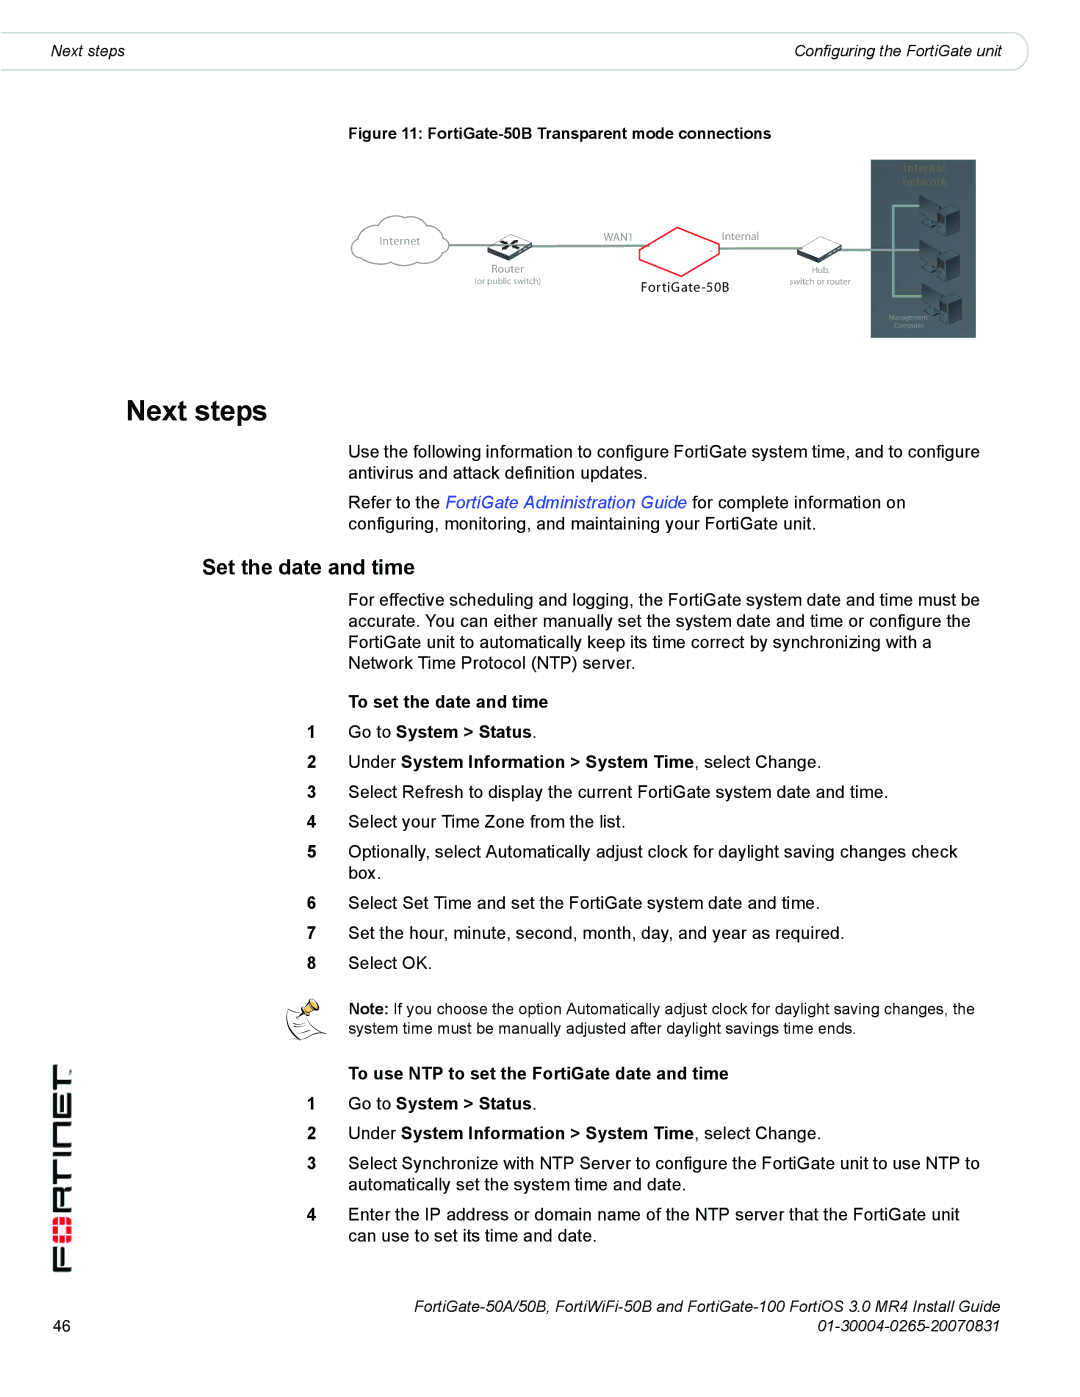
Figure 11: FortiGate-50B Transparent mode connections
Internal network
Internet | WAN1 | Internal |
|
|
|
| |
| Router |
| Hub, |
| (or public switch) | switch or router | |
|
|
|
Management
Computer
Next steps
Use the following information to configure FortiGate system time, and to configure antivirus and attack definition updates.
Refer to the FortiGate Administration Guide for complete information on configuring, monitoring, and maintaining your FortiGate unit.
Set the date and time
For effective scheduling and logging, the FortiGate system date and time must be accurate. You can either manually set the system date and time or configure the FortiGate unit to automatically keep its time correct by synchronizing with a Network Time Protocol (NTP) server.
To set the date and time
1Go to System > Status.
2Under System Information > System Time, select Change.
3Select Refresh to display the current FortiGate system date and time.
4Select your Time Zone from the list.
5Optionally, select Automatically adjust clock for daylight saving changes check box.
6Select Set Time and set the FortiGate system date and time.
7Set the hour, minute, second, month, day, and year as required.
8Select OK.
Note: If you choose the option Automatically adjust clock for daylight saving changes, the system time must be manually adjusted after daylight savings time ends.
To use NTP to set the FortiGate date and time
1Go to System > Status.
2Under System Information > System Time, select Change.
3Select Synchronize with NTP Server to configure the FortiGate unit to use NTP to automatically set the system time and date.
4Enter the IP address or domain name of the NTP server that the FortiGate unit can use to set its time and date.
46 | |