Basic Operation
Pump Calibration
NOTE: See Calibration 1 and 2 (Screens 22 and 23), page 46, for further screen information, if needed.
Calibrate the pump:
•The first time the system is operated.
•Whenever new materials are used in the system, especially if the materials have viscosities that differ significantly.
•At least once per month as part of regular mainte- nance.
•Whenever a pump is serviced or replaced.
NOTE:
•Pump factors on Calibration 1 (Screen 22) are updated automatically after the calibration pro- cedure is completed. You also may manually edit them if desired.
•All values on this screen are in cc or cc/in., regardless of the units set in Configure 4 (Screen 21).
•During each calibration the dispense valve will close during an up stroke and a down stroke (in either order). This test is to verify that the pump ball checks are seating properly and not leak- ing. If leaking occurs, the system will alarm after the calibration for that particular valve.
1.Before calibrating pump A or B, prime the system with material. See Prime the System, page 30.
2.If the display is on a Run Mode screen, press ![]() to access setup screens.
to access setup screens.
3.Press ![]() to display Calibration1 (Screen 22). Pump calibration factors are shown for Pump A and Pump B.
to display Calibration1 (Screen 22). Pump calibration factors are shown for Pump A and Pump B.
4.Press ![]()
![]() to move to Calibration 2 (Screen 23).
to move to Calibration 2 (Screen 23).
5.Press ![]()
![]() to highlight the pump you wish to cali- brate. Press
to highlight the pump you wish to cali- brate. Press ![]() . An X displays in the box.
. An X displays in the box.
6.Press ![]() to start the calibration on the checked
to start the calibration on the checked
pump (A or B). Press ![]() to cancel the calibration.
to cancel the calibration.
7.Trigger gun into a graduated cylinder. Dispense a minimum of
NOTE: Stop triggering the gun when desired amount is
reached. Do not press ![]() , as it will cancel the calibra- tion.
, as it will cancel the calibra- tion.
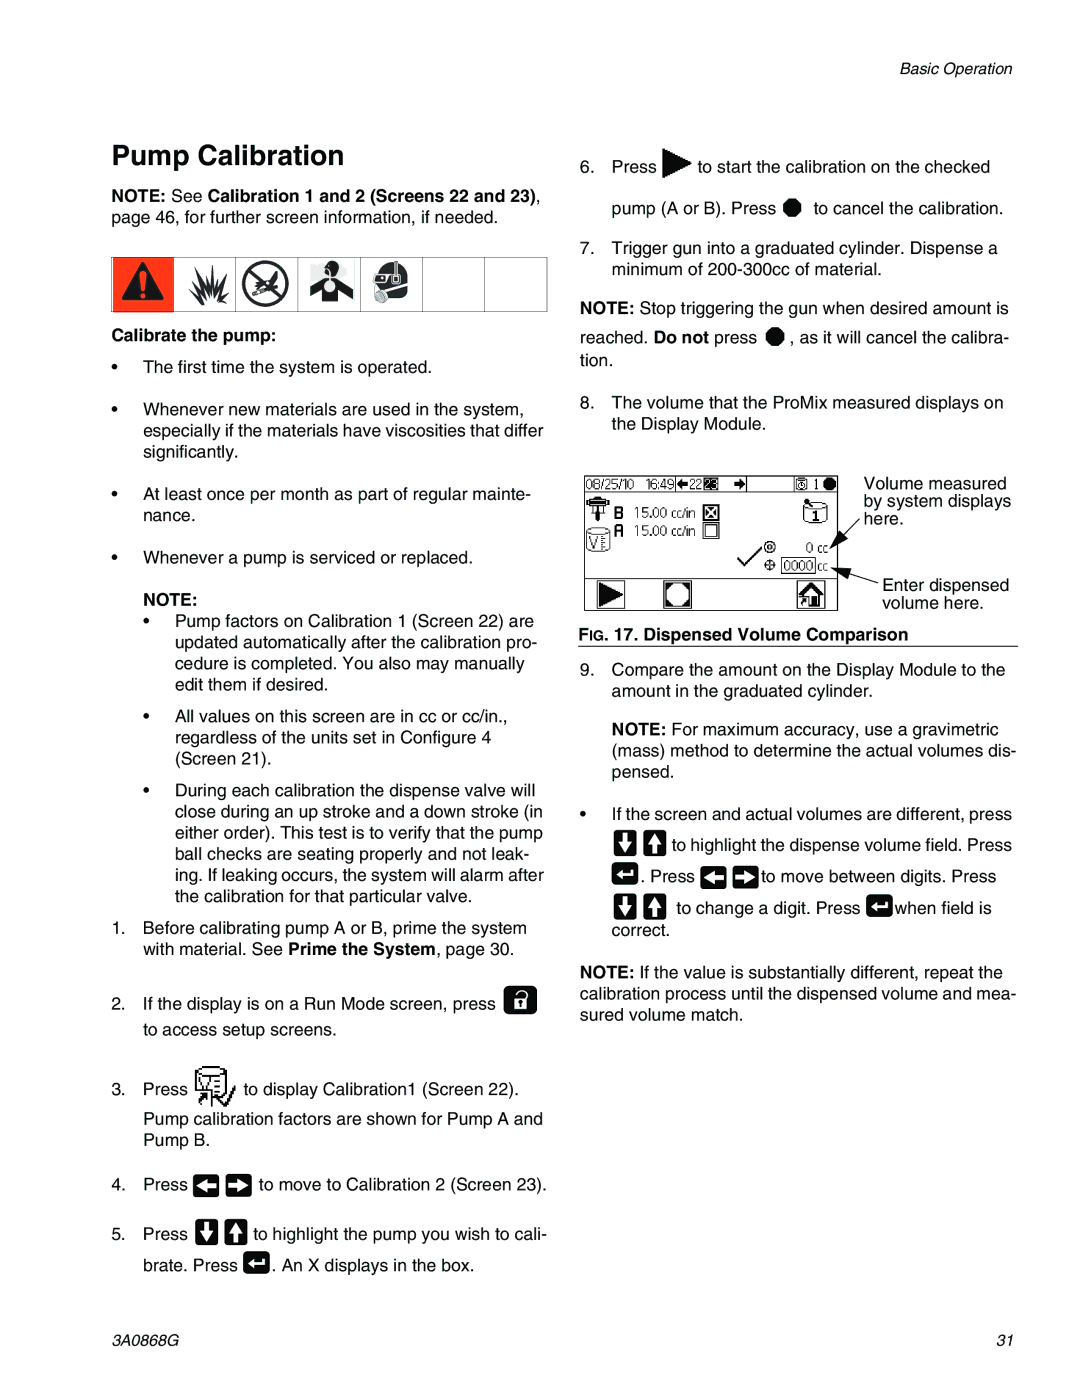
8.The volume that the ProMix measured displays on the Display Module.
Volume measured by system displays here.
Enter dispensed volume here.
FIG. 17. Dispensed Volume Comparison
9.Compare the amount on the Display Module to the amount in the graduated cylinder.
NOTE: For maximum accuracy, use a gravimetric (mass) method to determine the actual volumes dis- pensed.
•If the screen and actual volumes are different, press
![]()
![]() to highlight the dispense volume field. Press
to highlight the dispense volume field. Press
![]() . Press
. Press ![]()
![]() to move between digits. Press
to move between digits. Press
![]()
![]() to change a digit. Press
to change a digit. Press ![]() when field is correct.
when field is correct.
NOTE: If the value is substantially different, repeat the calibration process until the dispensed volume and mea- sured volume match.
3A0868G | 31 |