USER FUNCTIONS
Editing/Deleting a Scene
Ready To Arm
|
|
|
| 72 |
|
|
| Zones | Automation |
Arm Away | Arm Stay | Message | Phone | |
Delay |
| 10:18 AM June 8, 2010 | More | |
|
|
|
| |
|
| Ready To Arm |
| |
Switches |
|
| Rules |
|
68 Thermostat |
| Schedules |
| |
Locks |
|
| Scenes |
|
Tools |
|
|
|
|
|
|
|
| |
| Ready To Arm |
| |
Scene 1 | Scene 2 |
| |
Burglary Alarm | CO Alarm |
| |
Scene 3 | Scene 4 |
| |
Fire Alarm | Arm Stay |
| |
Edit | Add New | Delete | |
Scene | |||
|
| ||
|
|
Automation
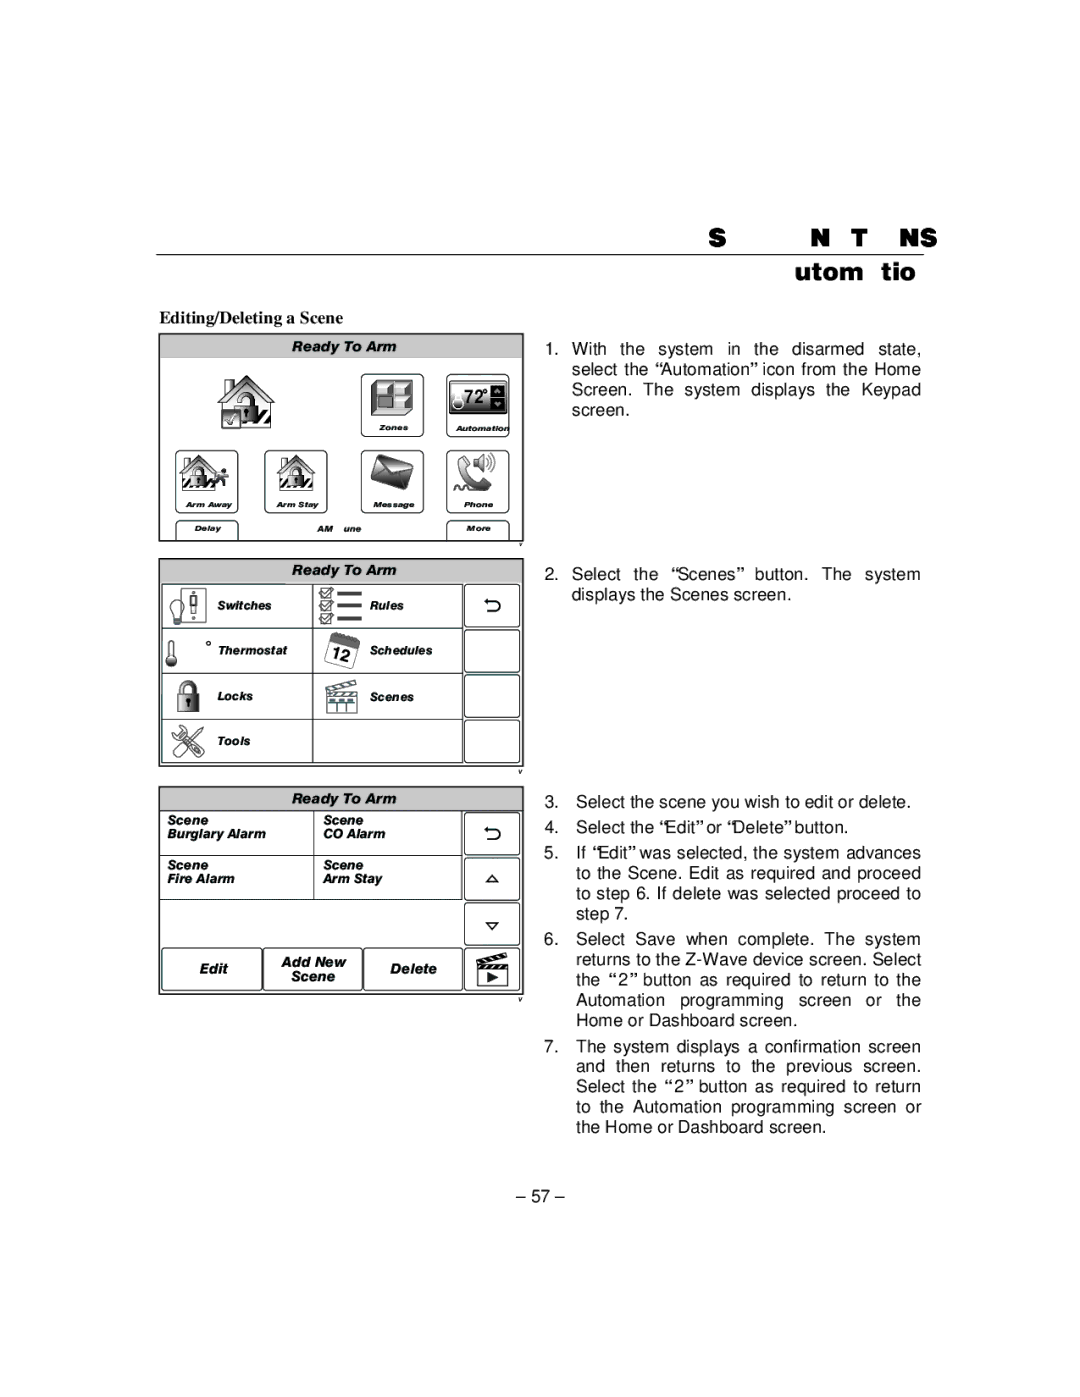
1.With the system in the disarmed state, select the “Automation” icon from the Home Screen. The system displays the Keypad screen.
2.Select the “Scenes” button. The system displays the Scenes screen.
3.Select the scene you wish to edit or delete.
4.Select the “Edit” or “Delete” button.
5.If “Edit” was selected, the system advances to the Scene. Edit as required and proceed to step 6. If delete was selected proceed to step 7.
6.Select Save when complete. The system
returns to the
7.The system displays a confirmation screen
and then returns to the previous screen. Select the “2” button as required to return to the Automation programming screen or the Home or Dashboard screen.
– 57 –
