SECURING THE PREMISES
Displaying/Clearing Bypassed Zones
Ready To Arm - Bypass
|
|
|
|
| 72 | |
|
|
| Zones | Automation | ||
Arm Away | Arm Stay |
| Message |
| Phone | |
Delay | 10:18 AM June 8, 2010 |
| More | |||
|
|
|
|
| ||
| Ready To Arm - Bypass |
|
| |||
2. Front |
| 3. Garage |
|
| ||
Door | BYPASSED | Door |
| READY |
| |
|
|
|
| |||
95. Fire |
| 96. Medical |
|
| ||
| READY |
|
| READY |
| |
99. Police |
|
|
|
|
| |
| READY |
|
|
|
| |
Bypass All | Clear | Bypass | Select | |||
Faulted | Bypasses | All | ||||
|
| |||||
|
|
|
|
| ||
| Ready To Arm - Bypass |
| ||
2. Front | 3. Garage |
|
| |
Door | Door | READY |
| |
| BYPASSED |
| ||
95. Fire | 96. Medical |
|
| |
| READY | READY |
| |
99. Police |
|
|
| |
| READY |
|
| |
Bypass All | Clear | Bypass | Select | |
Faulted | Bypasses | All | ||
| ||||
|
|
| ||
Bypassing Protection Zones
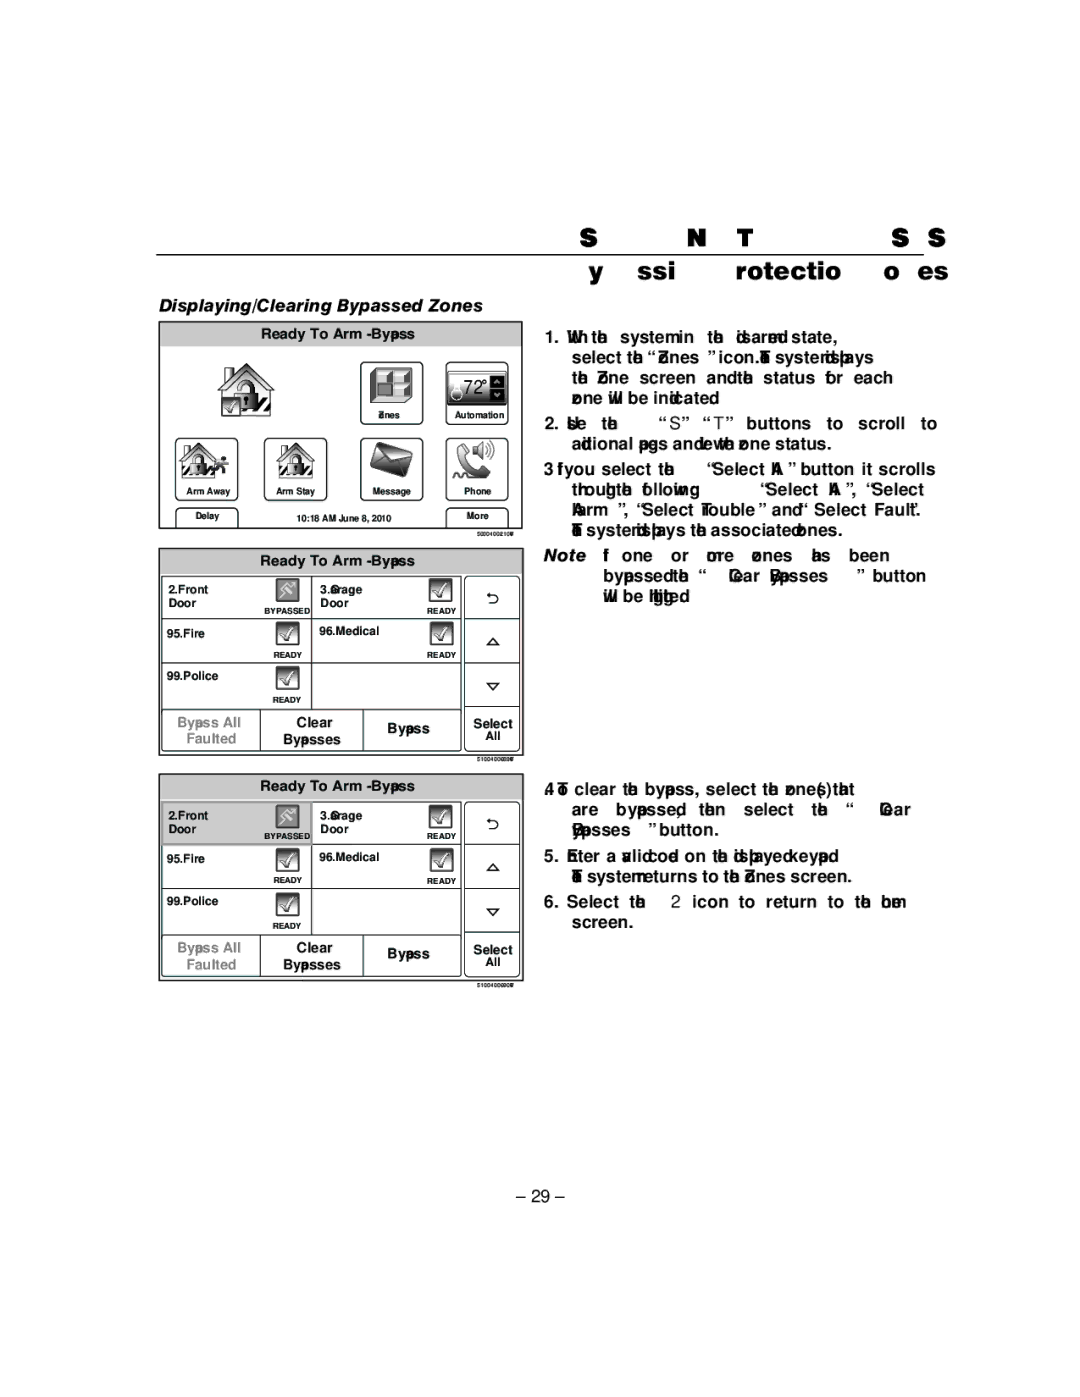
1.With the system in the disarmed state, select the “Zones” icon. The system displays the Zone screen and the status for each zone will be indicated.
2.Use the “S” “T” buttons to scroll to additional pages and view the zone status.
3.If you select the “Select All” button it scrolls through the following: “Select All”, “Select Alarm”, “Select Trouble” and “Select Fault”. The system displays the associated zones.
Note: If one or more zones has been bypassed the “Clear Bypasses” button will be highlighted.
4.To clear the bypass, select the zone(s) that are bypassed, then select the “Clear Bypasses” button.
5.Enter a valid code on the displayed keypad. The system returns to the Zones screen.
6.Select the 2 icon to return to the home screen.
– 29 –