Menu Mode Programming
|
|
| Summary Screen |
| Zn | ZT P RC HW: RT | |
| |||
| 01 | 09 1 10 EL 1 | |
| OR [D] to go to prompts for wireless key programming templates | ||
|
|
| |
|
|
| |
|
|
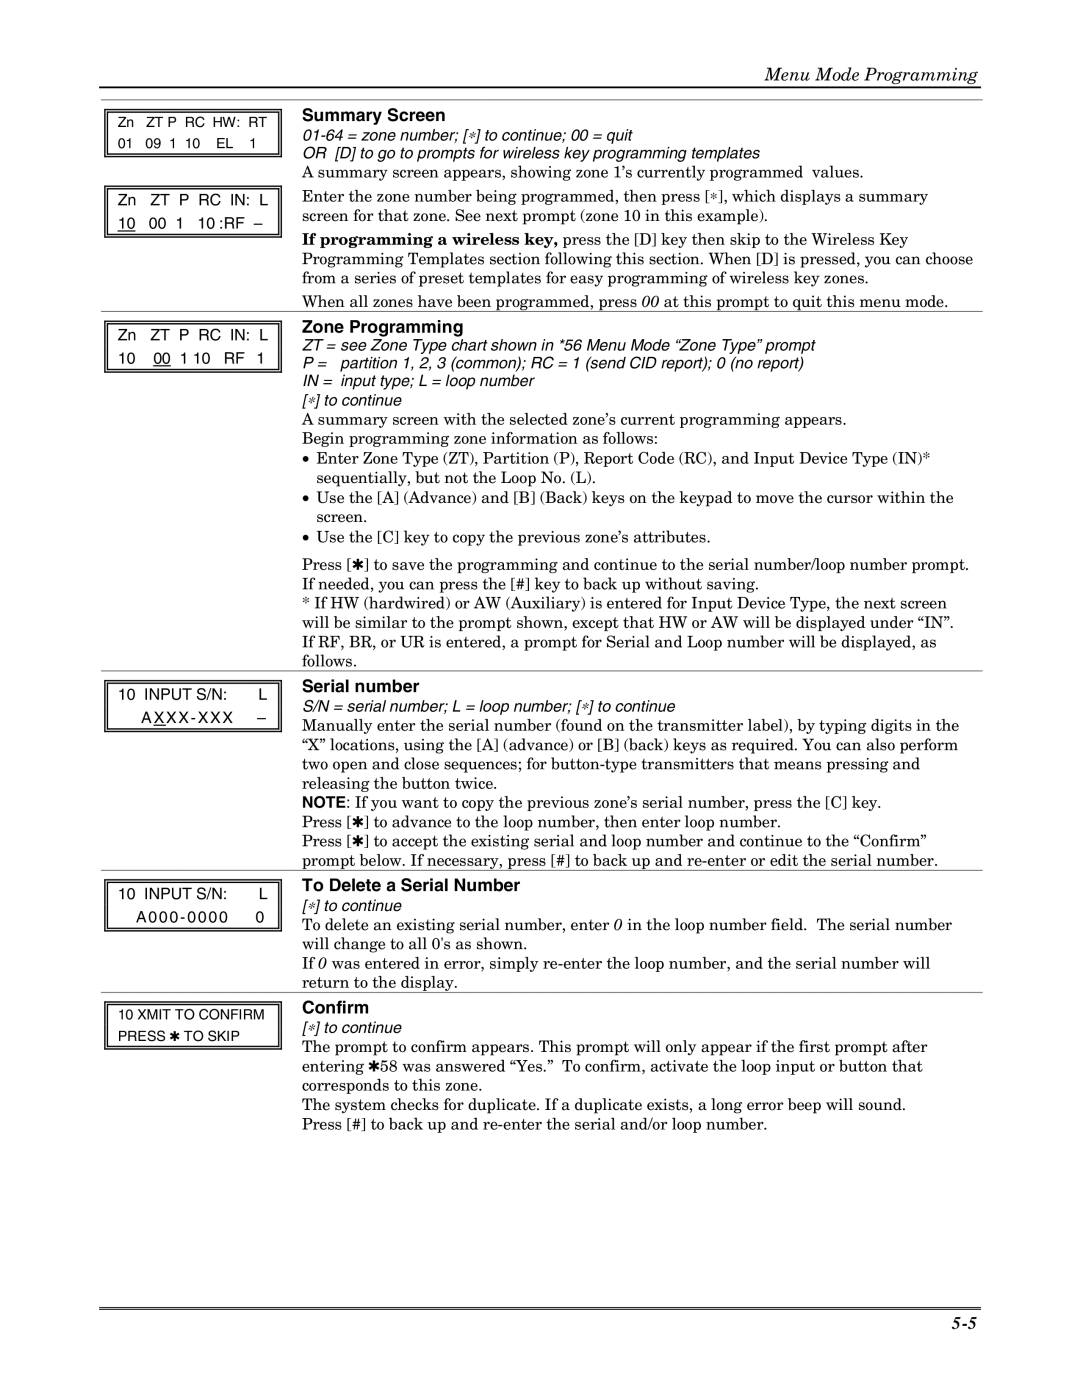
| A summary screen appears, showing zone 1’s currently programmed values. |
|
|
| Enter the zone number being programmed, then press [∗], which displays a summary |
| Zn | ZT P RC IN: L | |
| 10 | 00 1 10 :RF – | screen for that zone. See next prompt (zone 10 in this example). |
| If programming a wireless key, press the [D] key then skip to the Wireless Key | ||
|
|
| |
|
|
| |
|
|
| Programming Templates section following this section. When [D] is pressed, you can choose |
|
|
| from a series of preset templates for easy programming of wireless key zones. |
|
|
| When all zones have been programmed, press 00 at this prompt to quit this menu mode. |
|
|
|
| Zone Programming |
| Zn | ZT P RC IN: L | ||
| ZT = see Zone Type chart shown in *56 Menu Mode “Zone Type” prompt | |||
| 10 | 00 1 10 RF | 1 | |
| P = partition 1, 2, 3 (common); RC = 1 (send CID report); 0 (no report) | |||
|
|
|
| IN = input type; L = loop number |
|
|
|
| [∗] to continue |
|
|
|
| A summary screen with the selected zone’s current programming appears. |
|
|
|
| Begin programming zone information as follows: |
|
|
|
| • Enter Zone Type (ZT), Partition (P), Report Code (RC), and Input Device Type (IN)* |
|
|
|
| sequentially, but not the Loop No. (L). |
|
|
|
| • Use the [A] (Advance) and [B] (Back) keys on the keypad to move the cursor within the |
|
|
|
| screen. |
|
|
|
| • Use the [C] key to copy the previous zone’s attributes. |
|
|
|
| Press [✱] to save the programming and continue to the serial number/loop number prompt. |
|
|
|
| If needed, you can press the [#] key to back up without saving. |
|
|
|
| * If HW (hardwired) or AW (Auxiliary) is entered for Input Device Type, the next screen |
|
|
|
| will be similar to the prompt shown, except that HW or AW will be displayed under “IN”. |
|
|
|
| If RF, BR, or UR is entered, a prompt for Serial and Loop number will be displayed, as |
|
|
|
| follows. |
|
|
|
| Serial number |
| 10 INPUT S/N: | L | ||
| S/N = serial number; L = loop number; [∗] to continue | |||
|
| A X X X - XXX – | ||
|
| Manually enter the serial number (found on the transmitter label), by typing digits in the | ||
|
|
|
| |
|
|
|
| “X” locations, using the [A] (advance) or [B] (back) keys as required. You can also perform |
|
|
|
| two open and close sequences; for |
|
|
|
| releasing the button twice. |
|
|
|
| NOTE: If you want to copy the previous zone’s serial number, press the [C] key. |
|
|
|
| Press [✱] to advance to the loop number, then enter loop number. |
|
|
|
| Press [✱] to accept the existing serial and loop number and continue to the “Confirm” |
|
|
|
| prompt below. If necessary, press [#] to back up and |
10 INPUT S/N: L
A000 - 000 0 0
To Delete a Serial Number
[∗] to continue
To delete an existing serial number, enter 0 in the loop number field. The serial number will change to all 0's as shown.
If 0 was entered in error, simply
10 XMIT TO CONFIRM PRESS ✱ TO SKIP
Confirm
[∗] to continue
The prompt to confirm appears. This prompt will only appear if the first prompt after entering ✱58 was answered “Yes.” To confirm, activate the loop input or button that corresponds to this zone.
The system checks for duplicate. If a duplicate exists, a long error beep will sound. Press [#] to back up and
