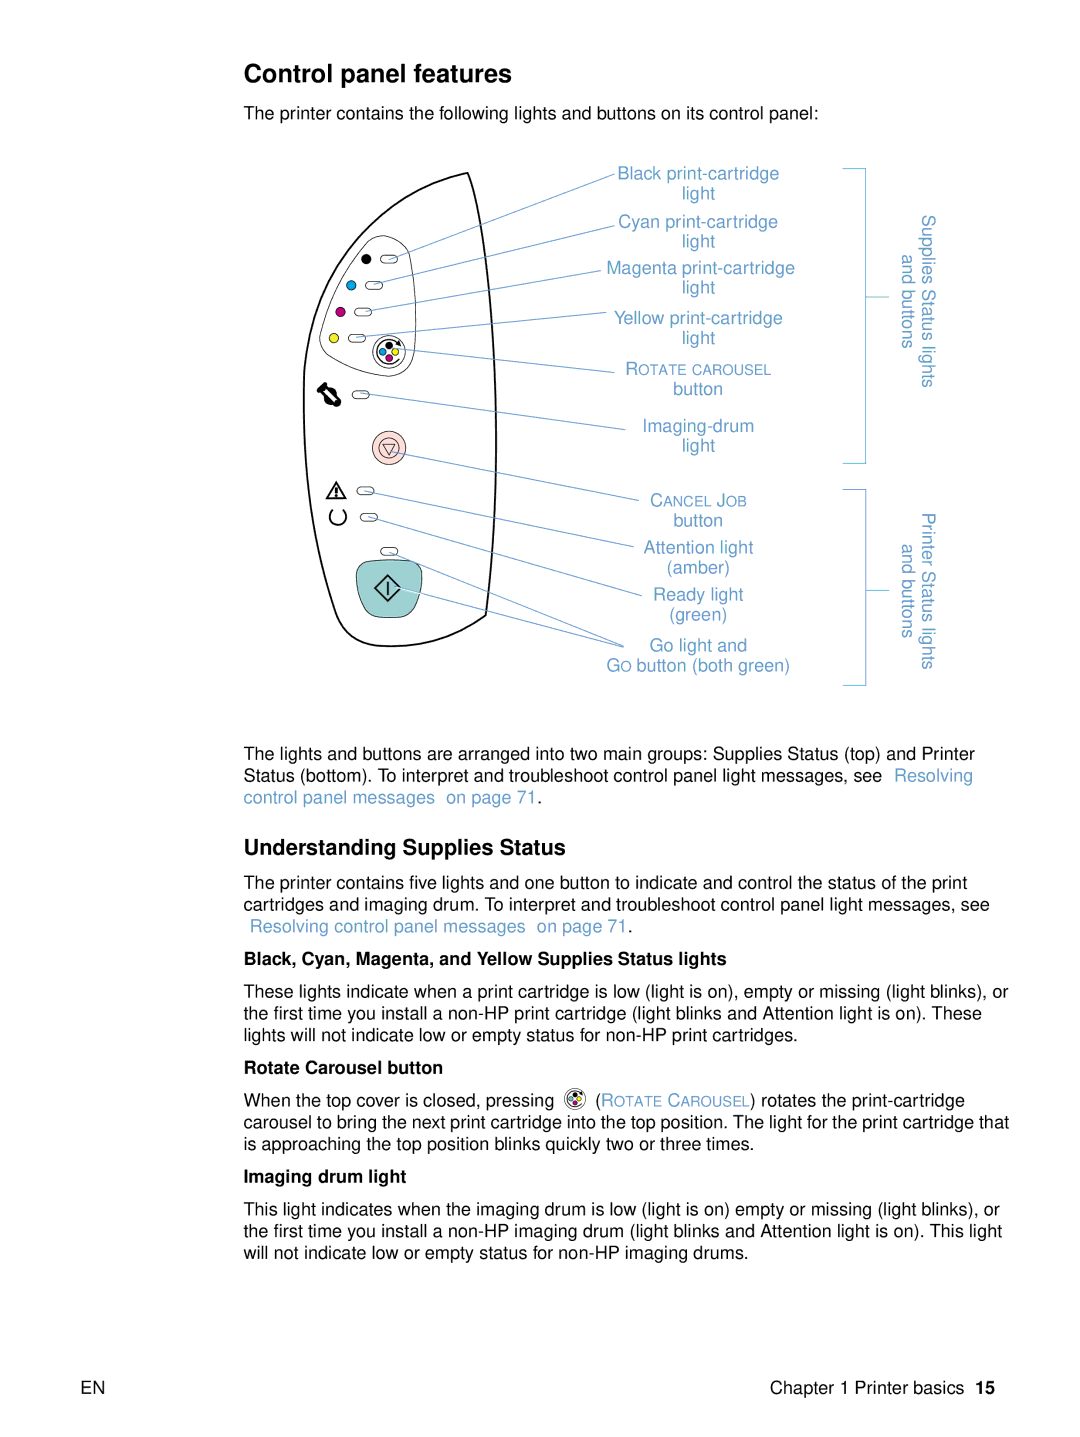
Control panel features
The printer contains the following lights and buttons on its control panel:
![]() Black
Black
![]() Cyan
Cyan
![]() Magenta
Magenta
light
![]() Yellow
Yellow
ROTATE CAROUSEL
button
light
CANCEL JOB
button
![]() Attention light (amber)
Attention light (amber)
Ready light
(green)
Go light and
GO button (both green)
Supplies Status lights and buttons
Printer Status lights and buttons
The lights and buttons are arranged into two main groups: Supplies Status (top) and Printer Status (bottom). To interpret and troubleshoot control panel light messages, see “Resolving control panel messages” on page 71.
Understanding Supplies Status
The printer contains five lights and one button to indicate and control the status of the print cartridges and imaging drum. To interpret and troubleshoot control panel light messages, see “Resolving control panel messages” on page 71.
Black, Cyan, Magenta, and Yellow Supplies Status lights
These lights indicate when a print cartridge is low (light is on), empty or missing (light blinks), or the first time you install a
Rotate Carousel button
When the top cover is closed, pressing ![]() (ROTATE CAROUSEL) rotates the
(ROTATE CAROUSEL) rotates the
Imaging drum light
This light indicates when the imaging drum is low (light is on) empty or missing (light blinks), or the first time you install a
EN | Chapter 1 Printer basics 15 |