•Select 2. The following menu appears:
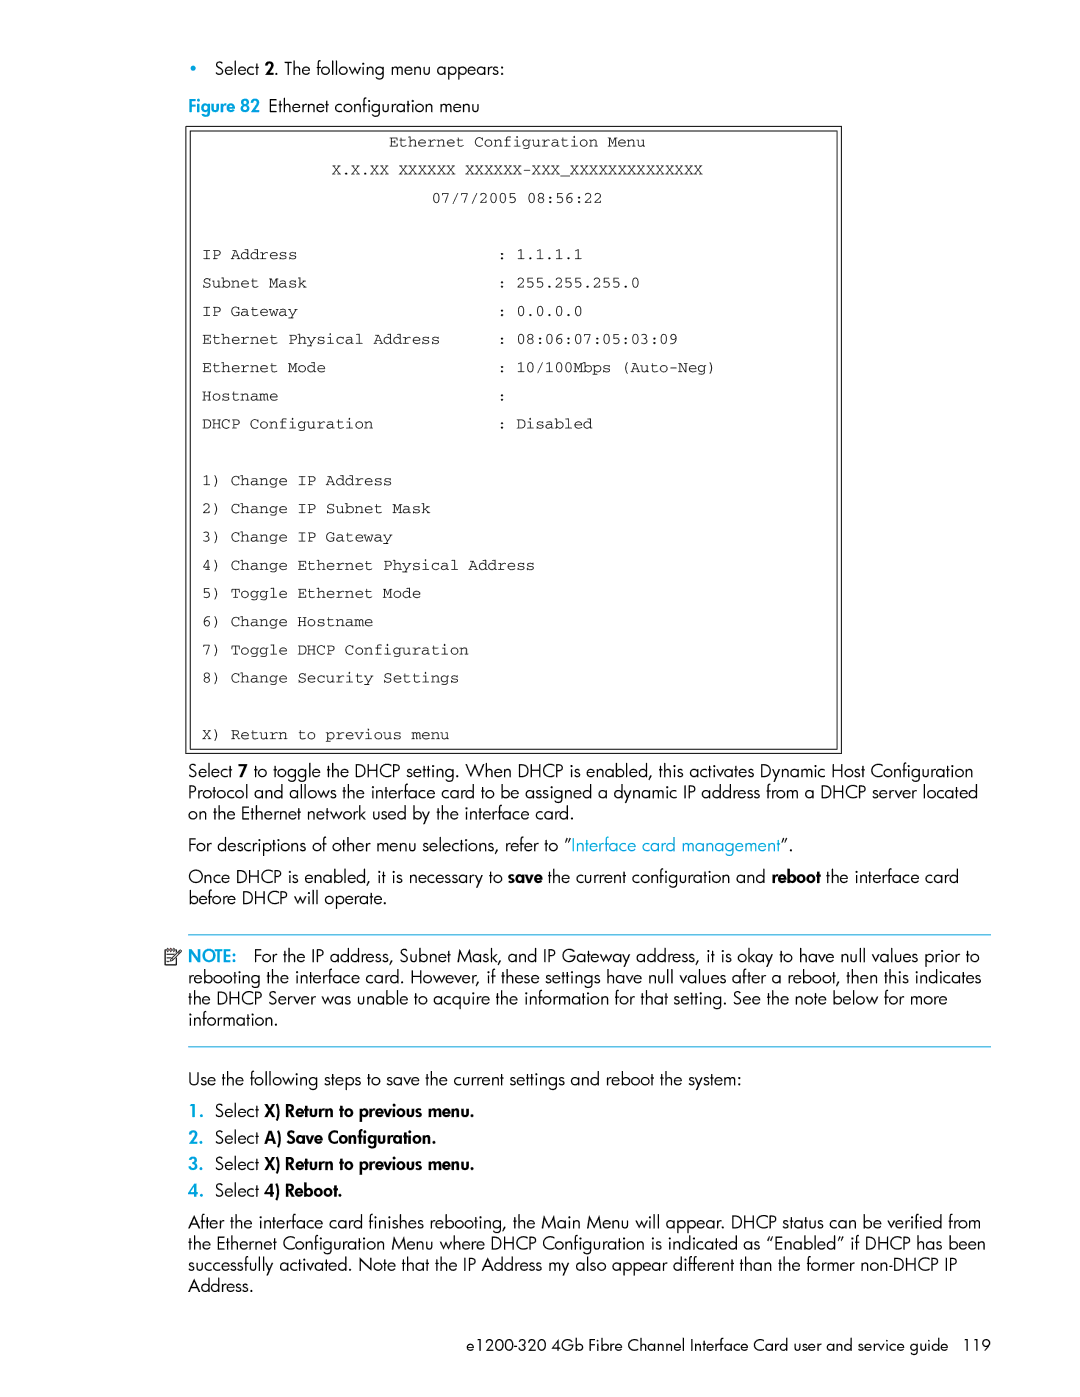
Figure 82 Ethernet configuration menu
Ethernet Configuration Menu
X.X.XX XXXXXX XXXXXX-XXX_XXXXXXXXXXXXXX
07/7/2005 | 08:56:22 | |
IP Address | : 1.1.1.1 | |
Subnet Mask | : 255.255.255.0 | |
IP Gateway | : 0.0.0.0 | |
Ethernet Physical Address | : 08:06:07:05:03:09 | |
Ethernet Mode | : 10/100Mbps | |
Hostname | : |
|
DHCP Configuration | : Disabled | |
1)Change IP Address
2)Change IP Subnet Mask
3)Change IP Gateway
4)Change Ethernet Physical Address
5)Toggle Ethernet Mode
6)Change Hostname
7)Toggle DHCP Configuration
8)Change Security Settings
X) Return to previous menu
Select 7 to toggle the DHCP setting. When DHCP is enabled, this activates Dynamic Host Configuration Protocol and allows the interface card to be assigned a dynamic IP address from a DHCP server located on the Ethernet network used by the interface card.
For descriptions of other menu selections, refer to ”Interface card management”.
Once DHCP is enabled, it is necessary to save the current configuration and reboot the interface card before DHCP will operate.
![]() NOTE: For the IP address, Subnet Mask, and IP Gateway address, it is okay to have null values prior to rebooting the interface card. However, if these settings have null values after a reboot, then this indicates the DHCP Server was unable to acquire the information for that setting. See the note below for more information.
NOTE: For the IP address, Subnet Mask, and IP Gateway address, it is okay to have null values prior to rebooting the interface card. However, if these settings have null values after a reboot, then this indicates the DHCP Server was unable to acquire the information for that setting. See the note below for more information.
Use the following steps to save the current settings and reboot the system:
1.Select X) Return to previous menu.
2.Select A) Save Configuration.
3.Select X) Return to previous menu.
4.Select 4) Reboot.
After the interface card finishes rebooting, the Main Menu will appear. DHCP status can be verified from the Ethernet Configuration Menu where DHCP Configuration is indicated as “Enabled” if DHCP has been successfully activated. Note that the IP Address my also appear different than the former