TRANSDUCER INSTALLATION
Perform the following
1.Testing the transducer
2.Assembling the transducer and float
3.Connecting the cable
1. Testing the Transducer Prior to Installation
Prior to installation, test the transducer to make sure that no damage occurred during shipping.
1.Connectthe transducer to the control head. The slots are keyed to prevent reverse installation, so be careful not to force the connector into the holder.
2.Drop the transducer into the ice hole. If the transducer is working properly, you will see the bottom displayed on the Flasher Dial as a red line.
WARNING: Before walking onto the ice, make sure that conditions are safe.
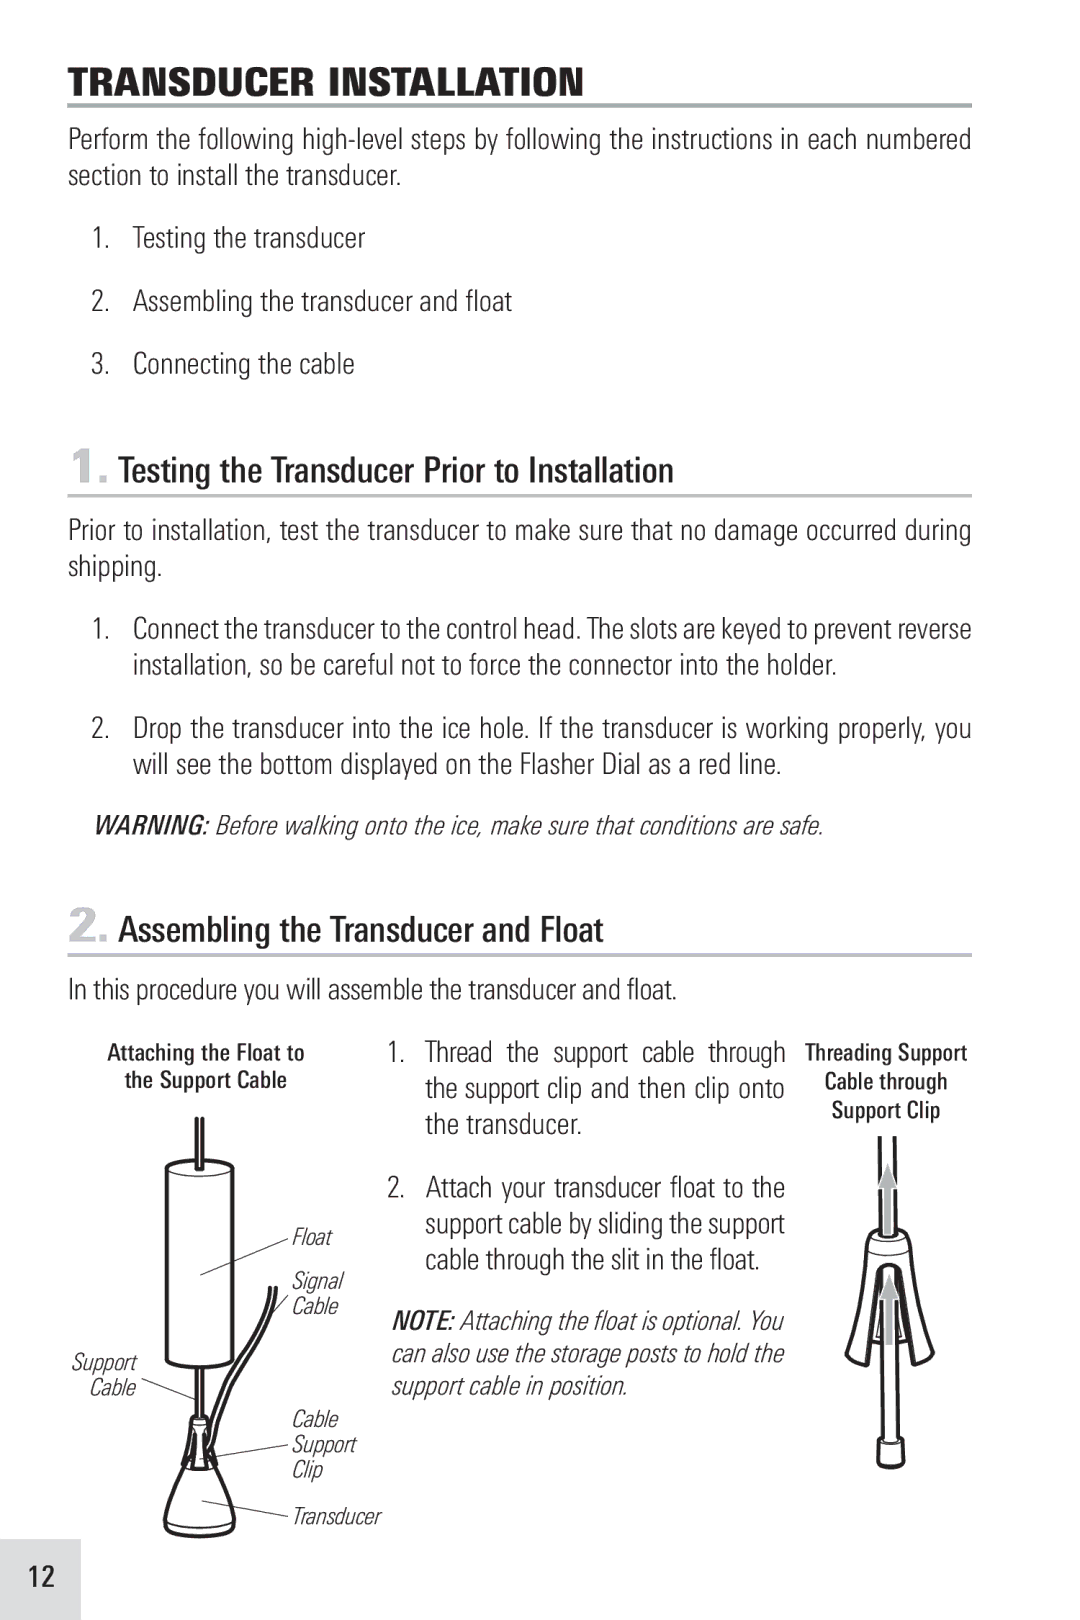
2. Assembling the Transducer and Float
In this procedure you willassemblethe transducerand float.
Attaching the Float to
the Support Cable
Float
Signal
![]() Cable
Cable
Support
Cable ![]()
Cable
![]()
![]() Support
Support
Clip
1.Thread the support cable through the support clip and then clip onto the transducer.
2.Attach your transducer float to the support cable by sliding the support cable through the slit in the float.
NOTE: Attaching the float is optional. You can also use the storage posts to hold the support cable in position.
Threading Support
Cable through
Support Clip
![]()
![]() Transducer
Transducer
12
