DIMM 
Retaining clip
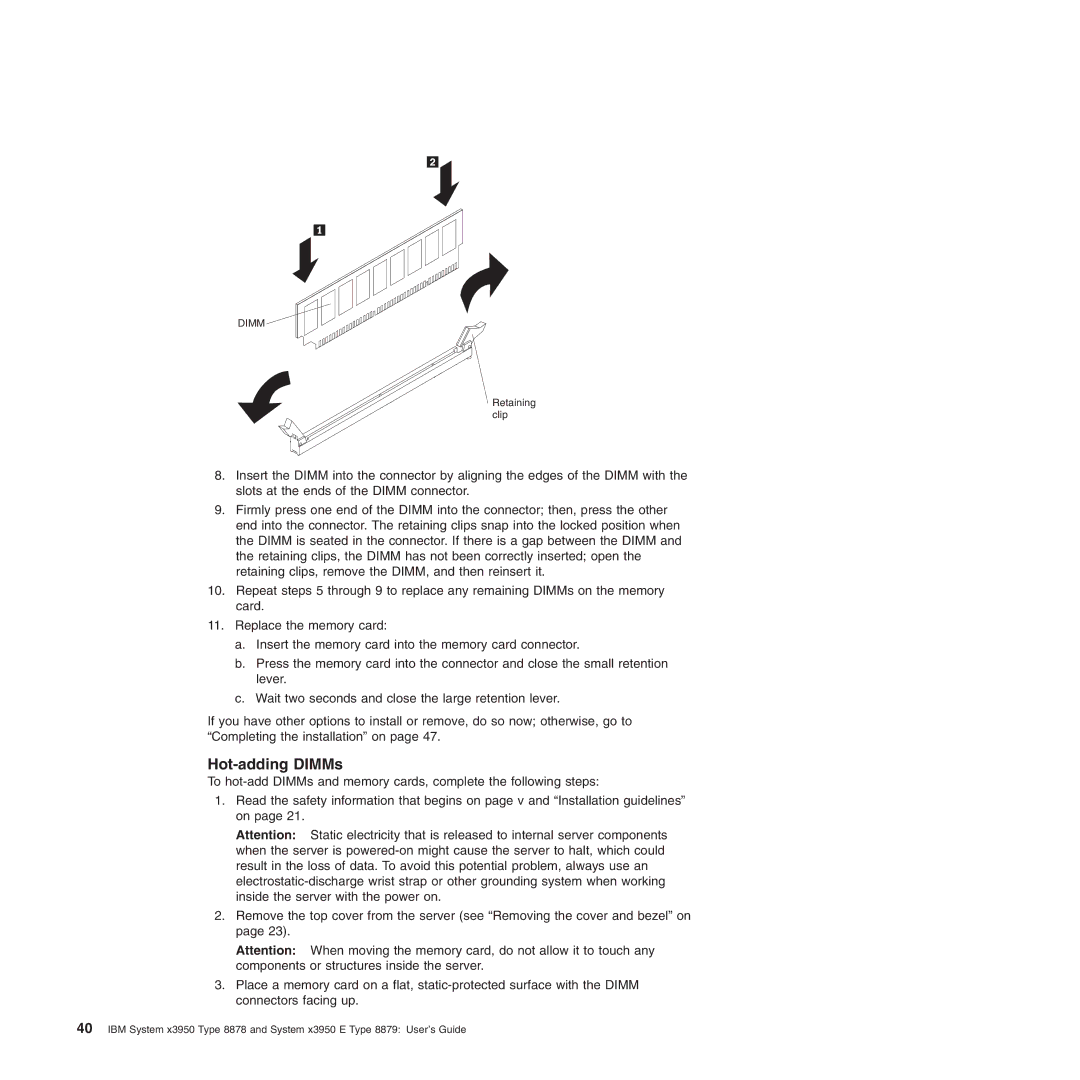
8.Insert the DIMM into the connector by aligning the edges of the DIMM with the slots at the ends of the DIMM connector.
9.Firmly press one end of the DIMM into the connector; then, press the other end into the connector. The retaining clips snap into the locked position when the DIMM is seated in the connector. If there is a gap between the DIMM and the retaining clips, the DIMM has not been correctly inserted; open the retaining clips, remove the DIMM, and then reinsert it.
10.Repeat steps 5 through 9 to replace any remaining DIMMs on the memory card.
11.Replace the memory card:
a.Insert the memory card into the memory card connector.
b.Press the memory card into the connector and close the small retention lever.
c.Wait two seconds and close the large retention lever.
If you have other options to install or remove, do so now; otherwise, go to “Completing the installation” on page 47.
Hot-adding DIMMs
To
1.Read the safety information that begins on page v and “Installation guidelines” on page 21.
Attention: Static electricity that is released to internal server components when the server is
2.Remove the top cover from the server (see “Removing the cover and bezel” on page 23).
Attention: When moving the memory card, do not allow it to touch any components or structures inside the server.
3.Place a memory card on a flat,
40IBM System x3950 Type 8878 and System x3950 E Type 8879: User’s Guide