SECTION
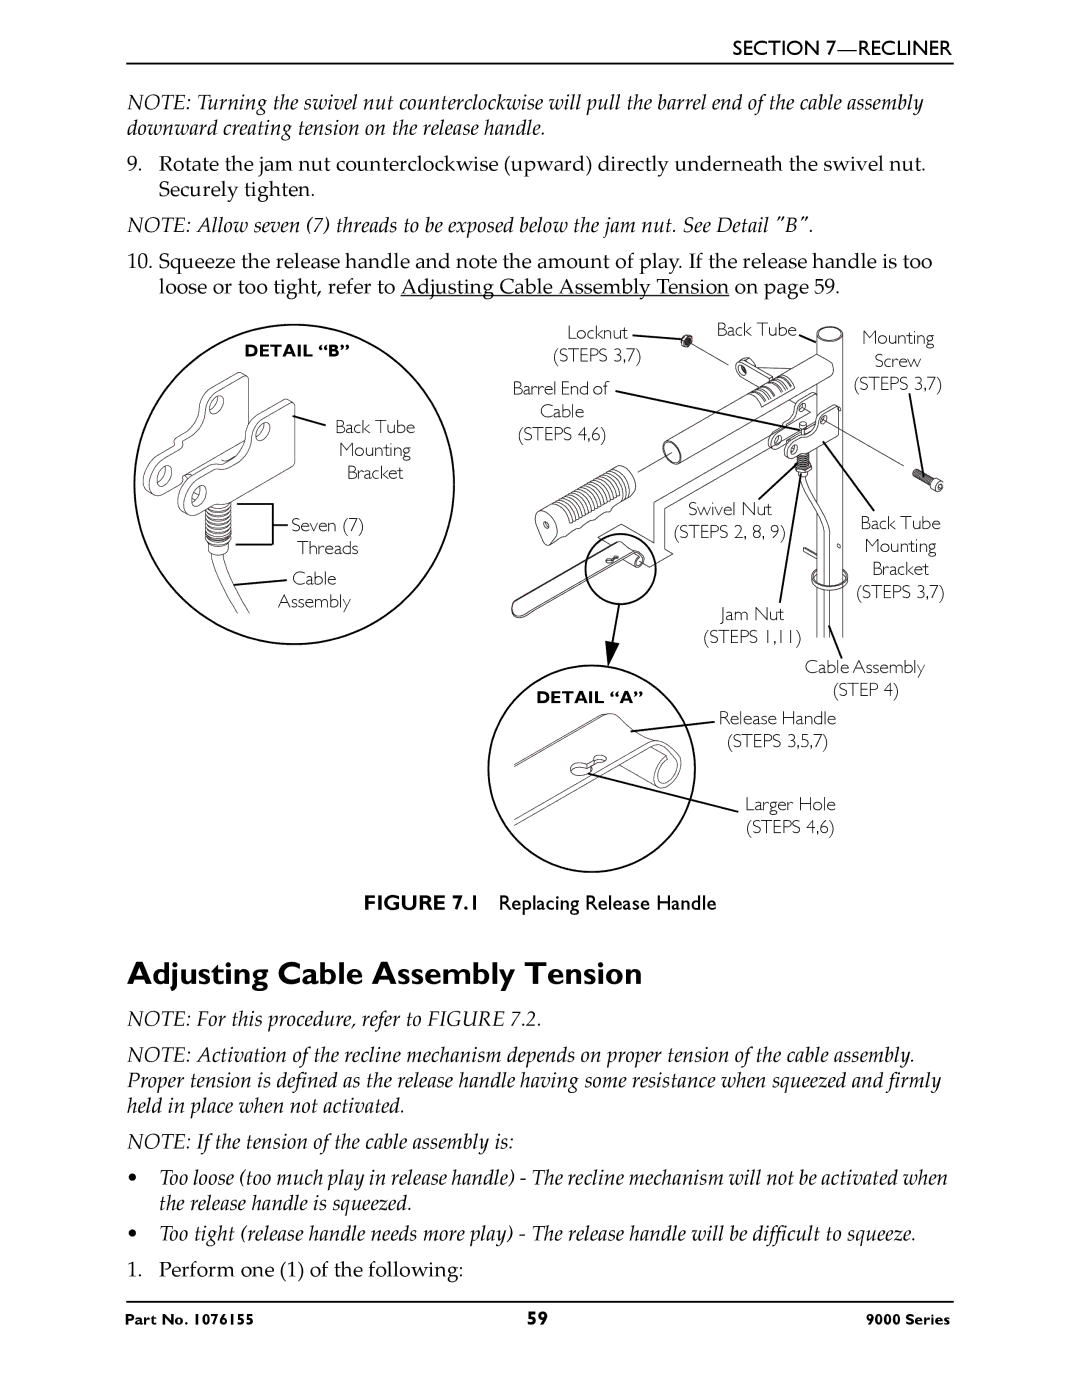
NOTE: Turning the swivel nut counterclockwise will pull the barrel end of the cable assembly downward creating tension on the release handle.
9.Rotate the jam nut counterclockwise (upward) directly underneath the swivel nut. Securely tighten.
NOTE: Allow seven (7) threads to be exposed below the jam nut. See Detail ʺBʺ.
10.Squeeze the release handle and note the amount of play. If the release handle is too loose or too tight, refer to Adjusting Cable Assembly Tension on page 59.
DETAIL “B” | Locknut | Back Tube | Mounting |
(STEPS 3,7) |
| Screw | |
|
| ||
| Barrel End of |
| (STEPS 3,7) |
Back Tube | Cable |
|
|
(STEPS 4,6) |
|
| |
Mounting |
|
| |
|
|
| |
Bracket |
|
|
|
Seven (7) |
| Swivel Nut | Back Tube |
| (STEPS 2, 8, 9) | ||
Threads |
| Mounting | |
|
| ||
Cable |
|
| Bracket |
|
| (STEPS 3,7) | |
Assembly |
| Jam Nut | |
|
| ||
|
|
| |
|
| (STEPS 1,11) |
|
|
| Cable Assembly | |
| DETAIL “A” | (STEP 4) | |
| Release Handle |
| |
|
|
| |
|
| (STEPS 3,5,7) |
|
|
| Larger Hole |
|
|
| (STEPS 4,6) |
|
FIGURE 7.1 Replacing Release Handle
Adjusting Cable Assembly Tension
NOTE: For this procedure, refer to FIGURE 7.2.
NOTE: Activation of the recline mechanism depends on proper tension of the cable assembly. Proper tension is defined as the release handle having some resistance when squeezed and firmly held in place when not activated.
NOTE: If the tension of the cable assembly is:
•Too loose (too much play in release handle) ‐ The recline mechanism will not be activated when the release handle is squeezed.
•Too tight (release handle needs more play) ‐ The release handle will be difficult to squeeze.
1. Perform one (1) of the following:
Part No. 1076155 | 59 | 9000 Series |
