SECTION 7—RECLINER
Replacing Locking Rod
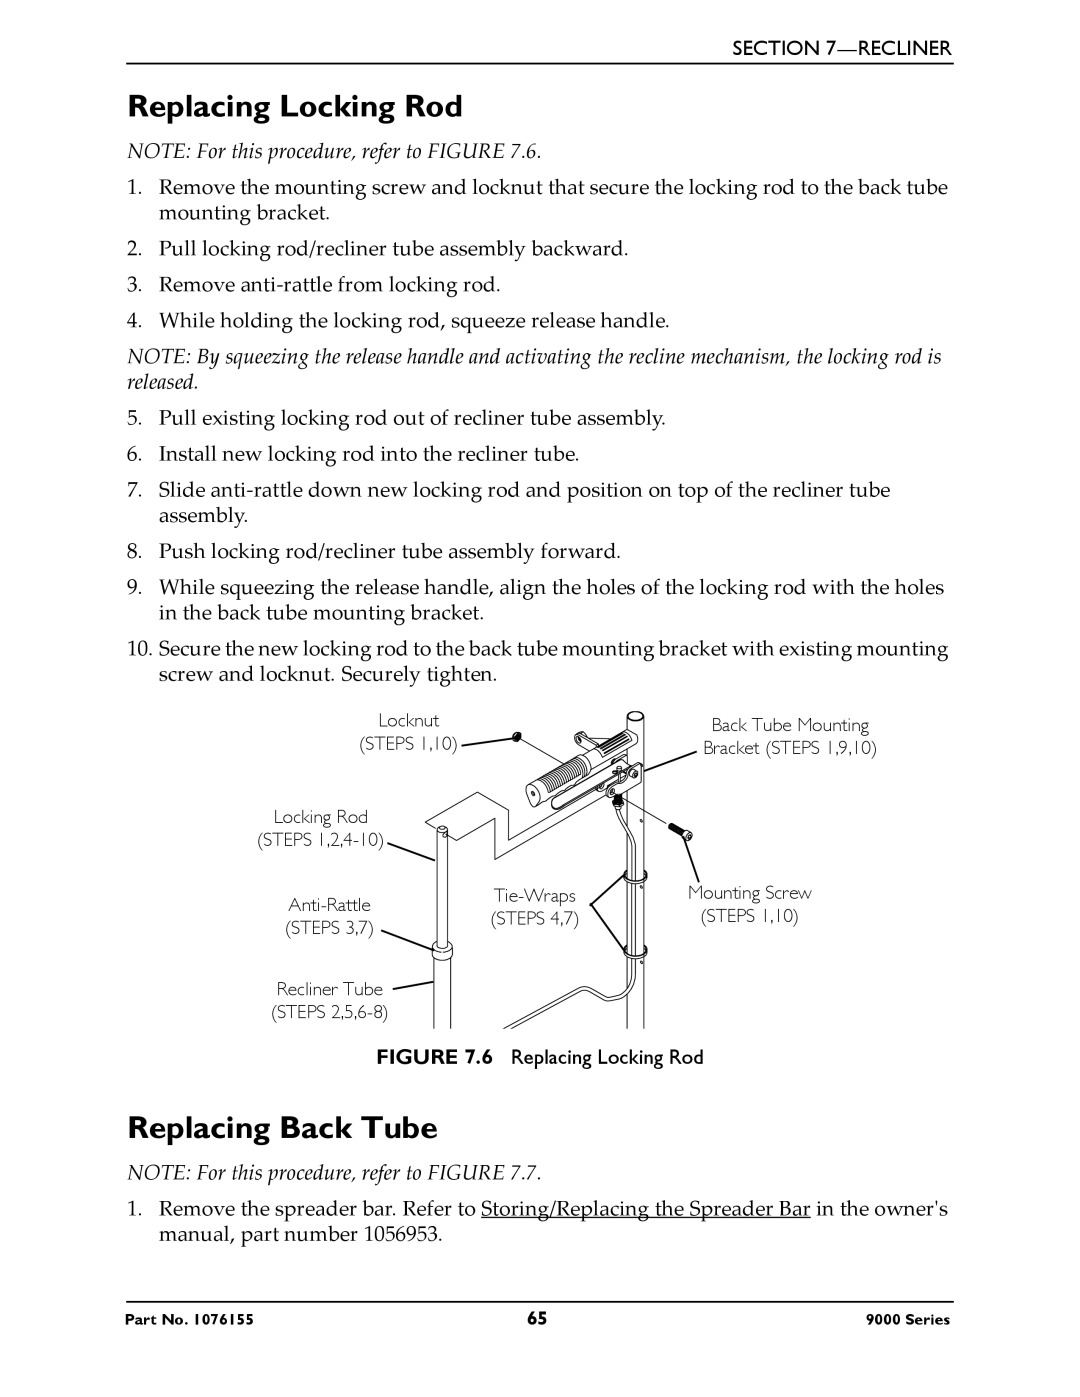
NOTE: For this procedure, refer to FIGURE 7.6.
1.Remove the mounting screw and locknut that secure the locking rod to the back tube mounting bracket.
2.Pull locking rod/recliner tube assembly backward.
3.Remove anti‐rattle from locking rod.
4.While holding the locking rod, squeeze release handle.
NOTE: By squeezing the release handle and activating the recline mechanism, the locking rod is released.
5.Pull existing locking rod out of recliner tube assembly.
6.Install new locking rod into the recliner tube.
7.Slide anti‐rattle down new locking rod and position on top of the recliner tube assembly.
8.Push locking rod/recliner tube assembly forward.
9.While squeezing the release handle, align the holes of the locking rod with the holes in the back tube mounting bracket.
10.Secure the new locking rod to the back tube mounting bracket with existing mounting screw and locknut. Securely tighten.
Locknut | Back Tube Mounting |
(STEPS 1,10) | Bracket (STEPS 1,9,10) |
Locking Rod
(STEPS 1,2,4-10)
Mounting Screw | |||
(STEPS 4,7) | (STEPS 1,10) | ||
(STEPS 3,7) | |||
|
|
Recliner Tube ![]()
![]() (STEPS
(STEPS
FIGURE 7.6 Replacing Locking Rod
Replacing Back Tube
NOTE: For this procedure, refer to FIGURE 7.7.
1.Remove the spreader bar. Refer to Storing/Replacing the Spreader Bar in the ownerʹs manual, part number 1056953.
Part No. 1076155 | 65 | 9000 Series |