SECTION
SECTION 3—SEAT AND BACK
WARNING
After any adjustments, repair or service and before use, make sure all attaching hardware is tightened securely. Otherwise, injury or damage may occur.
The seat depth, back height/angle, seat angle, size/position of the front casters, size/position of the rear wheels,
Adjusting Back Angle
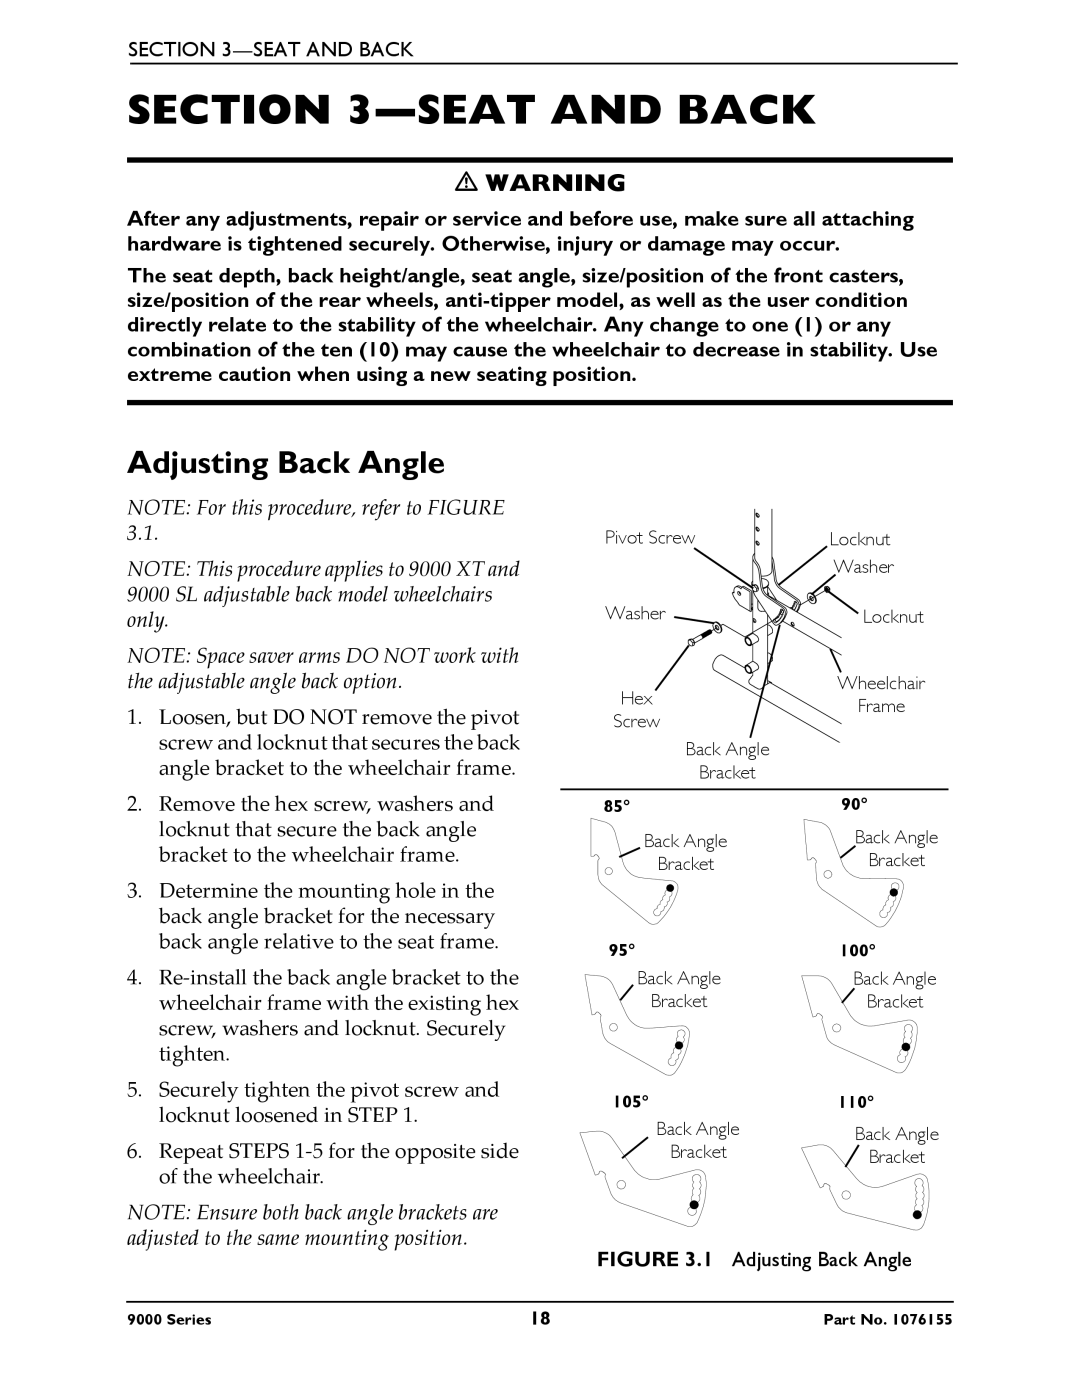
NOTE: For this procedure, refer to FIGURE 3.1.
NOTE: This procedure applies to 9000 XT and 9000 SL adjustable back model wheelchairs only.
NOTE: Space saver arms DO NOT work with the adjustable angle back option.
1. Loosen, but DO NOT remove the pivot |
screw and locknut that secures the back |
angle bracket to the wheelchair frame. |
Pivot Screw
Washer ![]()
Hex
Screw
Back Angle
Bracket
Locknut
![]() Washer
Washer
Locknut
Wheelchair
Frame
2. | Remove the hex screw, washers and |
| locknut that secure the back angle |
| bracket to the wheelchair frame. |
3. | Determine the mounting hole in the |
| back angle bracket for the necessary |
| back angle relative to the seat frame. |
4. | Re‐install the back angle bracket to the |
| wheelchair frame with the existing hex |
| screw, washers and locknut. Securely |
| tighten. |
5. | Securely tighten the pivot screw and |
| locknut loosened in STEP 1. |
6. | Repeat STEPS 1‐5 for the opposite side |
| of the wheelchair. |
NOTE: Ensure both back angle brackets are adjusted to the same mounting position.
85° | 85° | 90° |
| Back Angle | Back Angle |
| Bracket | Bracket |
95° | 95° | 100° |
| Back Angle | Back Angle |
| Bracket | Bracket |
105°105°110°
Back Angle | Back Angle |
Bracket | Bracket |
FIGURE 3.1 Adjusting Back Angle
9000 Series | 18 | Part No. 1076155 |
