Cable Box
Control
Suggested Location
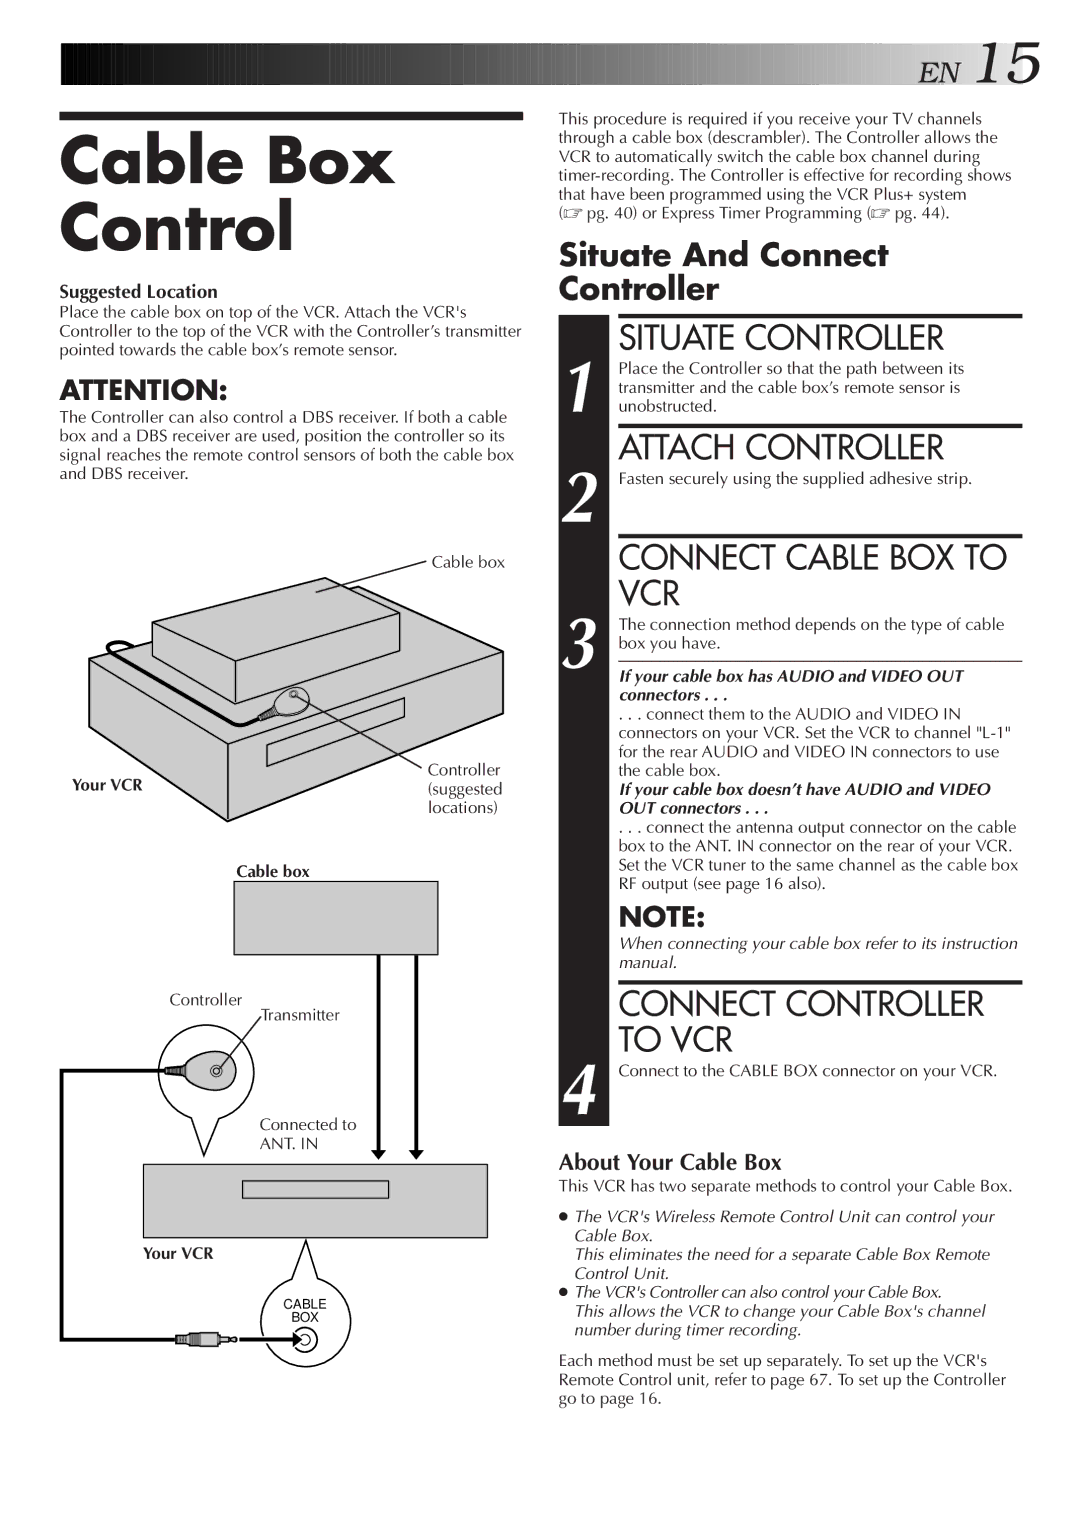
Place the cable box on top of the VCR. Attach the VCR's Controller to the top of the VCR with the Controller’s transmitter pointed towards the cable box’s remote sensor.
ATTENTION:
The Controller can also control a DBS receiver. If both a cable box and a DBS receiver are used, position the controller so its signal reaches the remote control sensors of both the cable box and DBS receiver.
Cable box
Controller
Your VCR(suggested
locations)
Cable box
Controller
Transmitter
Connected to
ANT. IN
Your VCR
CABLE
BOX
![]()
![]()
![]()
![]()
![]()
![]()
![]()
![]()
![]()
![]()
![]()
![]()
![]()
![]()
![]()
![]()
![]()
![]()
![]()
![]()
![]()
![]()
![]()
![]()
![]()
![]()
![]()
![]()
![]()
![]()
![]()
![]()
![]()
![]()
![]()
![]()
![]()
![]()
![]()
![]()
![]()
![]()
![]()
![]()
![]()
![]() EN
EN![]()
![]() 15
15![]()
This procedure is required if you receive your TV channels through a cable box (descrambler). The Controller allows the VCR to automatically switch the cable box channel during
(☞ pg. 40) or Express Timer Programming (☞ pg. 44).
Situate And Connect
Controller
SITUATE CONTROLLER
1 Place the Controller so that the path between its transmitter and the cable box’s remote sensor is unobstructed.
ATTACH CONTROLLER
2 Fasten securely using the supplied adhesive strip.
CONNECT CABLE BOX TO VCR
3 The connection method depends on the type of cable box you have.
If your cable box has AUDIO and VIDEO OUT connectors . . .
. . . connect them to the AUDIO and VIDEO IN connectors on your VCR. Set the VCR to channel
If your cable box doesn’t have AUDIO and VIDEO
OUT connectors . . .
. . . connect the antenna output connector on the cable box to the ANT. IN connector on the rear of your VCR. Set the VCR tuner to the same channel as the cable box RF output (see page 16 also).
NOTE:
When connecting your cable box refer to its instruction manual.
CONNECT CONTROLLER
TO VCR
4 Connect to the CABLE BOX connector on your VCR.
About Your Cable Box
This VCR has two separate methods to control your Cable Box.
●The VCR's Wireless Remote Control Unit can control your Cable Box.
This eliminates the need for a separate Cable Box Remote Control Unit.
●The VCR's Controller can also control your Cable Box.
This allows the VCR to change your Cable Box's channel number during timer recording.
Each method must be set up separately. To set up the VCR's Remote Control unit, refer to page 67. To set up the Controller go to page 16.
