CH |
| T | W | 3 |
| 1 | 2 | |
|
|
| 2 |
NUMBER | 4 | 5 | 6 |
|
|
| |
| 7 | 8 | 9 |
|
| 0 | 4 |
| 1 | DV | VHS |
3
MENU
OK
INFORMATION
When the VCR's clock has not been set (with AUTO CLOCK set to ON), if you press OK in step 7, "CABLE BOX USERS SET CLOCK MANUALLY" will be displayed on the screen for about 5 seconds, then the Clock Set screen will appear; perform the manual clock setting procedure on page 12. If you press MENU after the clock has been set, the Cable Box Brand Set screen appears.
NOTES:
●Although the supplied Controller is compatible with many different cable box brands, it is possible that it will not work with your cable box.
●If your cable box doesn’t respond to any code between 1 and 25, you can’t use the Controller to change cable box channels. In this case, make sure to leave the cable box turned on and tuned to the proper channel before the scheduled start of timer recording.
Please contact your cable company about the possibility of exchanging your current cable box with one that is compatible with your VCR.
●The VCR can only change the cable box channel through the Controller during timer recording.
●If your cable box is one that can’t be operated with a remote control (because it has no remote sensor), you can’t use the Controller to change its channels. Make sure to leave the cable box turned on and tuned to the proper channel before the scheduled start of timer recording.
●If the VCR's memory backup expires because of a power failure, set the cable box output channel and brand again.
●If you are unable to set the Controller, please contact JVC toll
free at
![]()
![]()
![]()
![]()
![]()
![]()
![]()
![]()
![]()
![]()
![]()
![]()
![]()
![]()
![]()
![]()
![]()
![]()
![]()
![]()
![]()
![]()
![]()
![]()
![]()
![]()
![]() EN
EN![]()
![]() 17
17![]()
ACCESS CABLE BOX
BRAND SET SCREEN
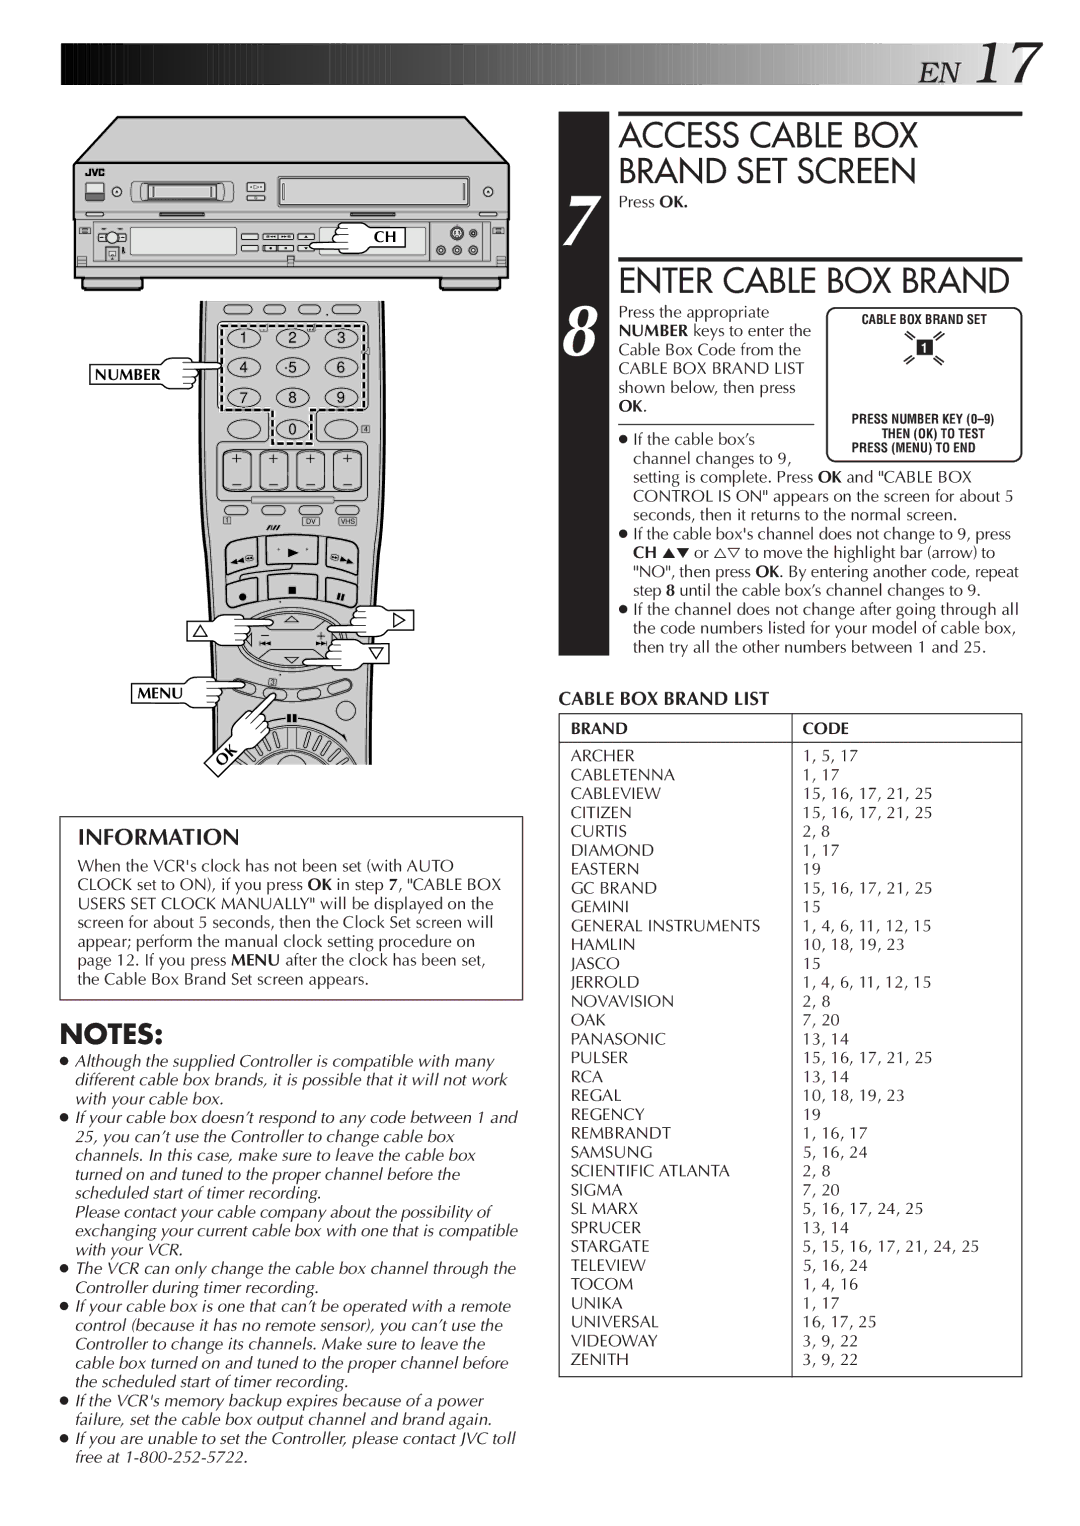
7 Press OK.
ENTER CABLE BOX BRAND
8 | Press the appropriate | CABLE BOX BRAND SET | |||
NUMBER keys to enter the | |||||
|
|
| |||
Cable Box Code from the |
| 1 |
| ||
|
|
| |||
| CABLE BOX BRAND LIST |
|
|
| |
| shown below, then press |
|
|
| |
| OK. |
|
|
| |
● If the cable box’s channel changes to 9,
setting is complete. Press OK and "CABLE BOX CONTROL IS ON" appears on the screen for about 5 seconds, then it returns to the normal screen.
●If the cable box's channel does not change to 9, press CH 5° or %Þ to move the highlight bar (arrow) to "NO", then press OK. By entering another code, repeat step 8 until the cable box’s channel changes to 9.
●If the channel does not change after going through all the code numbers listed for your model of cable box, then try all the other numbers between 1 and 25.
CABLE BOX BRAND LIST
BRAND | CODE |
|
|
ARCHER | 1, 5, 17 |
CABLETENNA | 1, 17 |
CABLEVIEW | 15, 16, 17, 21, 25 |
CITIZEN | 15, 16, 17, 21, 25 |
CURTIS | 2, 8 |
DIAMOND | 1, 17 |
EASTERN | 19 |
GC BRAND | 15, 16, 17, 21, 25 |
GEMINI | 15 |
GENERAL INSTRUMENTS | 1, 4, 6, 11, 12, 15 |
HAMLIN | 10, 18, 19, 23 |
JASCO | 15 |
JERROLD | 1, 4, 6, 11, 12, 15 |
NOVAVISION | 2, 8 |
OAK | 7, 20 |
PANASONIC | 13, 14 |
PULSER | 15, 16, 17, 21, 25 |
RCA | 13, 14 |
REGAL | 10, 18, 19, 23 |
REGENCY | 19 |
REMBRANDT | 1, 16, 17 |
SAMSUNG | 5, 16, 24 |
SCIENTIFIC ATLANTA | 2, 8 |
SIGMA | 7, 20 |
SL MARX | 5, 16, 17, 24, 25 |
SPRUCER | 13, 14 |
STARGATE | 5, 15, 16, 17, 21, 24, 25 |
TELEVIEW | 5, 16, 24 |
TOCOM | 1, 4, 16 |
UNIKA | 1, 17 |
UNIVERSAL | 16, 17, 25 |
VIDEOWAY | 3, 9, 22 |
ZENITH | 3, 9, 22 |
|
|