Settings (Step 2 Network Settings)
Set the IP address for
Caution
•Upon turning on the power of this camera, it may take about 60 seconds before it can be connected to the PC.
•At the factory, DHCP is enabled for
•Using DHCP
JVC does not recommend operating
Note
•To connect to a
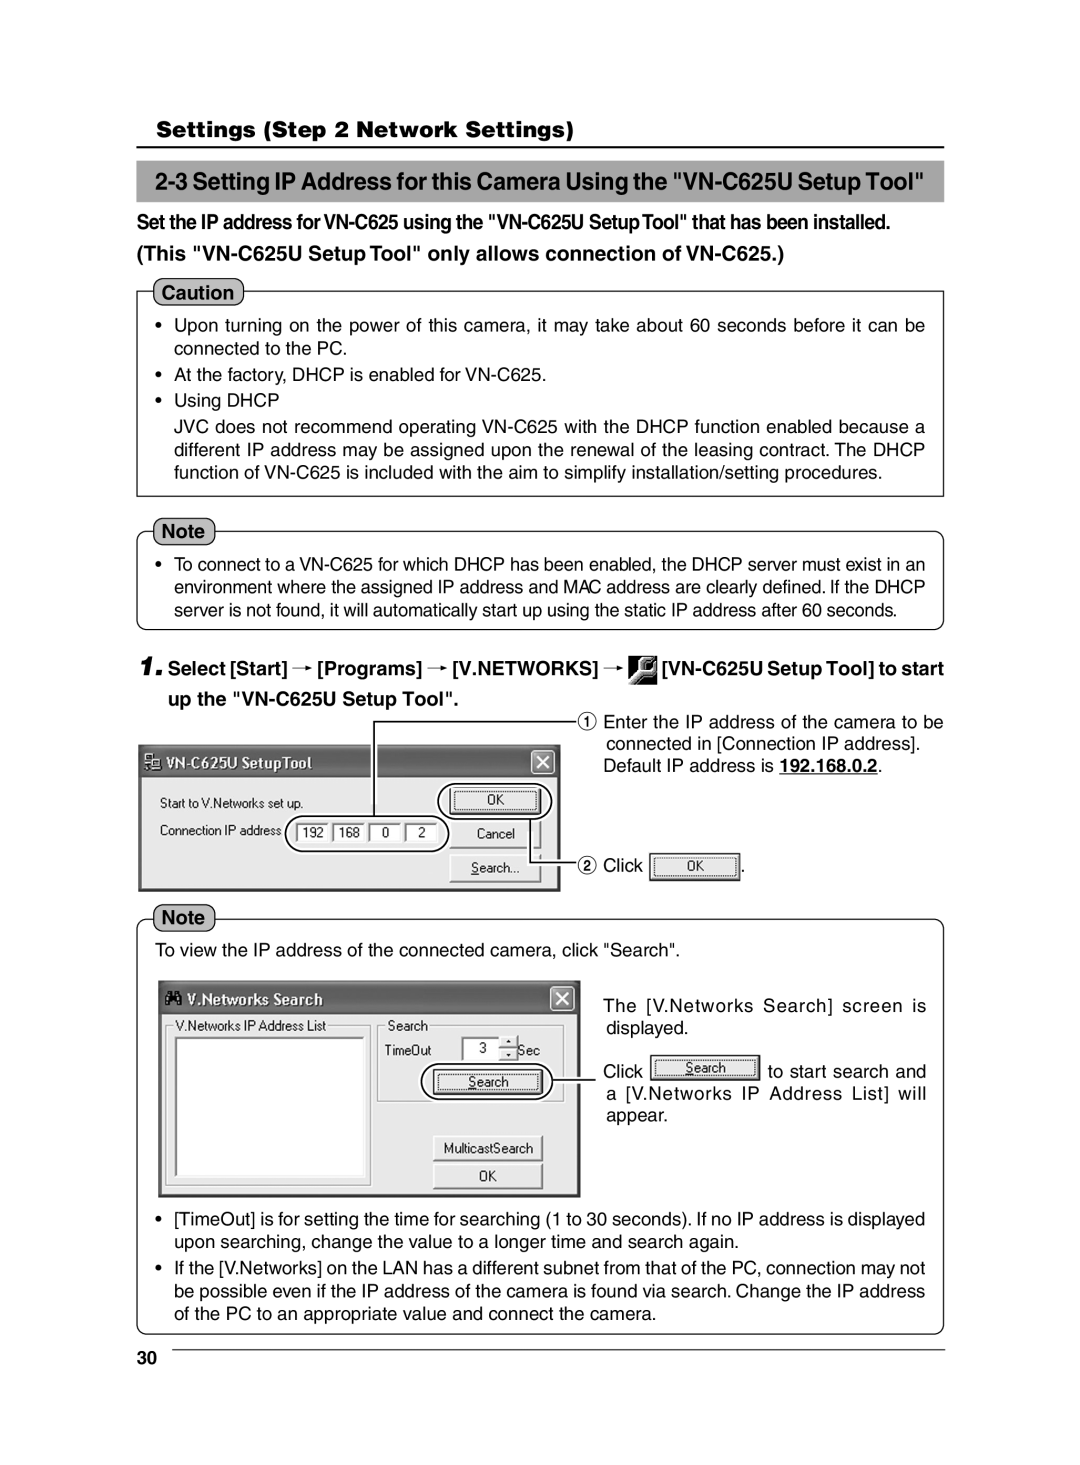
1.Select [Start] †[Programs] †[V.NETWORKS] †![]()
1 Enter the IP address of the camera to be connected in [Connection IP address]. Default IP address is 192.168.0.2.
![]() 2 Click
2 Click ![]() .
.
Note
To view the IP address of the connected camera, click "Search".
The [V.Networks Search] screen is displayed.
Click ![]() to start search and a [V.Networks IP Address List] will appear.
to start search and a [V.Networks IP Address List] will appear.
•[TimeOut] is for setting the time for searching (1 to 30 seconds). If no IP address is displayed upon searching, change the value to a longer time and search again.
•If the [V.Networks] on the LAN has a different subnet from that of the PC, connection may not be possible even if the IP address of the camera is found via search. Change the IP address of the PC to an appropriate value and connect the camera.
30