Settings (Step 2 Network Settings)
The connected camera can be registered with the installed "V.Networks Controller".
1.Select [Start] † [Programs] † [V. NETWORKS] † ![]() [V.Networks Controller] to start up the "V.Networks Controller".
[V.Networks Controller] to start up the "V.Networks Controller".
2.Select [File] and [New].
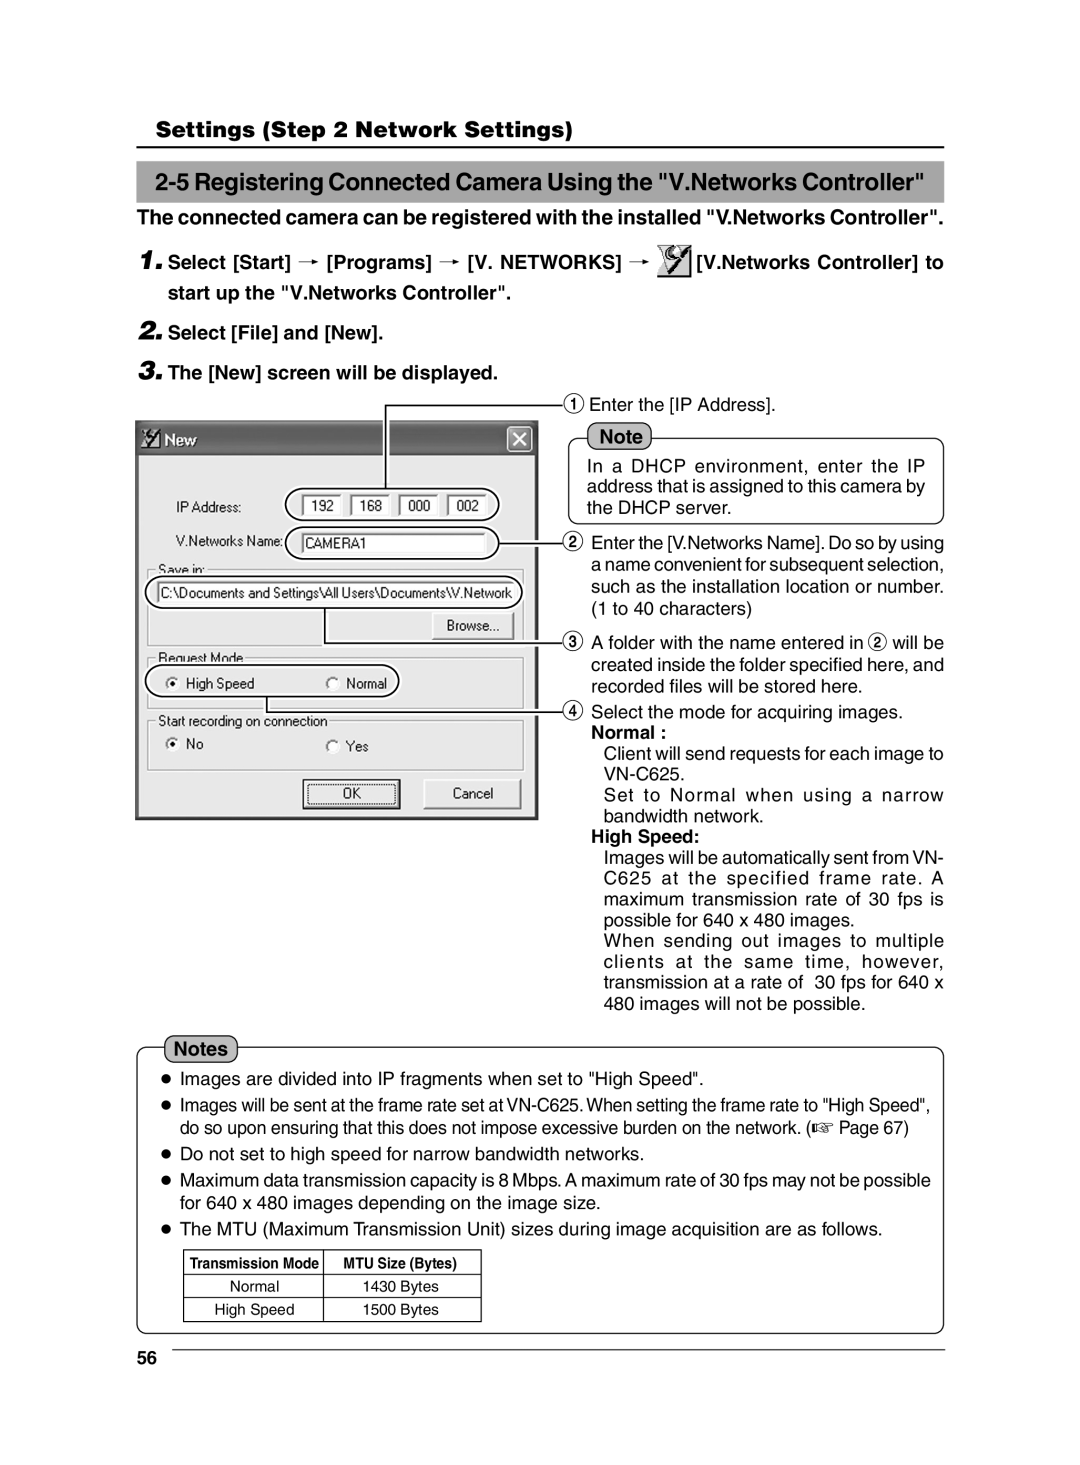
3.The [New] screen will be displayed.
1 Enter the [IP Address].
Note
In a DHCP environment, enter the IP address that is assigned to this camera by the DHCP server.
![]() 2 Enter the [V.Networks Name]. Do so by using a name convenient for subsequent selection, such as the installation location or number. (1 to 40 characters)
2 Enter the [V.Networks Name]. Do so by using a name convenient for subsequent selection, such as the installation location or number. (1 to 40 characters)
3 A folder with the name entered in 2 will be created inside the folder specified here, and recorded files will be stored here.
4 Select the mode for acquiring images.
Normal :
Client will send requests for each image to
Set to Normal when using a narrow bandwidth network.
High Speed:
Images will be automatically sent from VN- C625 at the specified frame rate. A maximum transmission rate of 30 fps is possible for 640 x 480 images.
When sending out images to multiple clients at the same time, however, transmission at a rate of 30 fps for 640 x 480 images will not be possible.
Notes
●Images are divided into IP fragments when set to "High Speed".
●Images will be sent at the frame rate set at
●Do not set to high speed for narrow bandwidth networks.
●Maximum data transmission capacity is 8 Mbps. A maximum rate of 30 fps may not be possible for 640 x 480 images depending on the image size.
●The MTU (Maximum Transmission Unit) sizes during image acquisition are as follows.
Transmission Mode | MTU Size (Bytes) |
Normal | 1430 Bytes |
High Speed | 1500 Bytes |
56