Preparation (Step 1 Connection/Installation)
1-4 Installing the Camera (Continued)
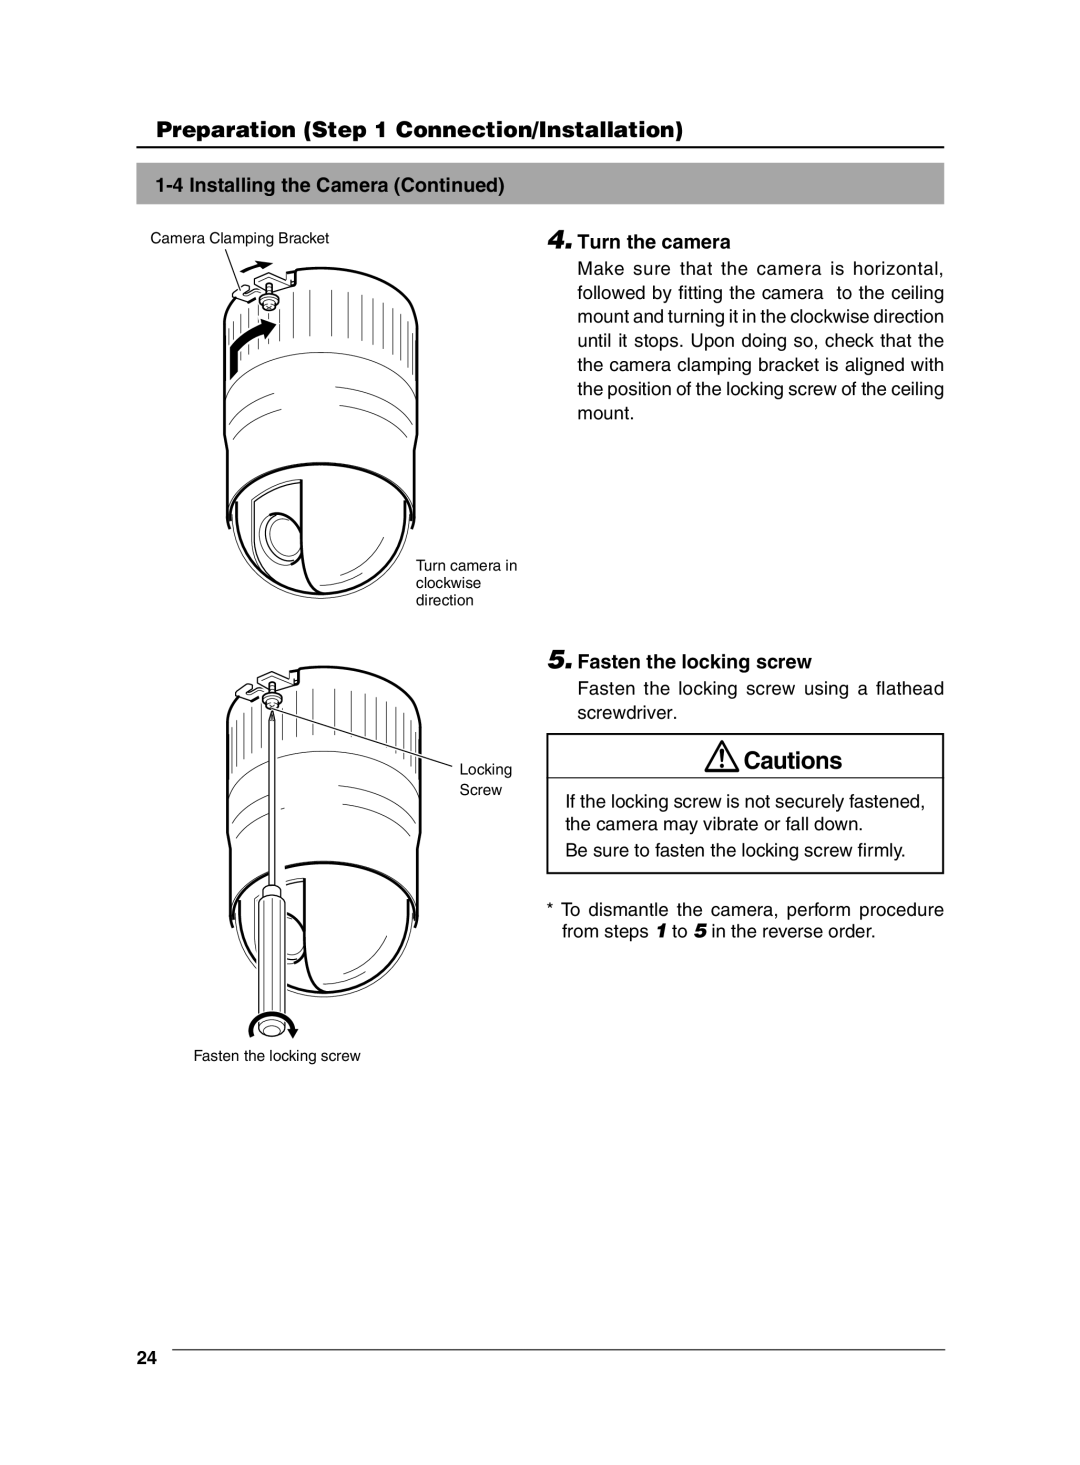
Camera Clamping Bracket
Turn camera in clockwise direction
4.Turn the camera
Make sure that the camera is horizontal, followed by fitting the camera to the ceiling mount and turning it in the clockwise direction until it stops. Upon doing so, check that the the camera clamping bracket is aligned with the position of the locking screw of the ceiling mount.
Locking Screw
5.Fasten the locking screw
Fasten the locking screw using a flathead screwdriver.
![]() Cautions
Cautions
If the locking screw is not securely fastened, the camera may vibrate or fall down.
Be sure to fasten the locking screw firmly.
*To dismantle the camera, perform procedure from steps 1 to 5 in the reverse order.
Fasten the locking screw
24