4)At this point, you can start recording or go to another menu to continue setting up.
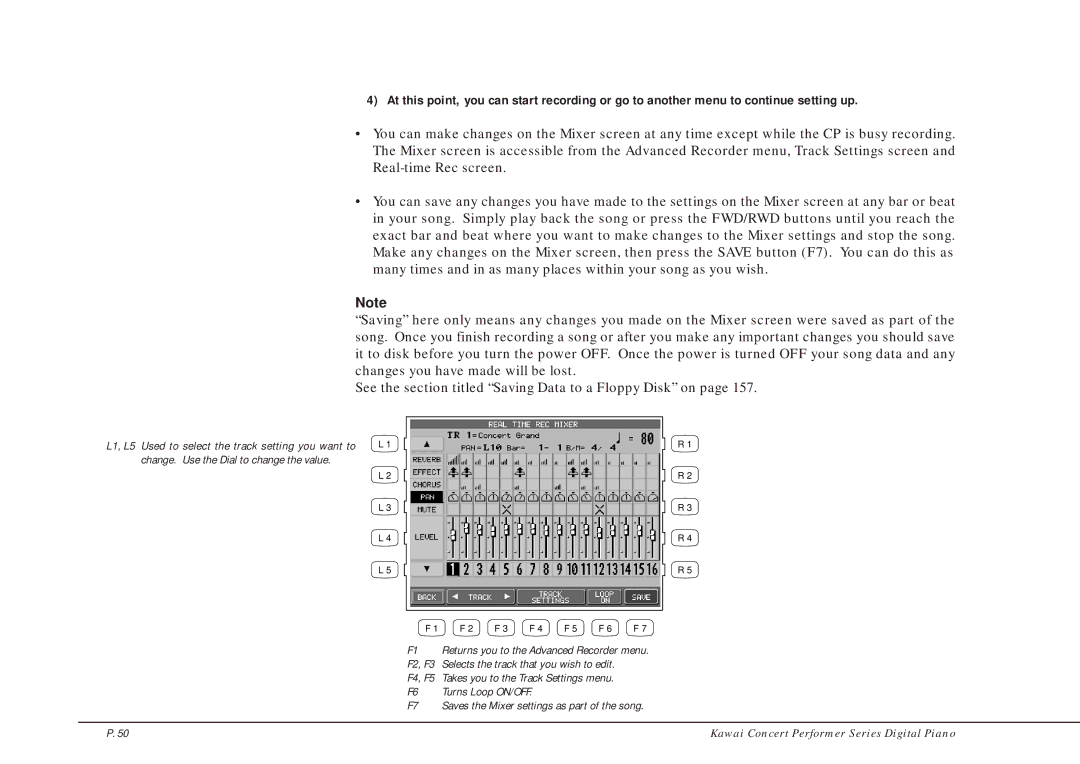
•You can make changes on the Mixer screen at any time except while the CP is busy recording. The Mixer screen is accessible from the Advanced Recorder menu, Track Settings screen and
•You can save any changes you have made to the settings on the Mixer screen at any bar or beat in your song. Simply play back the song or press the FWD/RWD buttons until you reach the exact bar and beat where you want to make changes to the Mixer settings and stop the song. Make any changes on the Mixer screen, then press the SAVE button (F7). You can do this as many times and in as many places within your song as you wish.
Note
“Saving” here only means any changes you made on the Mixer screen were saved as part of the song. Once you finish recording a song or after you make any important changes you should save it to disk before you turn the power OFF. Once the power is turned OFF your song data and any changes you have made will be lost.
See the section titled “Saving Data to a Floppy Disk” on page 157.
L1, L5 Used to select the track setting you want to | L 1 |
change. Use the Dial to change the value.
L 2
L 3
L 4
L 5
R1
R 2
R 3
R 4
R 5
F 1 | F 2 | F 3 | F 4 | F 5 | F 6 | F 7 |
F1 Returns you to the Advanced Recorder menu. F2, F3 Selects the track that you wish to edit.
F4, F5 Takes you to the Track Settings menu.
F6 Turns Loop ON/OFF.
F7 Saves the Mixer settings as part of the song.
P. 50 | Kawai Concert Performer Series Digital Piano |
