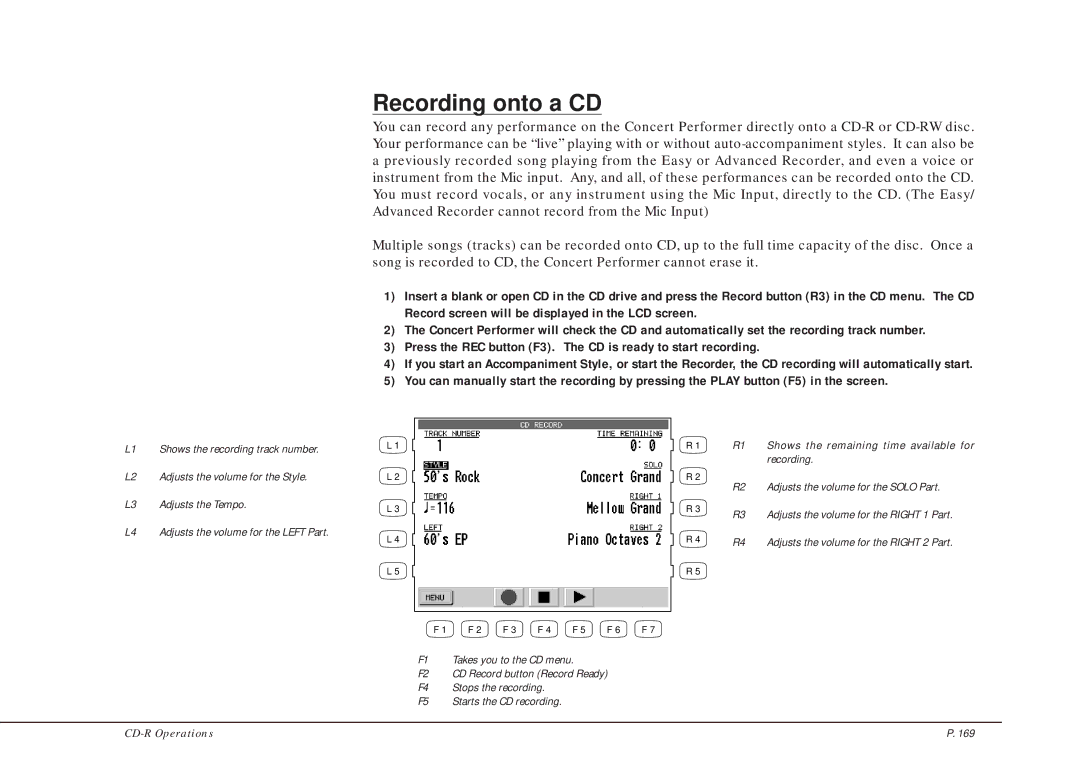
L1 Shows the recording track number.
L2 Adjusts the volume for the Style.
L3 Adjusts the Tempo.
L4 Adjusts the volume for the LEFT Part.
Recording onto a CD
You can record any performance on the Concert Performer directly onto a
Multiple songs (tracks) can be recorded onto CD, up to the full time capacity of the disc. Once a song is recorded to CD, the Concert Performer cannot erase it.
1)Insert a blank or open CD in the CD drive and press the Record button (R3) in the CD menu. The CD Record screen will be displayed in the LCD screen.
2)The Concert Performer will check the CD and automatically set the recording track number.
3)Press the REC button (F3). The CD is ready to start recording.
4)If you start an Accompaniment Style, or start the Recorder, the CD recording will automatically start.
5)You can manually start the recording by pressing the PLAY button (F5) in the screen.
L 1 | R 1 | R1 | Shows the remaining time available for |
|
|
| recording. |
L 2 | R 2 | R2 | Adjusts the volume for the SOLO Part. |
|
| ||
L 3 | R 3 | R3 | Adjusts the volume for the RIGHT 1 Part. |
|
| ||
L 4 | R 4 | R4 | Adjusts the volume for the RIGHT 2 Part. |
L 5 | R 5 |
|
|
F 1 | F 2 | F 3 | F 4 | F 5 | F 6 | F 7 |
F1 Takes you to the CD menu.
F2 CD Record button (Record Ready)
F4 Stops the recording.
F5 Starts the CD recording.
P. 169 |