5.3 Cleaning the Printer
5.3Cleaning the Printer
As discussed earlier, the following parts must be cleaned each time the toner container and waste toner box are replaced:
•Paper transfer unit
•Main charger unit
In addition to this, it is recommended that these parts are cleaned periodically at least once a month.
5.3.1Cleaning the Registration Roller
A dirty registration roller can cause soiling of the reverse side of the paper and other printing problems. Use the following procedure to clean the registration roller.
| Be careful not to touch the transfer belt (black) |
| or to place anything on top of the transfer belt |
Note | during cleaning. Doing so can cause poor print |
| quality. |
1 | Pull the paper transfer unit handle and pull it out to |
| the right. |
|
|
|
| Paper transfer unit |
|
|
|
| |
|
|
|
| Transfer belt (black) |
|
|
|
| |
| Figure | |||
2 | Use the cleaning cloth that comes with the toner kit to | |||
| wipe any paper particles from the metal roller. | |||
Registration roller
Figure
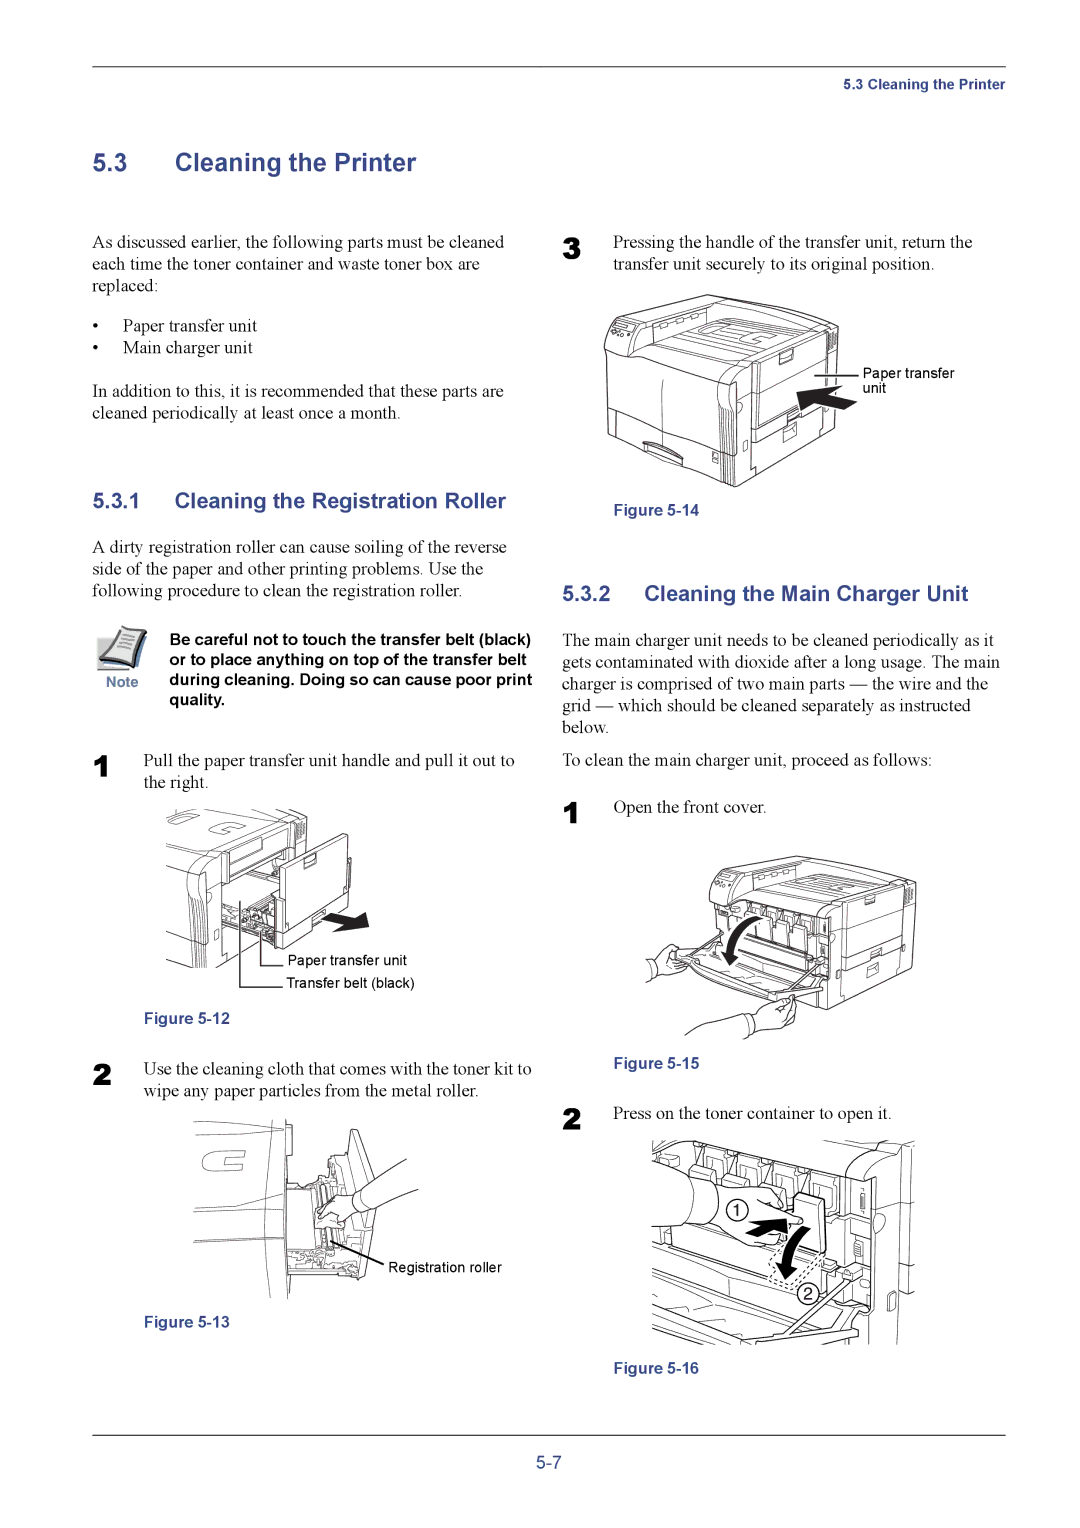
3 | Pressing the handle of the transfer unit, return the |
| transfer unit securely to its original position. |
![]() Paper transfer
Paper transfer ![]() unit
unit
Figure
5.3.2Cleaning the Main Charger Unit
The main charger unit needs to be cleaned periodically as it gets contaminated with dioxide after a long usage. The main charger is comprised of two main parts — the wire and the grid — which should be cleaned separately as instructed below.
To clean the main charger unit, proceed as follows:
1 | Open the front cover. |
| Figure |
2 | Press on the toner container to open it. |
Figure