Server Extended Application Support
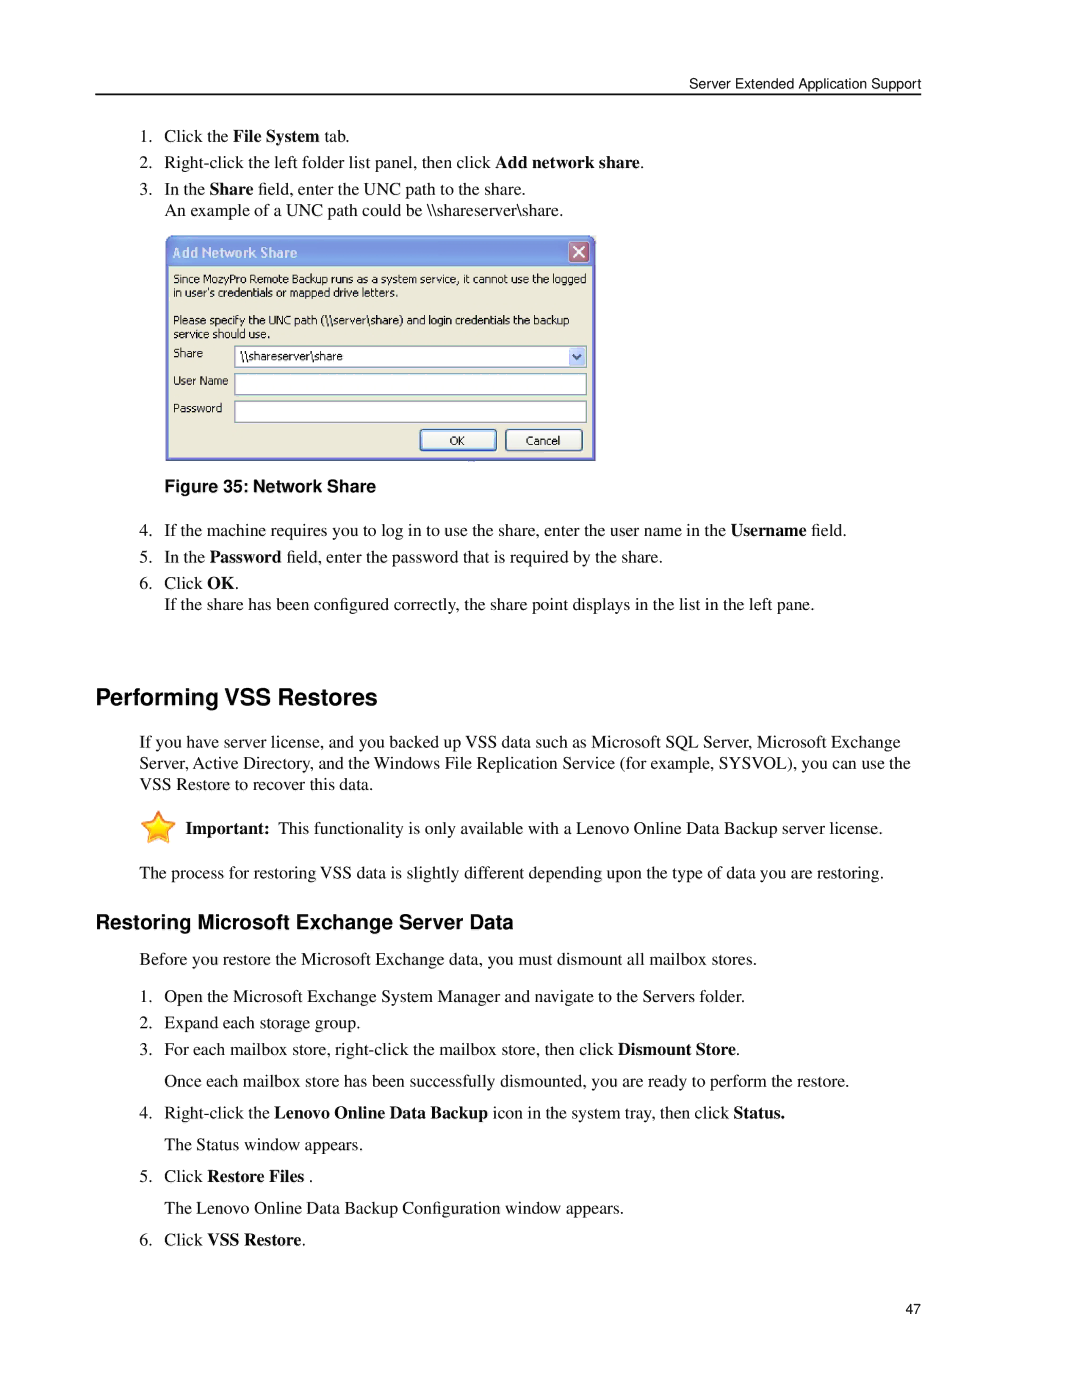
1.Click the File System tab.
2.
3.In the Share field, enter the UNC path to the share.
An example of a UNC path could be \\shareserver\share.
Figure 35: Network Share
4.If the machine requires you to log in to use the share, enter the user name in the Username field.
5.In the Password field, enter the password that is required by the share.
6.Click OK.
If the share has been configured correctly, the share point displays in the list in the left pane.
Performing VSS Restores
If you have server license, and you backed up VSS data such as Microsoft SQL Server, Microsoft Exchange Server, Active Directory, and the Windows File Replication Service (for example, SYSVOL), you can use the VSS Restore to recover this data.
![]() Important: This functionality is only available with a Lenovo Online Data Backup server license.
Important: This functionality is only available with a Lenovo Online Data Backup server license.
The process for restoring VSS data is slightly different depending upon the type of data you are restoring.
Restoring Microsoft Exchange Server Data
Before you restore the Microsoft Exchange data, you must dismount all mailbox stores.
1.Open the Microsoft Exchange System Manager and navigate to the Servers folder.
2.Expand each storage group.
3.For each mailbox store,
Once each mailbox store has been successfully dismounted, you are ready to perform the restore.
4.
5.Click Restore Files .
The Lenovo Online Data Backup Configuration window appears.
6.Click VSS Restore.
47