10.If you are instructed to return the old diagnostic module, follow all packaging instructions and use any packaging materials that are supplied to you for shipping.
What to do next:
•To work with another piece of hardware, go to the appropriate section.
•To complete the replacement, go to “Completing the parts replacement” on page 174.
Replacing the diagnostic module for server models with
Attention: Do not open your server or attempt any repair before reading and understanding “Safety information” on page iii and “Guidelines” on page 81.
To replace the diagnostic module for server models with
1.Remove all media from the drives and turn off all attached devices and the server. Then, disconnect all power cords from electrical outlets and disconnect all cables that are connected to the server.
2.If the server is installed in a rack cabinet, remove the server from the rack cabinet and place it on a flat, clean, and
3.Remove the server cover. See “Removing the server cover” on page 83.
4.Remove the front bezel. See “Removing and reinstalling the front bezel” on page 85.
5.Remove the cooling shroud. See “Removing and reinstalling the cooling shroud” on page 91.
6.Locate the diagnostic module. See “Components of server models with
7.Remove the left cage. See “Removing and reinstalling the left cage” on page 93.
8.Remove the front panel board. See “Replacing the front panel board for server models with
9.Disconnect the cable from the rear of the diagnostic module.
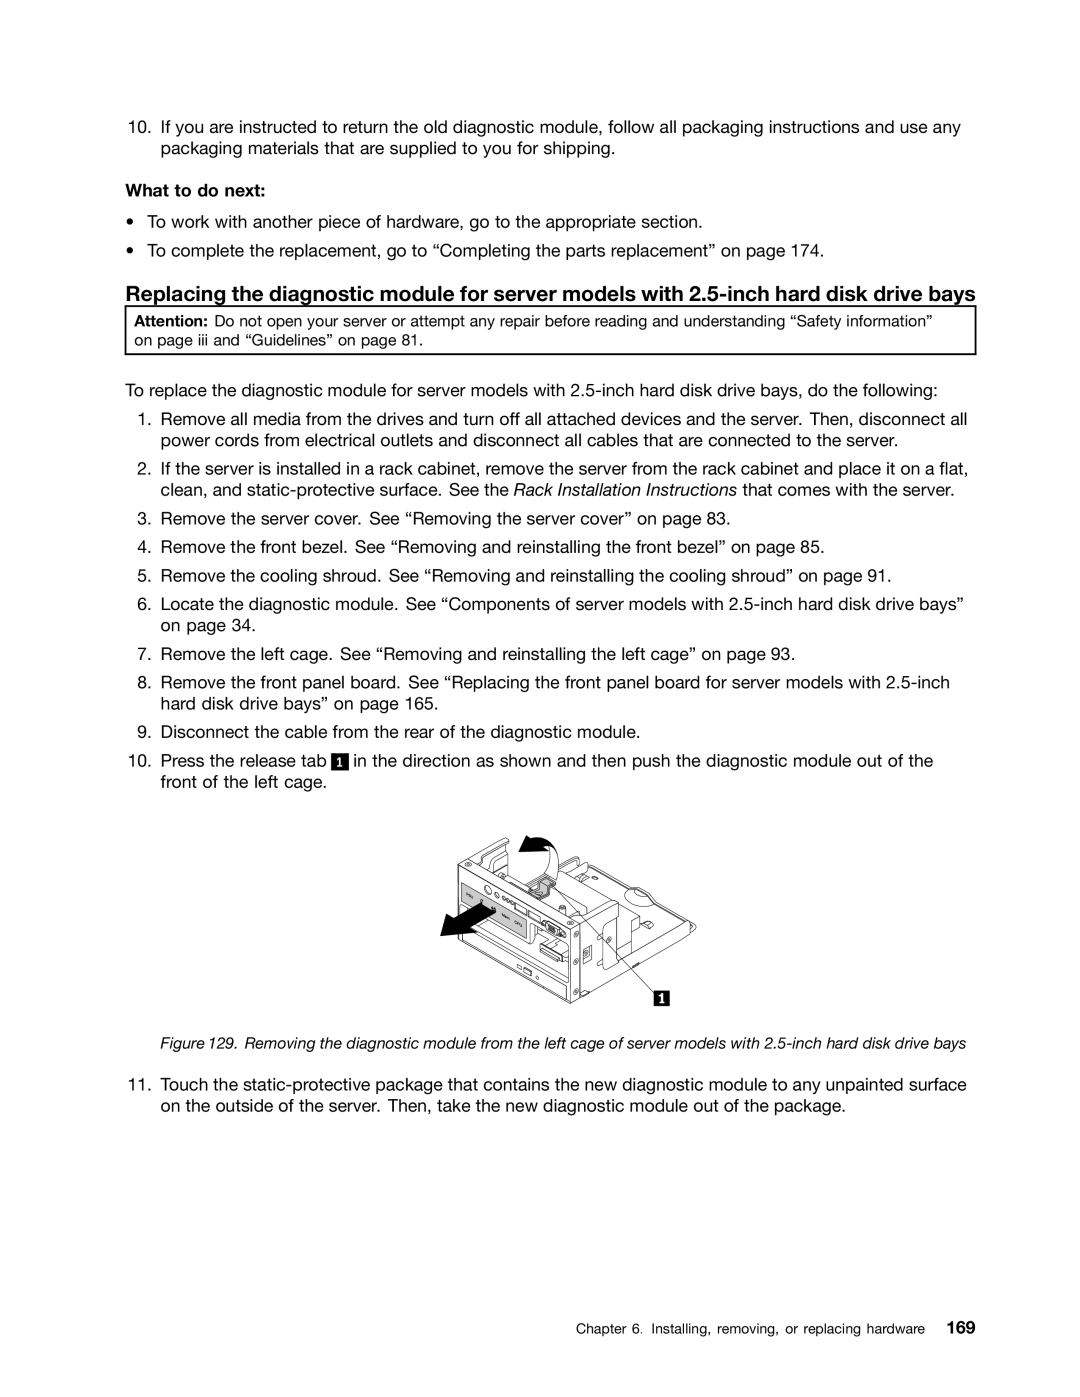
10.Press the release tab front of the left cage.
1
in the direction as shown and then push the diagnostic module out of the
Figure 129. Removing the diagnostic module from the left cage of server models with 2.5-inch hard disk drive bays
11.Touch the