Setting Up ELA and Shadow Mailbox Community IDs
2. At the enter command: prompt, enter either: |
|
Full Command Version | Short Command Version |
change | ch sy s |
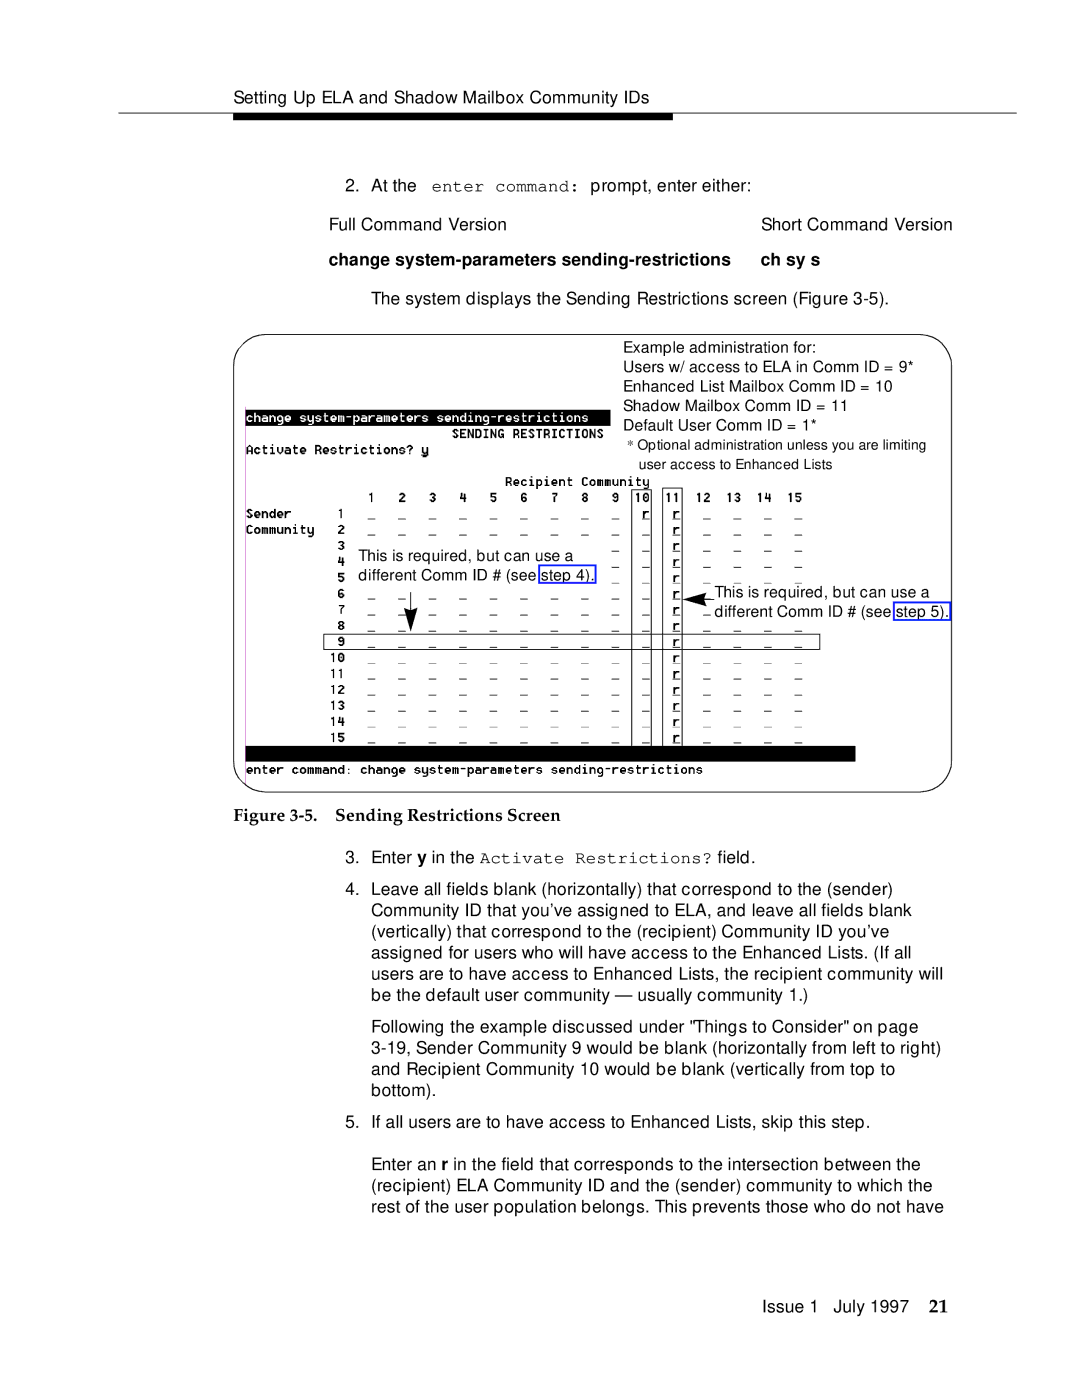
The system displays the Sending Restrictions screen (Figure 3-5).
Example administration for:
Users w/ access to ELA in Comm ID = 9*
Enhanced List Mailbox Comm ID = 10
Shadow Mailbox Comm ID = 11
Default User Comm ID = 1*
* Optional administration unless you are limiting user access to Enhanced Lists
This is required, but can use a different Comm ID # (see step 4).
This is required, but can use a different Comm ID # (see step 5).
Figure 3-5. Sending Restrictions Screen
3.Enter y in the Activate Restrictions? field.
4.Leave all fields blank (horizontally) that correspond to the (sender) Community ID that you’ve assigned to ELA, and leave all fields blank (vertically) that correspond to the (recipient) Community ID you’ve assigned for users who will have access to the Enhanced Lists. (If all users are to have access to Enhanced Lists, the recipient community will be the default user community — usually community 1.)
Following the example discussed under "Things to Consider" on page
5.If all users are to have access to Enhanced Lists, skip this step.
Enter an r in the field that corresponds to the intersection between the (recipient) ELA Community ID and the (sender) community to which the rest of the user population belongs. This prevents those who do not have
Issue 1 July 1997 21
