100
8.After completing the setting items, select HDDs used for logical drives to be created in [Devices Assignments]. Move the cursor to a targeting HDD by using the arrow keys "↑" and "↓" and press the [Space] key. The change of [Assignment] from "N" to "Y" indicates that the HDD is assigned to the logical drive.
9.After completing all the settings of the logical drive, press the [Ctrl] + [Y] keys to save the configuration information.
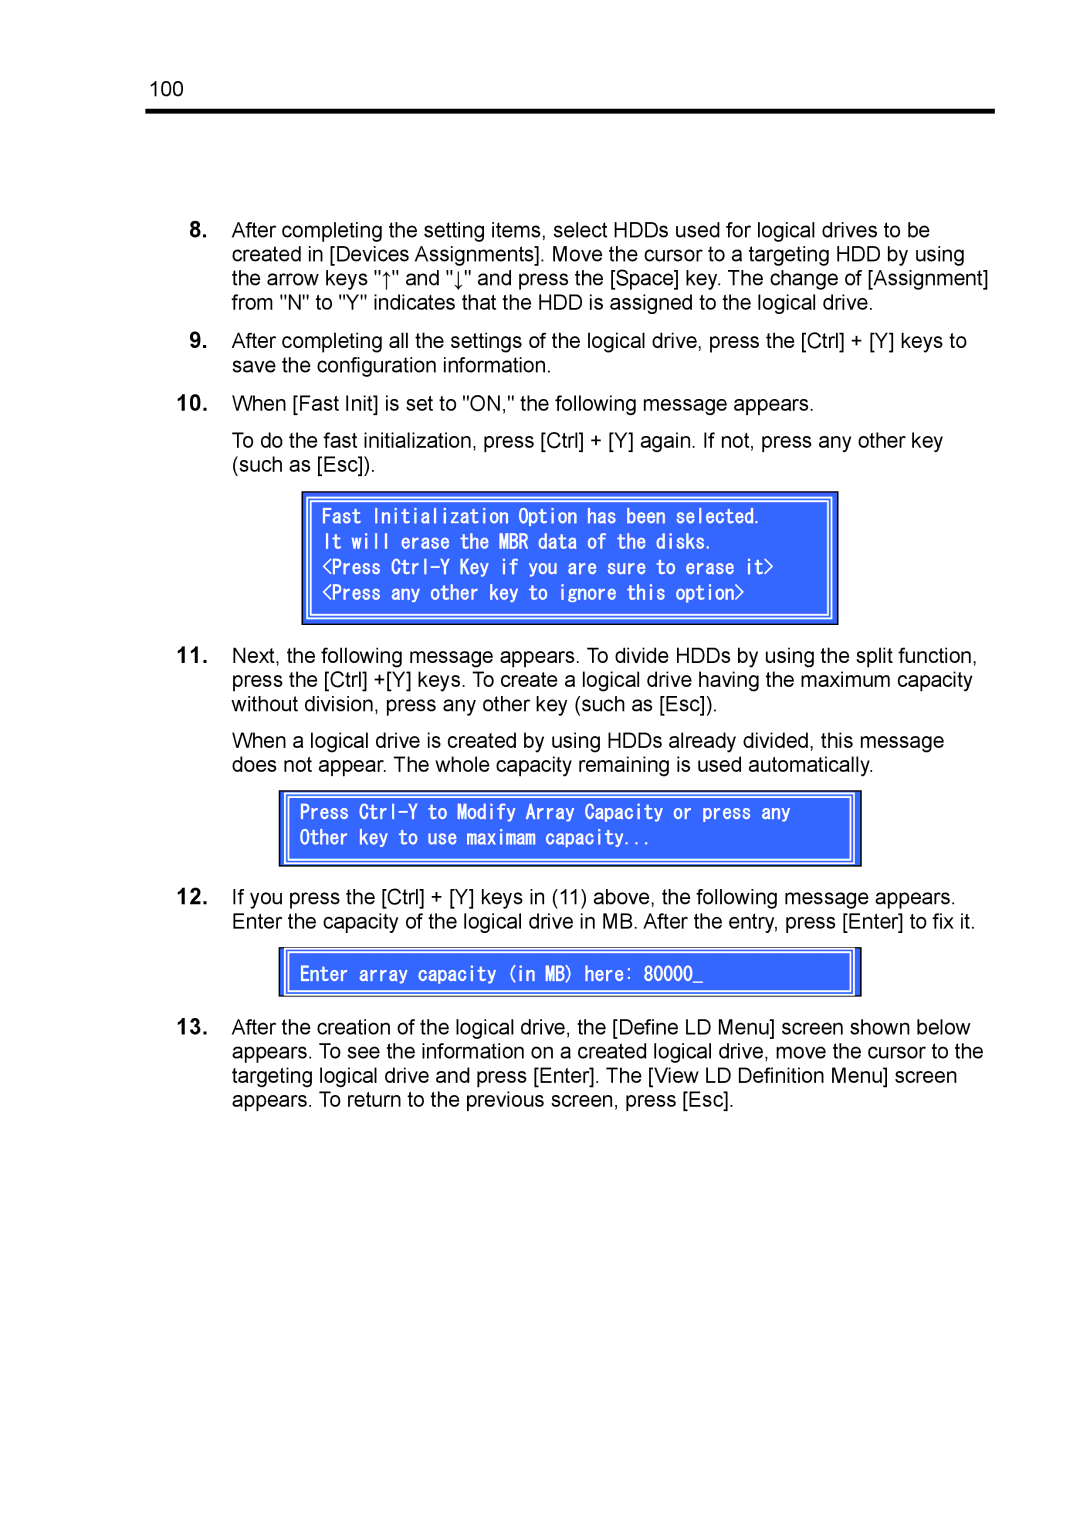
10.When [Fast Init] is set to "ON," the following message appears.
To do the fast initialization, press [Ctrl] + [Y] again. If not, press any other key (such as [Esc]).
Fast Initialization Option has been selected. It will erase the MBR data of the disks. <Press
11.Next, the following message appears. To divide HDDs by using the split function, press the [Ctrl] +[Y] keys. To create a logical drive having the maximum capacity without division, press any other key (such as [Esc]).
When a logical drive is created by using HDDs already divided, this message does not appear. The whole capacity remaining is used automatically.
Press
Other key to use maximam capacity...
12.If you press the [Ctrl] + [Y] keys in (11) above, the following message appears. Enter the capacity of the logical drive in MB. After the entry, press [Enter] to fix it.
Enter array capacity (in MB) here: 80000_
13.After the creation of the logical drive, the [Define LD Menu] screen shown below appears. To see the information on a created logical drive, move the cursor to the targeting logical drive and press [Enter]. The [View LD Definition Menu] screen appears. To return to the previous screen, press [Esc].