[a]
o | 2 | 3 |
OPEN
[b)
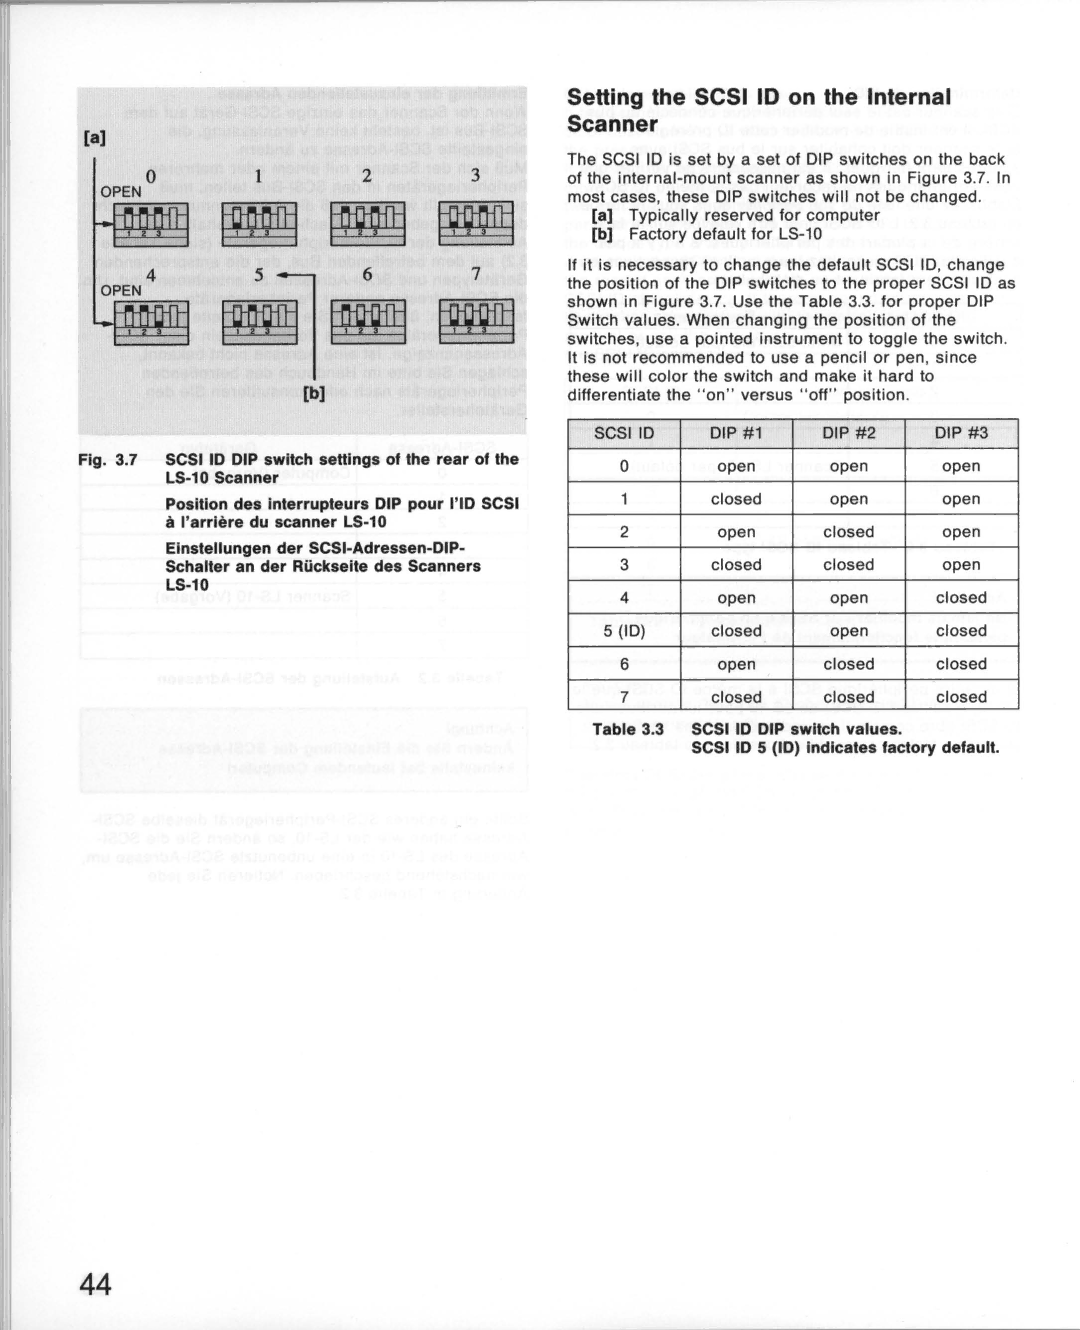
Fig. 3.7 SCSI 10 DIP switch settings of the rear of the LS-10 Scanner
Position des interrupteurs DIP pour 1'10SCSI a I'arrieredu scanner LS-10
Einstellungen der SCSI-Adressen-DIP-
Schalter an der Riickselte des Scanners
Setting the SCSI 10 on the Internal Scanner
The SCSI ID is set by a set of DIP switches on the back of the
[a]Typically reserved for computer
[b)Factory default for
If it is necessary to change the default SCSI ID, change the position of the DIP switches to the proper SCSI ID as shown in Figure 3.7. Use the Table 3.3. for proper DIP Switch values. When changing the position of the switches, use a pointed instrument to toggle the switch . It is not recommended to use a pencil or pen, since these will color the switch and make it hard to differentiate the " on " versus " off" position .
SCSIID | DIP #1 | DIP #2 | DIP #3 |
0 | open | open | open |
| closed | open | open |
2 | open | closed | open |
3 | closed | closed | open |
4 | open | open | closed |
5 (ID) | closed | open | closed |
6 | open | closed | closed |
7 | closed | closed | closed |
Table 3.3 | SCSI 10 DIP switch values. |
| |
| SCSI 10 5 (10) indicates factory default. | ||
44
