The Video Adjust menu
13
ENTER
3Select the setting you want to
adjust.
• Black Setup – Corrects the standard |
reference black level (NTSC video input |
only). |
• Hue – Adjusts overall balance between |
red and green. |
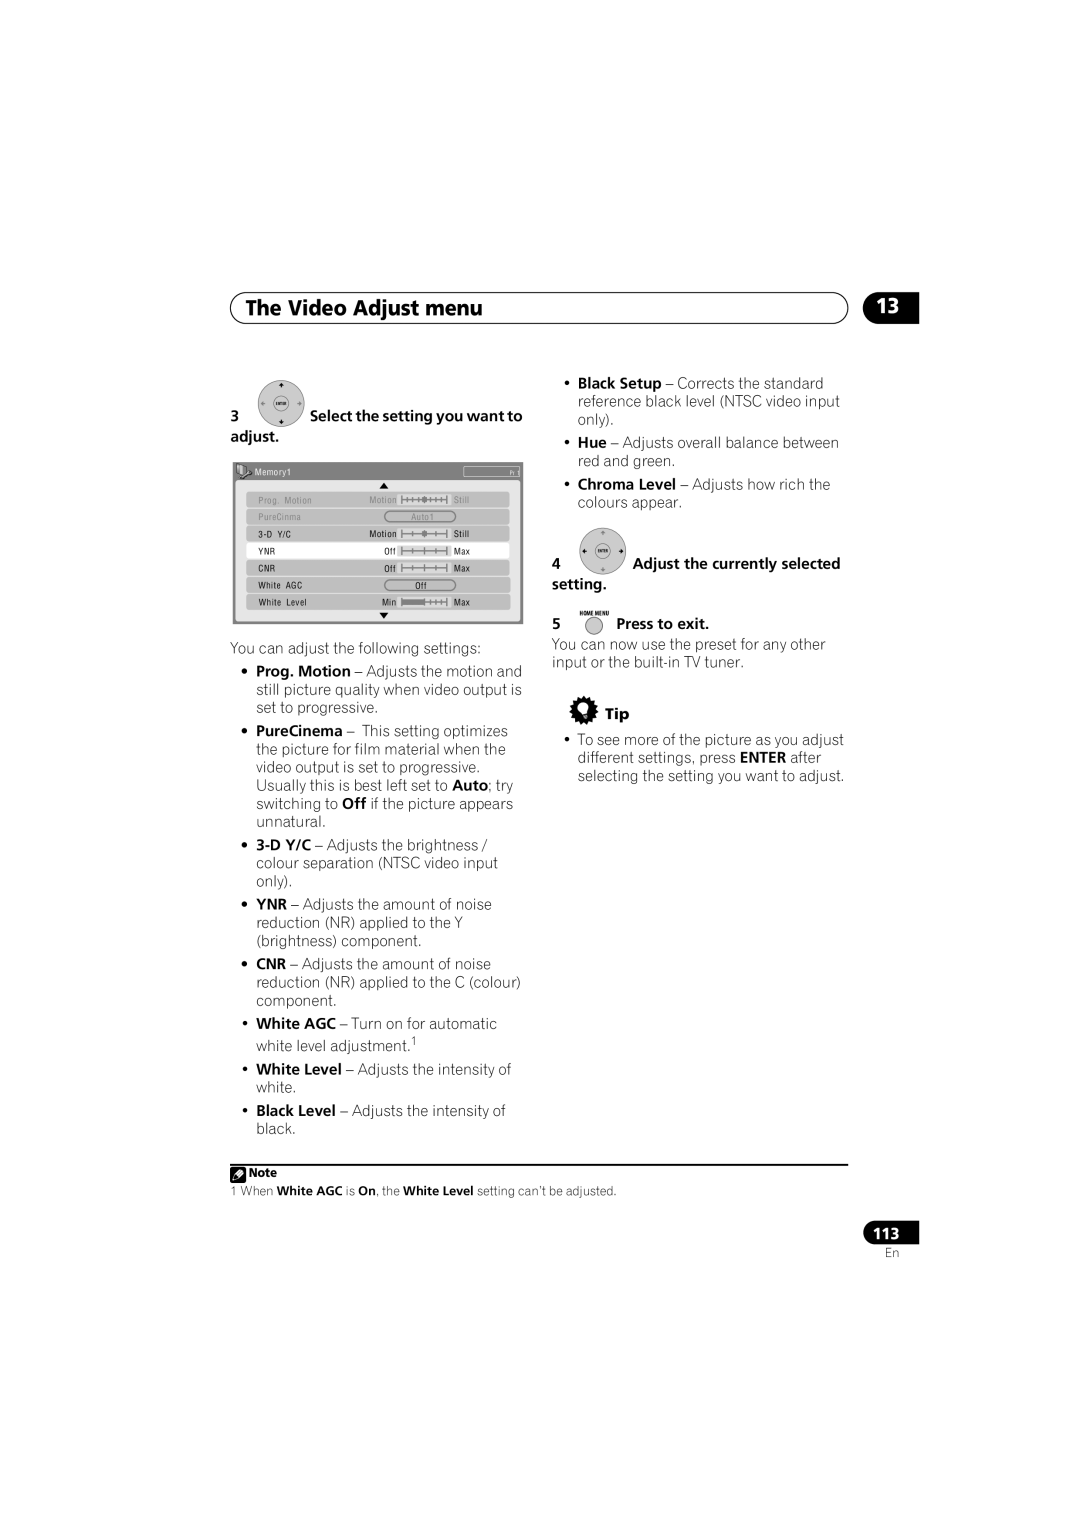
Memory1 |
| |
Prog. Motion | Motion | |
PureCinma | Auto1 | |
Motion | ||
YNR |
| Off |
CNR |
| Off |
White | AGC | Off |
White | Level | Min |
Pr 1
Still
Still
Max
Max
Max
• Chroma Level – Adjusts how rich the |
colours appear. |
ENTER
4Adjust the currently selected
setting.
5 | HOME MENU |
Press to exit. |
You can adjust the following settings:
•Prog. Motion – Adjusts the motion and still picture quality when video output is set to progressive.
•PureCinema – This setting optimizes the picture for film material when the video output is set to progressive.
Usually this is best left set to Auto; try switching to Off if the picture appears unnatural.
•
•YNR – Adjusts the amount of noise reduction (NR) applied to the Y (brightness) component.
•CNR – Adjusts the amount of noise reduction (NR) applied to the C (colour) component.
You can now use the preset for any other input or the
![]() Tip
Tip
•To see more of the picture as you adjust different settings, press ENTER after selecting the setting you want to adjust.
•White AGC – Turn on for automatic white level adjustment.1
•White Level – Adjusts the intensity of white.
•Black Level – Adjusts the intensity of black.
![]() Note
Note
1 When White AGC is On, the White Level setting can’t be adjusted.
113
En