Recording | 06 |
5Move the cursor to the recording start date and time on the grid.
• You can move the cursor forward or back
an hour at a time using the and buttons.
 Current time
![]() Recording start time
Recording start time
Easy Timer Recording |
|
|
|
| ||
8:00 | 9:00 | 10:00 | 11:00 | 12:00 | 13:00 | 14:00 |
1/01 |
|
|
|
|
|
|
2/01 |
|
|
|
|
|
|
3/01 |
|
|
|
|
|
|
SAT | 1/01 | 11:45 | – | |||
| Pr 7 | REC MODE | SP | HDD/DVD | HDD | |
Each row of the grid is one day (you can set the timer recording for up to a month in advance). Each column is a 15 minute interval.
The darker area represents time that has already passed and can’t therefore be selected. The lighter area is time that’s available.
6 ENTER Set the start time.
The start date and time is displayed in the middle of the screen.
•You can go back and reset the start time if you need to by pressing RETURN.
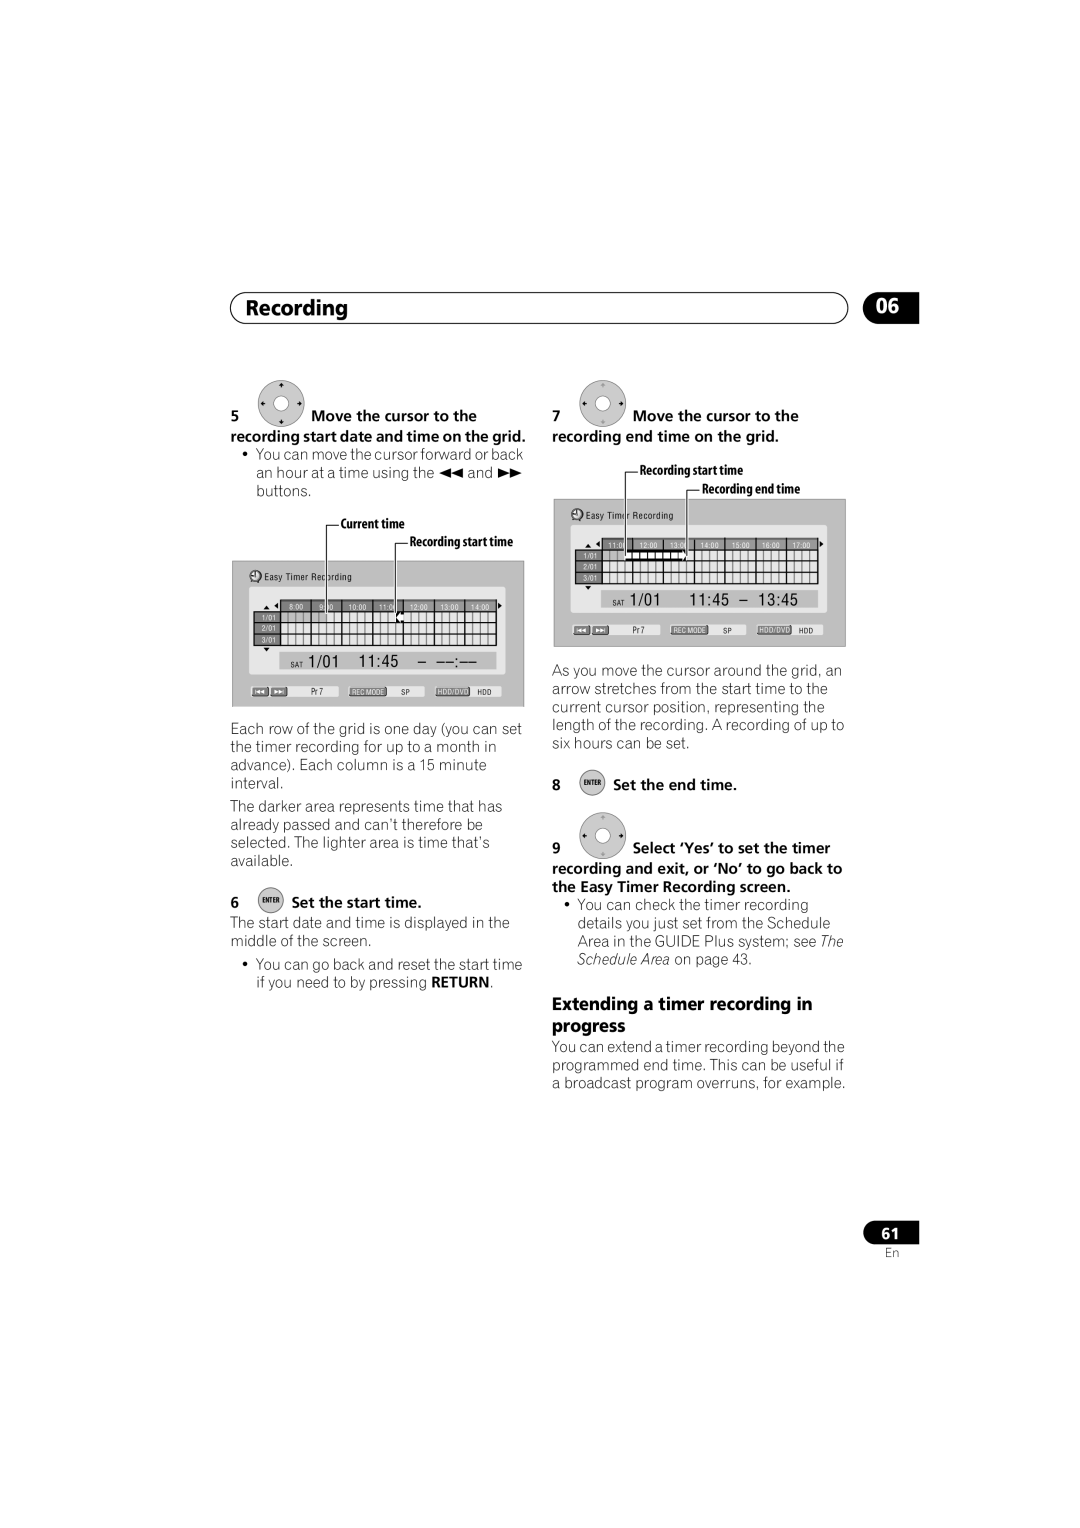
7Move the cursor to the
recording end time on the grid.
![]() Recording start time
Recording start time
![]() Recording end time
Recording end time
Easy Timer Recording |
|
|
|
|
| ||
11:00 | 12:00 | 13:00 | 14:00 |
| 15:00 | 16:00 | 17:00 |
1/01 |
|
|
|
|
|
|
|
2/01 |
|
|
|
|
|
|
|
3/01 |
|
|
|
|
|
|
|
SAT | 1/01 |
| 11:45 | – | 13:45 | ||
| Pr 7 | REC MODE | SP |
| HDD/DVD | HDD | |
As you move the cursor around the grid, an arrow stretches from the start time to the current cursor position, representing the length of the recording. A recording of up to six hours can be set.
8 ENTER Set the end time.
9Select ‘Yes’ to set the timer recording and exit, or ‘No’ to go back to the Easy Timer Recording screen.
•You can check the timer recording details you just set from the Schedule Area in the GUIDE Plus system; see The Schedule Area on page 43.
Extending a timer recording in progress
You can extend a timer recording beyond the programmed end time. This can be useful if a broadcast program overruns, for example.
61
En